Theme editor

Scale Model Shop

Hasegawa 1/32 Fiesler Fi -1B Storch Gran Sasso

Status
Not open for further replies.
Thread owner
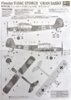
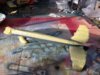
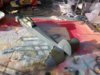
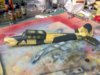
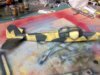
Well it's been a while, Christmas has come and gone and we're nearly into the new year so here's my last post for 2013. Firstly thanks for all your support for that elbow of mine it's seemed to have sorted it's self out following the injection. Some progress here the canopy has been sprayed with RLM 02 followed with RLM 70. The door has also had the same treatment including some RLM 02 to the inside of the door. The upper and lower surfaces of the wings have been sprayed RLM 70 and RLM 65 respectfully. Well that's it not really much progress but it's going in the right direction. And finally Happy New Year to everyone.

View attachment 75456

View attachment 75457

View attachment 75458


View attachment 188479

View attachment 188480

View attachment 188481
 

Attachments

  • 133112_0648.jpg
    133112_0648.jpg
    2.8 KB · Views: 0
  • 133112_0650.jpg
    133112_0650.jpg
    2.7 KB · Views: 0
  • 133112_0649.jpg
    133112_0649.jpg
    2.9 KB · Views: 0
Thats looking good Vaughan.

Glad to hear that the elbow is on the way back again.

Have a great new year.

Ian M
 
Looking very good Vaughan.

Your last post this year...but don't forget to post pics of this excellent build on 2014 now!! :) :)

Polux
 
Progress is progress and that looks like good progress.

I hope you get this one done next year, it's looking very good :)

Cheers

Steve
 
G;ad you are on the mend or even mended Vaughan :) Nice paint work mate, looking forward to more soon
 
Thread owner
Thanks for the kind comments I don't seem to have had the time or the inclination to do any modelling and to a degree have lost my Mojo. As you can see there's been no progress for January the only update I have, which I did back on the 4th, is that I applied the decals to the wings. The decals on the upper surface silvered badly despite a coat of clear, so I had to mask them with post-its and fill in with RLM70. The under surface decals went down ok with the exception of the outer 'L' which fell apart so I made a mask and that worked fine. The 'S' will need touching up too.

View attachment 77392


View attachment 77393


View attachment 190415

View attachment 190416
 

Attachments

  • 140401_0657.jpg
    140401_0657.jpg
    2.2 KB · Views: 0
  • 140401_0652.jpg
    140401_0652.jpg
    2.6 KB · Views: 0
Hi Vaughan

It's great to have you back. I'm really glad to hear that the elbow is better now and I hope your appetite for modelling is returning. I think everyone goes through these phases and I hope yours is short lived because it really is to the forum's loss.

The Storch is looking very good indeed and although there has been issues with the decals you really can't tell. The upper crosses look perfect and I'm confident you'll sort the 'S' code letter in due course.

The detail in the engine and cockpit is real quality (as always), and I'm really looking forward to this build's completion.

All the very best

Paul
 
Best way is to get into it Vaughan. Set a goal, and chip away at it. I have mojo but no modelling time. I rely on you guys at the moment to satisfy my model interests, so get back to work please and produce a nice Storch :)
 
Thread owner
Thanks for the comments guys hopefully my Mojo will return soon. I might even have a look at the Storch this afternoon.
 
Thread owner
Well I'm back with only a very small update which ended up needing a lot of work to achieve. If you refer back to my very first post you can see that there were several options as far as colour schemes. I opted to do the Grand Saso version, so I followed that chart and sprayed the wings RLM 70 following up with the decals. Then I found this chart (see below)at the bottom of the box all neatly folded up. On opening it up I realised that this was the additional chart for the Grand Sasso version complete with splinter pattern. If I'd looked at the box art it might have given me a hint.

Anyway the only way round this was to mask the decals very carefully so as not to pull them off and infill with RLM 71. This has worked but what a pain this has been. It's been two steps forward and one step back but I'm getting there!

View attachment 78485

View attachment 78486


View attachment 191508

View attachment 191509
 

Attachments

  • 142102_0877.jpg
    142102_0877.jpg
    5.6 KB · Views: 0
  • 142102_0875.jpg
    142102_0875.jpg
    2.7 KB · Views: 0
Hi Vaughan

The splinter pattern looks to have gone down very well judging by the pics. I've gotta say you've done really well there.

I hate that moment of realisation when you discover you've done something wrong or will make the build about 10 times harder. I've been there many times!!!

Although this little set back has been a bit time consuming the good news is that it is a flawless recovery and one you should give yourself a pat on the back for.

Just one thing - in the light the RLM71 looks brown? I'm assuming this is just the warm light and is in fact green.

Great to see you back and I really am looking forward to seeing this 'Il Duce rescue plane' finished.

Cheers

P
 
Slow but steady progress Vaughan, just do a bit as and when you fancy it and I'm sure your in time your mojo will return.

You're overcoming the obstacles and getting there, she's looking good.
 
Looks perfect to me Vaughan, nice rescue. Speaking of rescues.. heres a link to a short video about the Gran Sasso raid, its a bit flaky in places but there are some great shots of the actual Storch with Skorzeny and Mussolini cramming into it!
Hope this gives your Mojo a bit of a jump start , I know it made me want to get the old airfix HS 126 out of the stash and start looking for a DFS 230 glider ! cheers tony

p.s mute the soundtrack , it drives you nuts!
 
Thread owner
\ said:
Just one thing - in the light the RLM71 looks brown? I'm assuming this is just the warm light and is in fact green.

Great to see you back and I really am looking forward to seeing this 'Il Duce rescue plane' finished.

Cheers

P
You're not the first person to ask that Paul. I think it must be down to the lighting conditions. Both RLM70/71 are vallejo here's the bottles.

View attachment 78533


View attachment 191556
 

Attachments

  • 142502_0883.jpg
    142502_0883.jpg
    2.5 KB · Views: 0
Hi Vaughan

I thought it would be the light. Funnily enough I'll be applying the same splinter camo to my Stuka. I have the Vallejo colours on the shelves and also the Lifecolor equivalents. Not sure which brand I'll go with yet. I usually use Vallejo RLM 65 for the underside simply because I have so many bottles of it. It will be interesting to note the different colour in the greens, if any.

Green is a notoriously hard colour to photograph, I know because of the garment colour matching I've had to do at repro prior to printing catalogues etc

Keep up the great work Vaughan, your builds are always quality and I always enjoy watching them develop.

Cheers

P
 
Thread owner
Thanks Paul splinter patterns here we come.

Small update here, horizontal stabilisers added and sprayed along with the underside of the fuselage RLM65. Masked and a base coat of RLM70 added.

This afternoon I made a start on the splinter pattern, masking the stabilisers and then sprayed RLM 71. All's looking good and will make a start on the rest of the splinter pattern in the next few days.

View attachment 78830

View attachment 78831


View attachment 191853

View attachment 191854
 

Attachments

  • 140303_0904.jpg
    140303_0904.jpg
    3.1 KB · Views: 0
  • 140303_0903.jpg
    140303_0903.jpg
    3.2 KB · Views: 0
Very nice work Vaughan.

I've just started painting mine. seems we'll be applying splinter patterns together!

Terrific start to the paint work - it'll look the biz when complete.

Cheers

P
 
Thread owner

Attachments

  • 140403_0906.jpg
    140403_0906.jpg
    3.3 KB · Views: 0
  • 140403_0905.jpg
    140403_0905.jpg
    3.2 KB · Views: 0
  • 140403_0907.jpg
    140403_0907.jpg
    2.9 KB · Views: 0
Status
Not open for further replies.
Back
Top