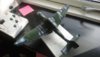
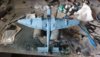
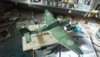
Talking of sadistic. The Canopies! Are you nuts.
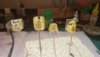
Frame lines, what there is of them are thinner than the masking tape and rather that a propper raised frame, they are just frosted mat. One side was a tiny bit better that the other but that's not saying much.
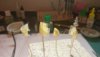
Here is two hours worth of sodding about with tape, scalpels and way to much coffee and tobacco!
View attachment 278122 View attachment 278123
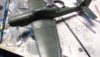
Like on a Mossie, half the frames are only on the inside. It ain't going to happen. As it is I almost cocked up. I was just about to glue the rear machine guns in when I thought it might be better to paint them first! lol. To late for the frame in the canopy behind the pilot though. That buggers glue good and propper.
Once I get these sorted, I can nail them in place and start throwing some primer at the thing.
Frame lines, what there is of them are thinner than the masking tape and rather that a propper raised frame, they are just frosted mat. One side was a tiny bit better that the other but that's not saying much.
Here is two hours worth of sodding about with tape, scalpels and way to much coffee and tobacco!
View attachment 278122 View attachment 278123
Like on a Mossie, half the frames are only on the inside. It ain't going to happen. As it is I almost cocked up. I was just about to glue the rear machine guns in when I thought it might be better to paint them first! lol. To late for the frame in the canopy behind the pilot though. That buggers glue good and propper.
Once I get these sorted, I can nail them in place and start throwing some primer at the thing.