Theme editor

Scale Model Shop

Joe's 1/72 Italeri Panavia Tornado ECR

Status
Not open for further replies.

flyjoe180

SMF Supporters
Joined
Jan 18, 2012
Messages
13,275
Reaction score
1,076
Points
113
1/3
Thread owner
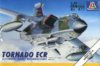
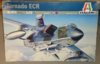
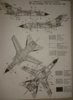
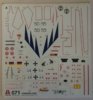
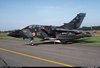
First Tornado I'll submit for this GB. Just the box top for this one, sprue shots etc to come later. I will do the Italian version, the aluminium underside and TORNADO fin marking appeals to me.

View attachment 288772
 

Attachments

  • boxtop.jpg
    boxtop.jpg
    3.7 KB · Views: 0
Thread owner

Attachments

  • DSC_0001.JPG
    DSC_0001.JPG
    2.6 KB · Views: 0
  • DSC_0002.JPG
    DSC_0002.JPG
    2.2 KB · Views: 0
  • DSC_0003.JPG
    DSC_0003.JPG
    2.2 KB · Views: 0
  • DSC_0004.JPG
    DSC_0004.JPG
    1.8 KB · Views: 0
  • DSC_0009.JPG
    DSC_0009.JPG
    2 KB · Views: 0
  • DSC_0012.JPG
    DSC_0012.JPG
    2.9 KB · Views: 0
Thread owner
Plastic has been cut.

Preparation for spraying the gull grey interior colour. Weights added to the forward fuselage and one in the nose cone. Instructions ask for 20g. Hasegawa asked for 10g, Revell 10g, so I gave it 14g.
View attachment 293767

Italeri opted for the horizontal split of the fuselage. As you will see they failed and much realignment and filling will be required. The rear matches nicely. And then you get to the wing root area, forward of which is out of whack. Fun times ahead. On the positive side the large fin fits nicely on a dry run and shouldn't pose too many problems.
View attachment 293768

The fin. I removed the ILS aerial marks which were there for the GR1 option and aren't required for the Italian IDS.
View attachment 293769

The interior and instrument panels sprayed gull grey. No decal options for the interior, it's going to be hand painted with ye olde hairy stick.
View attachment 293770

Tail fin small intake drilled out and dry fitted again:
View attachment 293771
 

Attachments

  • DSC_0017.JPG
    DSC_0017.JPG
    2.2 KB · Views: 0
  • DSC_0013.JPG
    DSC_0013.JPG
    1.9 KB · Views: 0
  • DSC_0014.JPG
    DSC_0014.JPG
    1.9 KB · Views: 0
  • DSC_0015.JPG
    DSC_0015.JPG
    3.1 KB · Views: 0
  • DSC_0016.JPG
    DSC_0016.JPG
    1.7 KB · Views: 0
Thread owner
Not much progress of note, but I had a play with the wings and tailplane. The mechanism for swinging the wings is simple and effective, and the same goes for the tailplane. This is all dry fitted so I can see what work I can do to clean the horrid fuselage joins up.

View attachment 294130
View attachment 294131

I will be fixing the wings swept fully aft and the elevators in a neutral position. This hides the ugly wing gap behind the roots, and avoids the wing stores pylons from having issues. Fully loaded per Rick's instructions.
 

Attachments

  • DSC_0147.JPG
    DSC_0147.JPG
    2.4 KB · Views: 0
  • DSC_0149.JPG
    DSC_0149.JPG
    2.2 KB · Views: 0
There's always the gaps to fill Joe, that's the Tornado way I'm afraid. :confounded: Looking good though.
 
Looks like a tornado. You just might want to re-visit your masking though........:smiling3:
 
Good start Joe.
Italeri's choice of fuselage split seems a fairly straight forward one. Although there are gaps at least they're fairly easy to get to. The stabilisers section look the trickiest to sand around but I think, because they move, it shouldn't prove to taxing.

looking forward to the progress.
Cheers
Paul
 
Thread owner
No pics again, but this one is all filled, sanded and ready for the final cockpit pieces to go in. The wings and tail planes went on no problem, and are now fixed in place in the swept position. Lots of sink marks and filling of gaps has been conducted. Will update with pics when I get a chance...
 
Status
Not open for further replies.
Back
Top