
Theme editor

Scale Model Shop

Mission Complete WIP of completed vignette.

rtfoe

Active member
Joined
Apr 29, 2018
Messages
9,309
Reaction score
715
Points
113
First Name
Richard
Location
Shah Alam, Malaysia
1/3
Thread owner
Hi Guys,
I have posted the finished vignette under completed dioramas...
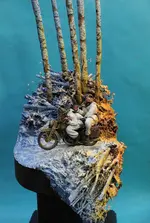
1000226348.webp

Now here is the WIP inspired by what I've seen in the movie Where Eagles Dare. The characters are not accurately depicted but just wanted a scene reminiscent of it. It's two saboteurs escaping after a successful mission. They're riding in tandem on a motorbike. The setting will be in winter. Much of the work will be done in modifying and scratching the two figures. The base figure is from the Tamiya German Motorcycle Orderly set. I had already assembled it so will need to break it down again...

1000215601.jpg

The rider will become the back seater and I will have to scratch the new rider in a more dramatic pose of riding. I will use this head and redoing the goggles configuration and making him wear it instead and cut off the peak flap and make a new one flat against his forehead from the wind gust. This will be done with putty later with straps added.

1776975172086.jpg 1000217074.jpg

The riding pose was a challenge using paper clip armatures. In hindsight I should have use more pliable wire. Satisfied with that I worked on the back seater cutting and twisting his body arms and legs. Putty will smoothen the joints and folds out later.

1776975172098.jpg 1000217075.jpg

More later as I progressed...

Cheers,
Richard aka Wabble
 
Thread owner
Hi,
I beefed up the armatures with putty to hold it in place and a bit on the passenger as well. Also roughly positioned the passengers head and when I'm satisfied I lock it in with CA.

1000217449.jpg

Did the removing of the wheel spokes and continued...should help with the moving illusion if executed well.

I had an experience the other day that delayed any bench time. My cat decided to do an Olympic dive into the pail of water I was mopping with and spread water all over the place. The judges gave her an 8 out of 10 score...I chased her out of the kitchen. The rest of the cats went helter skelter and left me with more work to do. So no WIP for that moment.

Cheers,
Wabble
 
Thread owner
Hi, when at the Planet I learnt a new method of making armatures. I had previously just used wire for my monkeys seen in my Ambush dio WIP. This time using two sprues for the pelvic and shoulders cut to the right length and giving room for the putty, five wires for the limbs and torso. Definitely helped with getting the riders posture right and the wires less fiddly.

1000217818.jpg 1000217820.jpg

Got the right leg of the passenger done but needed to adjust his footing to the pedestal. The torso of the rider was given a base shape. Also the riders head has been puttied.

It took me two months of procrastination to start this suffering nerves that I wouldn't be able to do it and now it's taken less than a week to get to this stage. Kicking myself for not starting earlier.

Cheers,
Wabble
 
Great skill needed to scratch or adapt figures.
 
Thread owner
Great skill needed to scratch or adapt figures.
Perhaps Jim but I believe it is possible for anyone to sculpt a figure if they have the right approach, reference and tools to make a start.

Also to patiently work in stages. I've place the hands holding the bar handles or is it a steering yoke? Plonked on the head, wanted to shorten the neck a bit but needed opinions as to how low can the head go and how much can the neck stretch for him to see forward I would have liked to make it lower than it is and as exaggerated as possible.

1000218587.jpg 1000218589.jpg

I did get some feedback as you will see the alterations later.

Cheers,
Wabble
 
Thread owner
Hi Guys,
Adjustments from comments done and also did some puttying for the left side of the rider and right hand of the the passenger...

1000219100.jpg 1000219102.jpg

Spokes have been cleaned. Found a resin hand to hold the Schmeisser machine gun.

Cheers,
Wabble
 
Amazing work richard , off to find the completed pics now , cheers tony
 
Thread owner
Amazing work richard , off to find the completed pics now , cheers tony
Thanks Tony, would have liked to have spent more time on the painting though.

Anyway here's more of the WIP...
Sat down and tackled the riders front and right side of the body...I learnt to work in stages to let the putty cure in between sessions. Also to have the figures unattached and workable... details added were the collar and lapel, shoulder tabs...

1000219256.jpg 1000219562.jpg 1000219563.jpg

I abandoned using the resin hand and opted for a plastic spare hand from the parts box, cut the fingers, deepened the palm, reworked the thumb and fingers with putty and then cut it at the wrist.

1000219564.jpg

Okay this guy isn't doing a Michael Jackson...he's just grabbing the seat handle bar. I remodified the existing arm to get the right angle, removed the hand and replaced it with the one I had resculpted holding the MP40 Schmeisser.

1000219257.jpg 1000219561.jpg

Only Clint can pull off holding a Schmeisser like that...

Cheers,
Wabble
 
Thread owner
Great figure work mate and trust me not anyone can do it.
Thanks Paul, I bet there is. There is an abundant amount of hidden talent that is to be discovered amongst our friends here.

Now back to the WIP.

Clint had Vidal Sasoon do his hair and while blowing his hair I got him to give the figure a blast of air...

1000219880.jpg

The blast of air got his collar lapels lifted and part of his tunic too.

While contemplating the base I had fun on the work table...

1000219234.jpg 1000219885.jpg

Never thought of putting them on a side car with a third passenger...hmmm...

Cheers,
Wabble
 
Clint had Vidal Sasoon do his hair and while blowing his hair I got him to give the figure a blast of air...


The blast of air got his collar lapels lifted and part of his tunic too.
Now that's the sort of detail that wins prizes!
Pete
 
Thread owner
Now that's the sort of detail that wins prizes!
Pete
Thanks Stillp, I just sat and looked at what happens when you apply a certain action and what reacts and see if I can achieve that effect within my means. This kind of concentrated effort seems to only apply to vignettes for me and I am slowly trying to do it for my bigger dios...very time consuming if you have hoards of figures.
Yup Toto, surprised myself as well...my first full figure sculpt from armatures up apart from the hands, head and feet. The only other time I did that was for my monkeys...ugly monkeys. 😅... meaning two little kids and real monkeys.
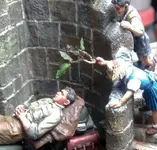
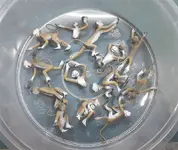
Samples...
B110.webpE186.webp

Cheers,
Wabble
 
Thread owner
Hi Guys,

I scratched the musset bag since I couldn't find one in my stash.

1000220294.jpg 1000220301.jpg

And also to shore up folds at the back of the rider.
Fun part starts here. After juggling a few ideas on the base presentation I decided on a snow covered woods lane with a clump of Birch on a slope for a background. The base was to be a circle and cut from foam as shown below on a pedestal...

1000220776.jpg 1000221150.jpg
I carved the terrain roughly and dry posed the figures.The terrain was whittled further to take the litter of ground coverage and snow that would be sprinkled on.

Cheers,
Wabble
 
Absolutely immense work.

Such a pleasure to view ....I can only dream.

More of the same Sir.

Toto
 
Thread owner
Absolutely immense work.

Such a pleasure to view ....I can only dream.

More of the same Sir.

Toto
Thanks Toto,
Here's more as asked...

Getting the riders tunic to be similar to the original figure sitting in the back with those foliage fasteners and then carving out to fit the Schmeisser...straps yet to be added.

1000221241.jpg 1000221461.jpg

The rider had his musset bag attached with a tiny wire holding it in place. I then worked the straps towards it from IKEA Salmon paste tube foil...

1000221242.jpg 1000221462.jpg

The strap for the Schmeisser was a challenge to make it free flowing and tight at the same time from wind gust.

Before I got figuremotis I decided I needed to detail the birch tree trunks using some cheap two part putty. Did some reference research on the bark texture. They're quite flaky and break off easily. Painting these will be fun and challenging as the figures would.

1000222015.jpg

I had to sand them outside the house as resin dust is inert. I used a sharp edged file to add detail and texture to the bark...under the blazing sun.

1000222234.jpg

Cheers,
Wabble
 
Thread owner
Hi,
Made some progress ready for priming...the priming picked up some imperfections that needed cleaning up.

1000222358.jpg 1000222360.jpg 1000222362.jpg

But while the primer cured, I was itchy to do the base...

1000223345.jpg 1000223347.jpg

I added stuff to the base and made it more forestry with fallen deciduous that would be partly covered with snow.

Cheers,
Wabble
 
Thread owner
Very nice. Thanks for sharing.
Thanks Paul, you're welcome.
Wabble I always love the meticulous attention to detail in your builds and the skills that bring them to life.
Hi Paul, a little more attention is focused on my vignettes since it's a small area to work with. The kit heads, hands, boots and bike detail from Tamiya is good even with the limits of injection molding. There was very little to add on and only minor cabling, wires and straps. The pose unfortunately had to be drastically modified to fit the scene naturally...one almost basically from scratch.

Cheers,
Wabble
 
Back
Top