Thanks Colin, Joe, John and Steve,
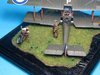
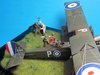
You'll be surprised at how much can be hidden in 1/72 without super detailing. For the holes I referenced from images off the internet and from Wingnut instruction sheet borrowed from a friend. CA was removed with a sharp blade, first cutting around the strut and then chipping with a chisel motion. The CA will lift off because of the paint. Then I repaint any base paint that has been chipped off and blasting matt varnish over the affected area with the airbrush. Actually a swipe with a paint brush loaded with matt varnish will do the trick too.
Kindly close your mouths for the next set of images as flies are prevalent in these parts.:smiling6:
View attachment 310307
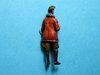
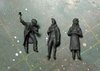
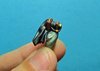
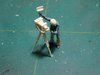
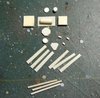
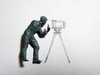
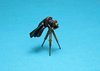
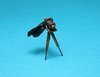
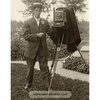
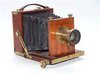
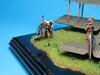
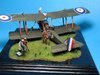
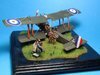
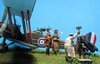
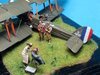
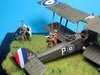
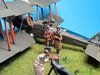
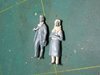
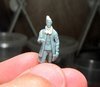
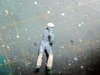
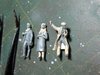
I warned you...some decapitation of Preiser figures were made to achieve the pose and look of WW1 British pilots and a civillian photographer from a Preiser Luftwaffe set.
View attachment 310308View attachment 310309
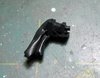
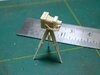
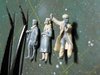
Initial putty application. This had to be worked in sections or as the amount of putty I had mixed.
View attachment 310310View attachment 310311
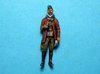
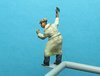
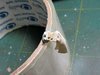
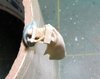
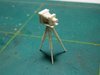
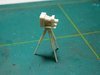
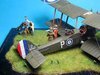
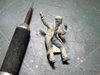
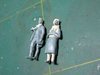
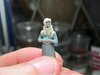
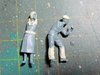
Slowly it's teased and blended onto the plastic figure creating folds and cuts.
View attachment 310312View attachment 310313
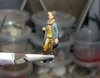
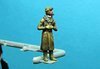
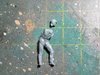
Stippling was done for the sheeps wool collar of the flight suite. Goggles are from plastic rod...
View attachment 310314View attachment 310315
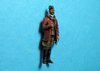
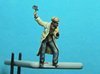
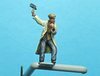
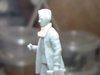
Suitable arms were found for the officer and his cap remodelled to represent the stiffer higher British version.
View attachment 310316View attachment 310317View attachment 310318View attachment 310319
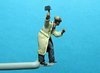
I gave them pipes made from rod and plastic strip.
View attachment 310320View attachment 310321
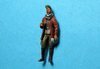
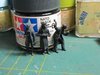
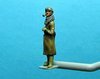
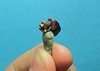
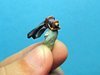
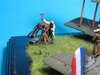
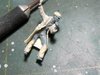
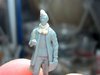
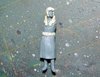
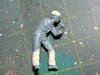
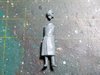
Putty for the long coat was teased and wrapped over the figure. The collars were added separately. Sleeves as well.
View attachment 310322View attachment 310323
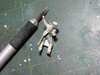
My high tech tool I used for this purpose. :tongue-out3:
View attachment 310324View attachment 310325
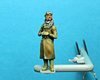
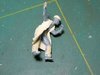
With a little blob of putty for a cap badge applied it was time for priming.
View attachment 310326
Cheers,
Richard
You'll be surprised at how much can be hidden in 1/72 without super detailing. For the holes I referenced from images off the internet and from Wingnut instruction sheet borrowed from a friend. CA was removed with a sharp blade, first cutting around the strut and then chipping with a chisel motion. The CA will lift off because of the paint. Then I repaint any base paint that has been chipped off and blasting matt varnish over the affected area with the airbrush. Actually a swipe with a paint brush loaded with matt varnish will do the trick too.
Kindly close your mouths for the next set of images as flies are prevalent in these parts.:smiling6:
View attachment 310307
I warned you...some decapitation of Preiser figures were made to achieve the pose and look of WW1 British pilots and a civillian photographer from a Preiser Luftwaffe set.
View attachment 310308View attachment 310309
Initial putty application. This had to be worked in sections or as the amount of putty I had mixed.
View attachment 310310View attachment 310311
Slowly it's teased and blended onto the plastic figure creating folds and cuts.
View attachment 310312View attachment 310313
Stippling was done for the sheeps wool collar of the flight suite. Goggles are from plastic rod...
View attachment 310314View attachment 310315
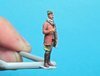
Suitable arms were found for the officer and his cap remodelled to represent the stiffer higher British version.
View attachment 310316View attachment 310317View attachment 310318View attachment 310319
I gave them pipes made from rod and plastic strip.
View attachment 310320View attachment 310321
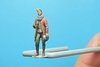
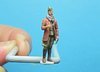
Putty for the long coat was teased and wrapped over the figure. The collars were added separately. Sleeves as well.
View attachment 310322View attachment 310323
My high tech tool I used for this purpose. :tongue-out3:
View attachment 310324View attachment 310325
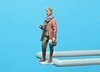
With a little blob of putty for a cap badge applied it was time for priming.
View attachment 310326
Cheers,
Richard
Attachments
-
 578055.jpg2.6 KB · Views: 0
 -
 578054.jpg2.7 KB · Views: 0
 -
 576736.jpg2.1 KB · Views: 0
 -
 576535.jpg2 KB · Views: 0
 -
 576534.jpg2.1 KB · Views: 0
 -
 576532.jpg2 KB · Views: 0
 -
 576531.jpg2.1 KB · Views: 0
 -
 576138.jpg2.4 KB · Views: 0
 -
 576137.jpg2.5 KB · Views: 0
 -
 576136.jpg2.5 KB · Views: 0
 -
 575790.jpg2.5 KB · Views: 0
 -
 575789.jpg2.6 KB · Views: 0
 -
 575788.jpg2.4 KB · Views: 0
 -
 575787.jpg2.6 KB · Views: 0
 -
 574765.jpg2.6 KB · Views: 0
 -
 574764.jpg2.5 KB · Views: 0
 -
 578056.jpg2.5 KB · Views: 0
 -
 578339.jpg2.7 KB · Views: 0
 -
 578340.jpg2.9 KB · Views: 0
 -
 574763.jpg2.8 KB · Views: 0