Neil Merryweather
Active member
1/3
First off, I'm not sure if I'm in the right place- Is a new thread a topic?
If not , could a mod please re-direct me?
Anyway
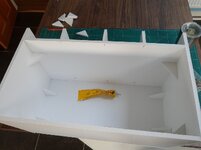
I’m very grateful to this forum for providing me with the impetus (via Group Builds) to build this project I’ve had on the stocks for at least ten years. The first phase is complete, thanks to @Geoffers’ D-Day GB, with the LCVP (link).
I mentioned in my GB thread that the LCVP is intended to be part of a diorama but I didn’t go into any detail- well now is the time. And I’m glad it’s a six month GB because I will surely need all of it..
The diorama is set at sea, off one of the American beaches on the morning of D-Day as the GI’s climb from their ship down the scramble net into the LCVP, while the ship’s crew lean over the rails watching them. As reference for the ship I started with a set of photos I took in San Francisco of the preserved Liberty Ship Jeremiah O’Brien .
filedata/fetch?filedataid=242245

filedata/fetch?filedataid=242244
Let me say right here that I'm pretty sure it didn't necessarily happen exactly this way, but a Liberty Ship was all I had at the start and now I’m too far in to change it , so artistic licence is going to be employed frequently during this project.
Having decided to use a Liberty Ship as my base I started trawling the internet for plans and photos to fill in the gaps in my own stuff. I printed parts of plans at 1-35 scale and I found a basic 3D printable model which I used to rough out the scope and size of the diorama in 3D CAD. I even bought a 1-350 model of one to check the finer dimensions- at 1-350 all I had to do was multiply by 10, and even I can manage that!
Then I gradually started to add bits and pieces to flesh it out,and as a way of improving my CAD skills, and before I knew it I had pretty much designed the whole model in 3D CAD. I should point out that this wasn’t quick- it took me about eight or ten months in lunch hours at work.
Anyway this is what I hope it will look like
filedata/fetch?filedataid=242247
filedata/fetch?filedataid=242248
filedata/fetch?filedataid=242249
If not , could a mod please re-direct me?
Anyway
I’m very grateful to this forum for providing me with the impetus (via Group Builds) to build this project I’ve had on the stocks for at least ten years. The first phase is complete, thanks to @Geoffers’ D-Day GB, with the LCVP (link).
I mentioned in my GB thread that the LCVP is intended to be part of a diorama but I didn’t go into any detail- well now is the time. And I’m glad it’s a six month GB because I will surely need all of it..
The diorama is set at sea, off one of the American beaches on the morning of D-Day as the GI’s climb from their ship down the scramble net into the LCVP, while the ship’s crew lean over the rails watching them. As reference for the ship I started with a set of photos I took in San Francisco of the preserved Liberty Ship Jeremiah O’Brien .
filedata/fetch?filedataid=242245
filedata/fetch?filedataid=242244
Let me say right here that I'm pretty sure it didn't necessarily happen exactly this way, but a Liberty Ship was all I had at the start and now I’m too far in to change it , so artistic licence is going to be employed frequently during this project.
Having decided to use a Liberty Ship as my base I started trawling the internet for plans and photos to fill in the gaps in my own stuff. I printed parts of plans at 1-35 scale and I found a basic 3D printable model which I used to rough out the scope and size of the diorama in 3D CAD. I even bought a 1-350 model of one to check the finer dimensions- at 1-350 all I had to do was multiply by 10, and even I can manage that!
Then I gradually started to add bits and pieces to flesh it out,and as a way of improving my CAD skills, and before I knew it I had pretty much designed the whole model in 3D CAD. I should point out that this wasn’t quick- it took me about eight or ten months in lunch hours at work.
Anyway this is what I hope it will look like
filedata/fetch?filedataid=242247
filedata/fetch?filedataid=242248
filedata/fetch?filedataid=242249


 . Excellent work on the 3D work, I feel a masterpiece could be in the offing here mate. I shall join the merry crew and follow along
 ") .
.