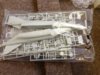
This is going to be my build for this GB.
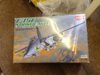
Please ignore the box art it's just what it came in.
View attachment 262474
View attachment 262475
View attachment 262476
View attachment 262477
View attachment 262478
View attachment 262479
View attachment 262480
Please ignore the box art it's just what it came in.
View attachment 262474
View attachment 262475
View attachment 262476
View attachment 262477
View attachment 262478
View attachment 262479
View attachment 262480
")