
You are using an out of date browser. It may not display this or other websites correctly.
You should upgrade or use an alternative browser.
You should upgrade or use an alternative browser.
Paul's (tricky) Normandy Panthers in 1/35 & 1/16
- Thread starter tr1ckey66
- Start date
- Status
- Not open for further replies.
G
Guest
Guest
Cracking work and detail, looking forward to the next update.
Small update on the Panther photo etch
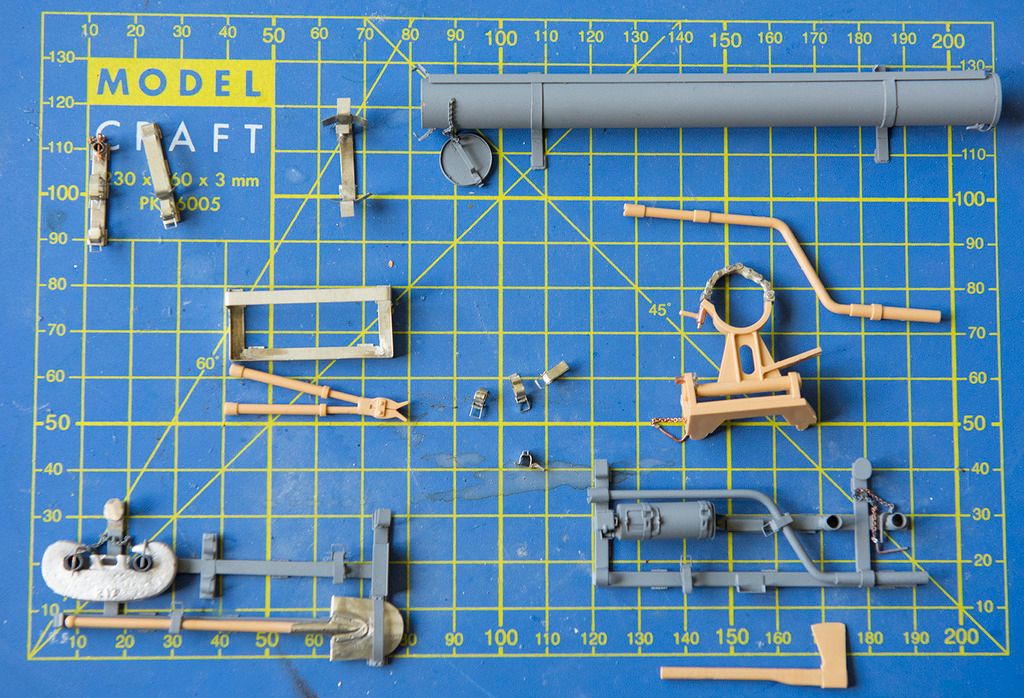
Hi everyone, thought I'd post the progress on the RC Panther build. It doesn't look like much but the photographs really don't convey the amount of work and time that went into constructing these PE parts.
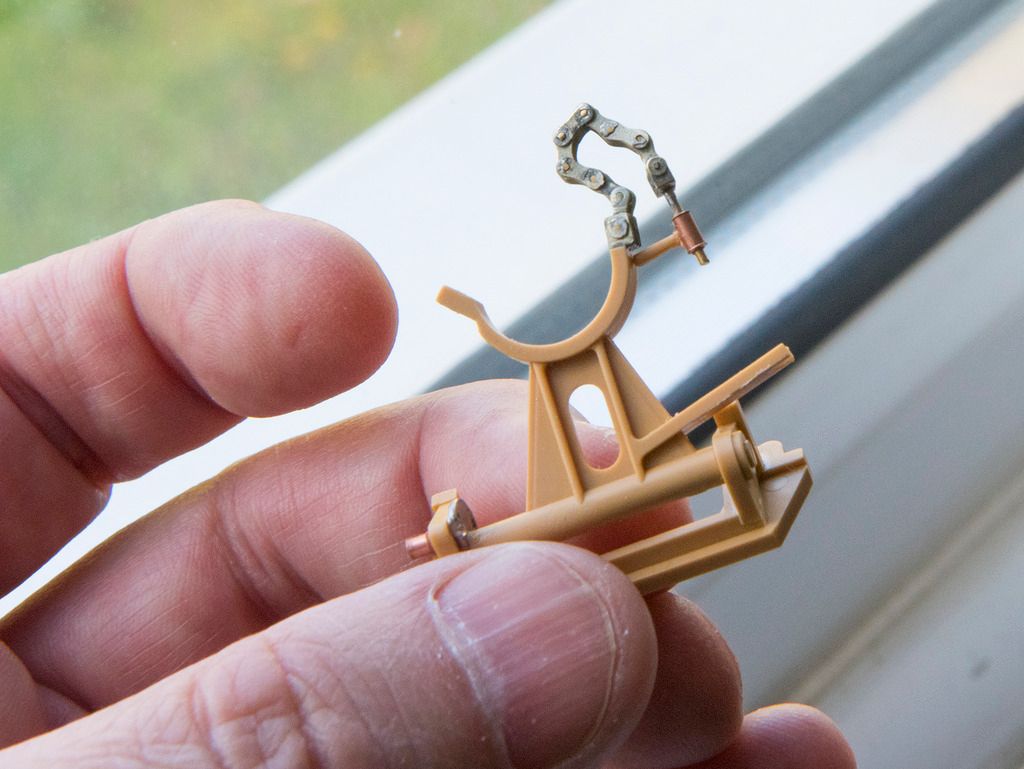
As always all the parts were soldered for strength including the chain for the gun crutch (which is comprised of over 60 parts all of which have to articulate!). Anyway, here's some shots...
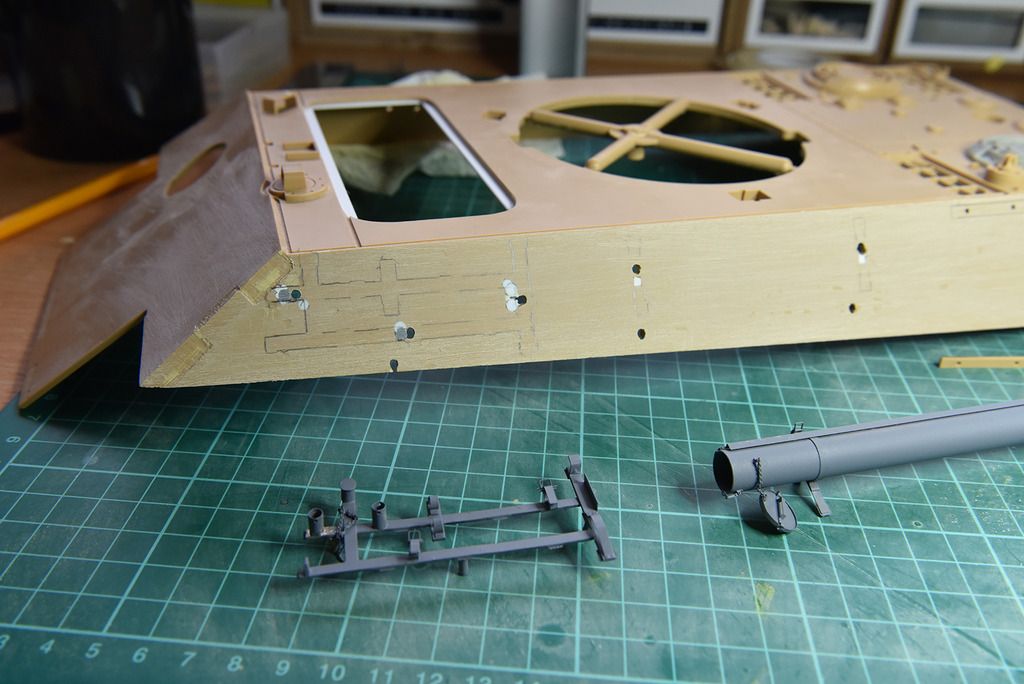
General PE overview (note some parts have been partially primed).
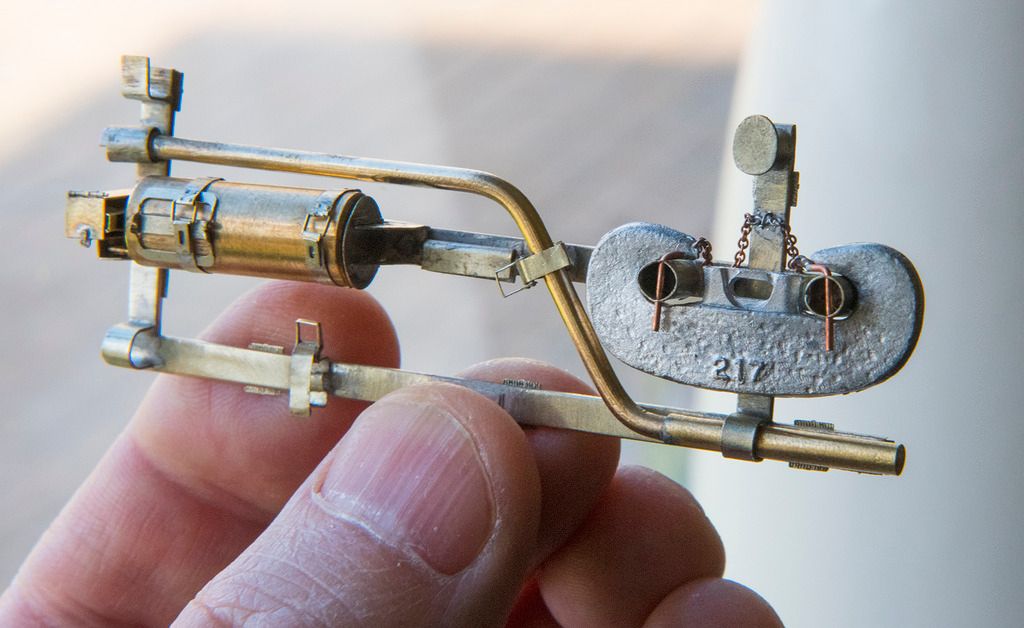
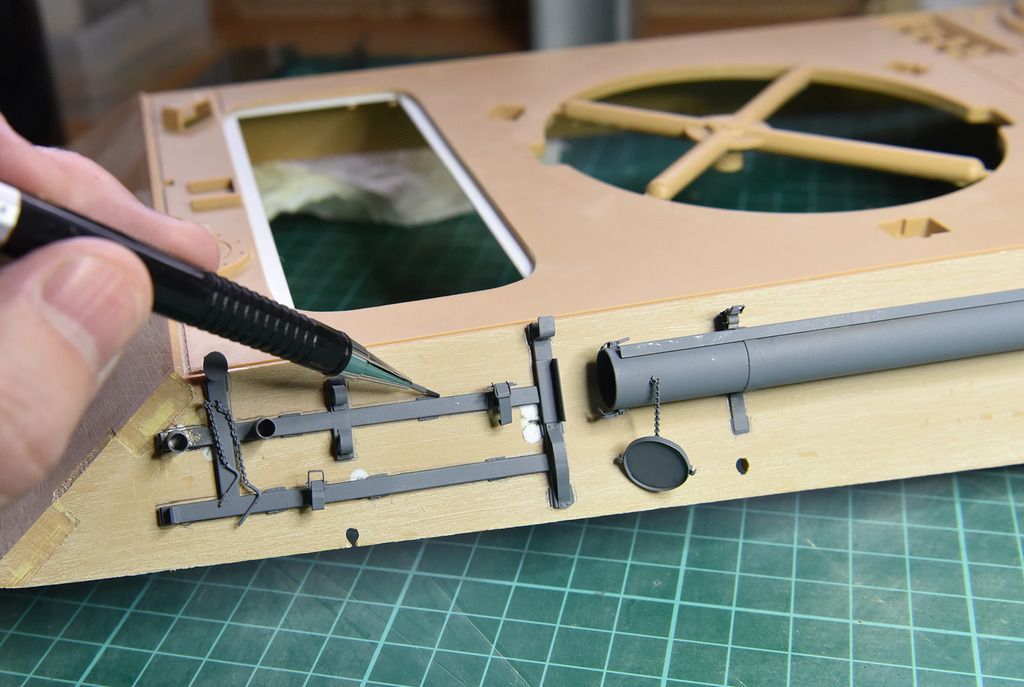
Right hand tool bracket with photo etch fire extinguisher and scratch built crank starter handle.
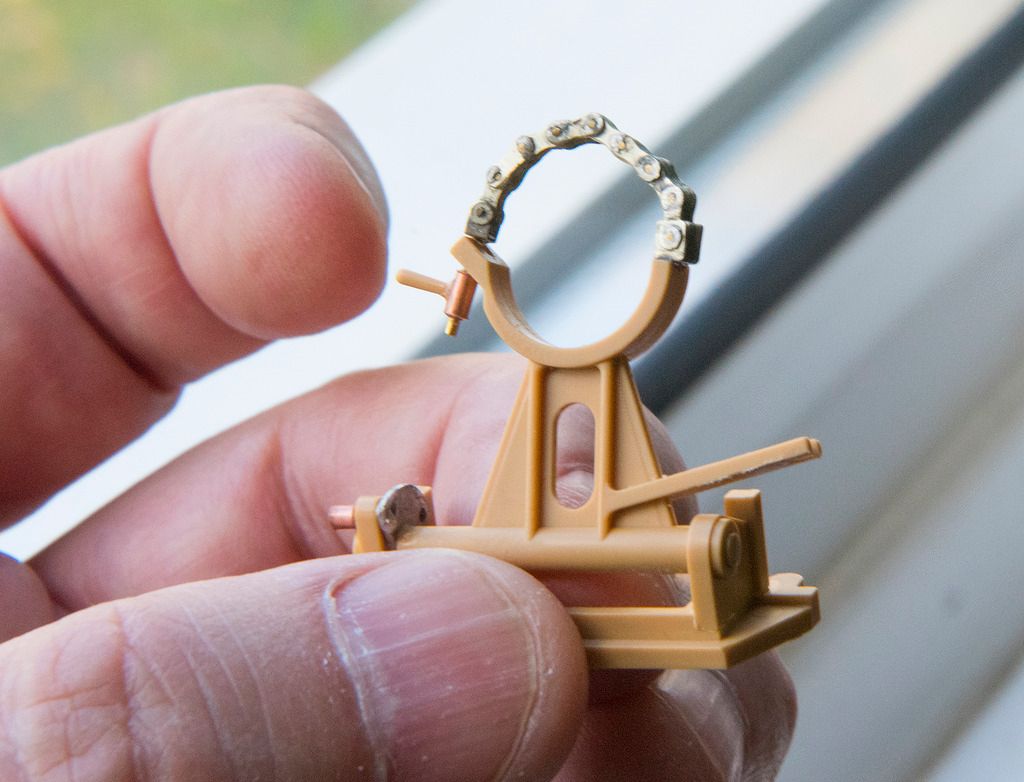
Gun crutch with working chain...
URL=http://s1109.photobucket.com/user/tr1ckey66/media/Normandy%20Panther%20Builds/Gun%20Crutch%2002.jpg.html]
 [/URL]
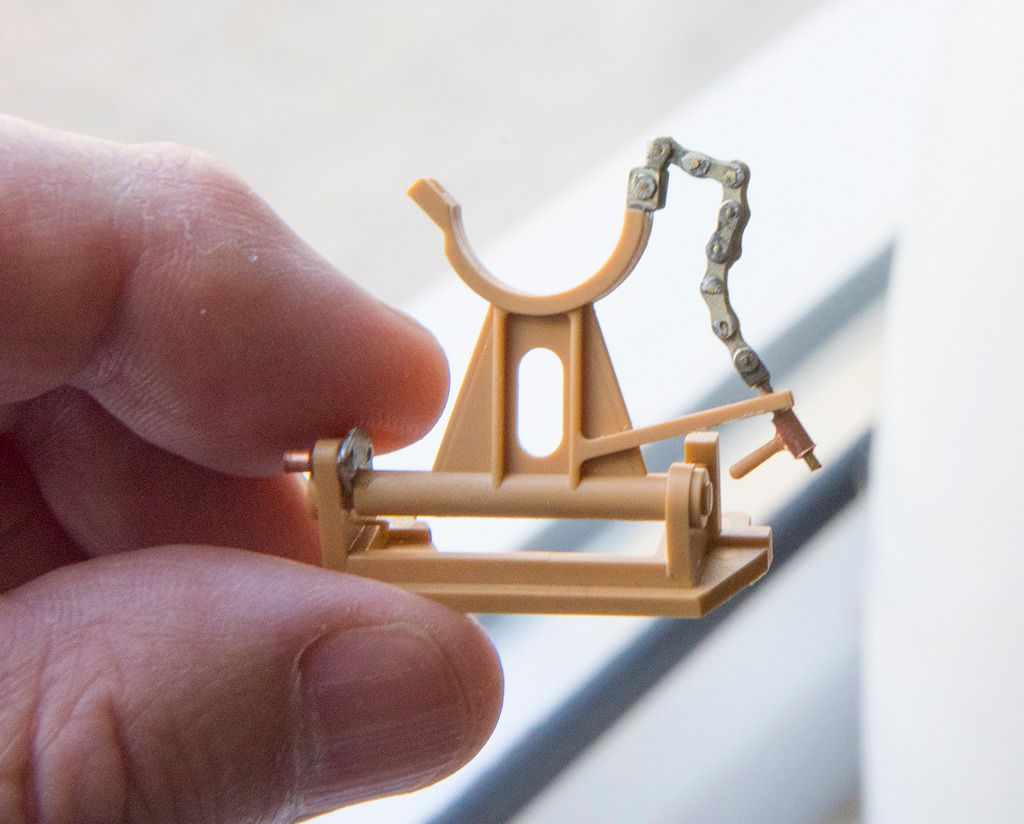
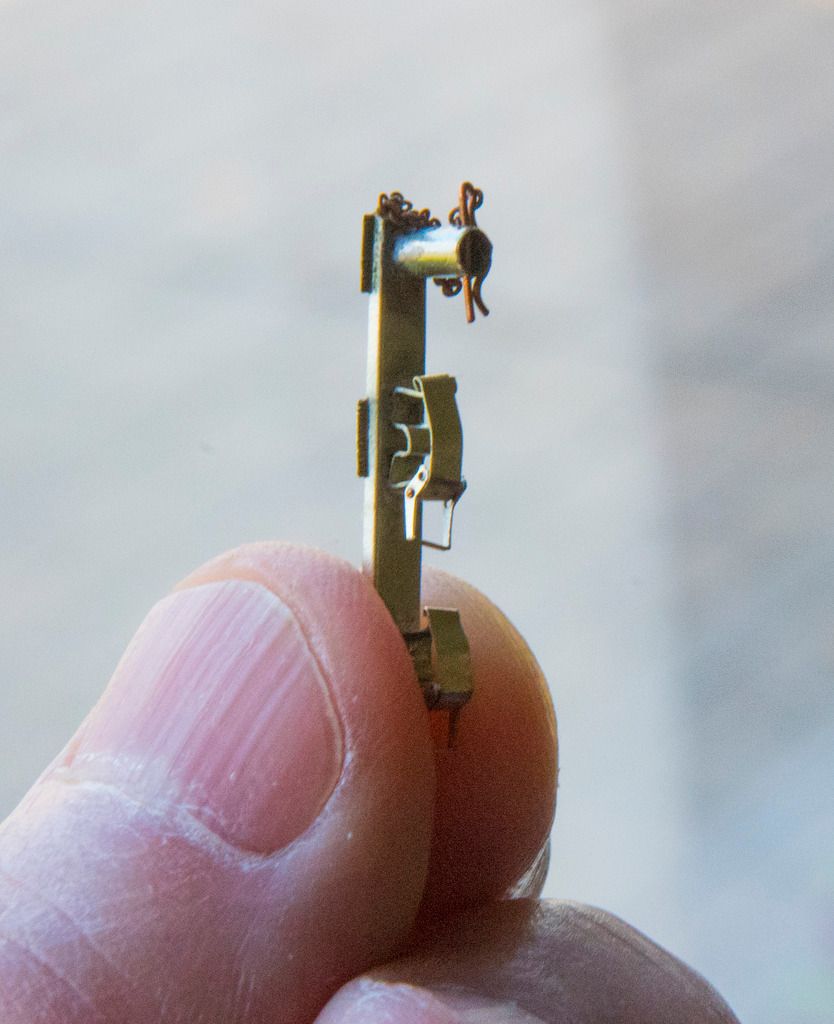
Another example with tiny split pin
It's slow but enjoyable progress and hopefully the final result will be worth the wait.
Thanks
P
Hi everyone, thought I'd post the progress on the RC Panther build. It doesn't look like much but the photographs really don't convey the amount of work and time that went into constructing these PE parts.
As always all the parts were soldered for strength including the chain for the gun crutch (which is comprised of over 60 parts all of which have to articulate!). Anyway, here's some shots...
General PE overview (note some parts have been partially primed).

Right hand tool bracket with photo etch fire extinguisher and scratch built crank starter handle.

Gun crutch with working chain...


URL=http://s1109.photobucket.com/user/tr1ckey66/media/Normandy%20Panther%20Builds/Gun%20Crutch%2002.jpg.html]
Another example with tiny split pin

It's slow but enjoyable progress and hopefully the final result will be worth the wait.
Thanks
P
G
Guest
Guest
Out freaking standing Paul some great PE work going on.

G
Guest
Guest
An articulated chain, even in 1/16 & soldered????  Paul your skills & attention to detail astounds me - consider my flabber well & truly gasted!
 ")
Paul your skills & attention to detail astounds me - consider my flabber well & truly gasted! 
G
Guest
Guest
I am loving the detail here.
Thanks guys
i think I've completed approximately 2 thirds of the PE going in to this build, there's still a lot to go on the rear plate, turret etc, but I think I'm getting there.
Thanks for the kind comments
P
i think I've completed approximately 2 thirds of the PE going in to this build, there's still a lot to go on the rear plate, turret etc, but I think I'm getting there.
Thanks for the kind comments
P
I will steal a quote from Sir Edmond for this one as I am unable to find an appropriate thing to say. So .....
"I think the phrase rhymes with Clucking Bell"
Great work Paul.
"I think the phrase rhymes with Clucking Bell"
Great work Paul.
")
Zimmerit Application
Took a break from soldering this weekend and turned my attention to how I would be replicating the Zimmerit on the Panther hull.
I had purchased the Atak Zimmerit set a while back but decided against using it. Instead I've opted to simulate the effect with a 2 part putty and a Zimmerit tool (a punch with the pattern in the end). The particular putty I'm using is a brand called Mori Mori which has a very fine grain and is a fantastic material for model making purposes. However, getting hold of this stuff is not easy (I bought mine from Japan years ago), it also stinks to high heaven and requires a well ventilated room (you also need to wear a mask when sanding this putty).
What follows is the method I've found (after much testing) that gives the best results...
1. Sand the surface of the hull to give the putty a key to stick to. Then trace where the hull fixtures are to be placed.
2. Mask the marked area with Demo tape (this not only masks the area but acts as a guide for the thickness of the putty you will apply.
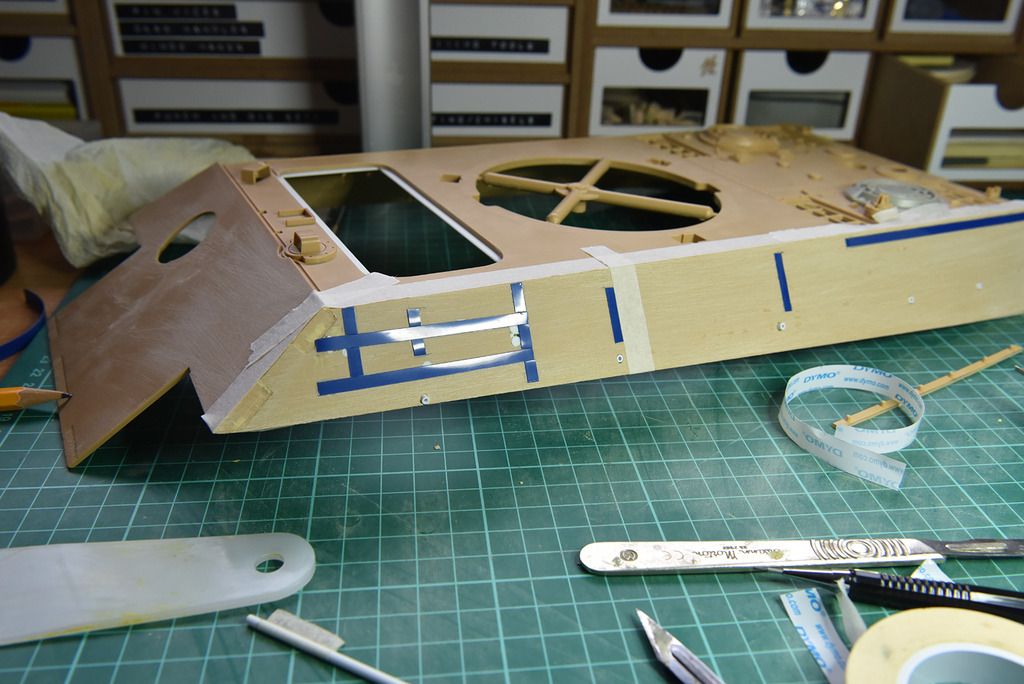
Mask the surrounding area with normal tape to protect it.
3. Mix the 2 part putty well (20 parts putty to 1 hardener). When the 2 parts are thoroughly mixed and of a smooth consistent colour the apply to the model. Apply it in manageable areas, although this putty has a long work time you do not want it to go off half way through the Zimm pattern!
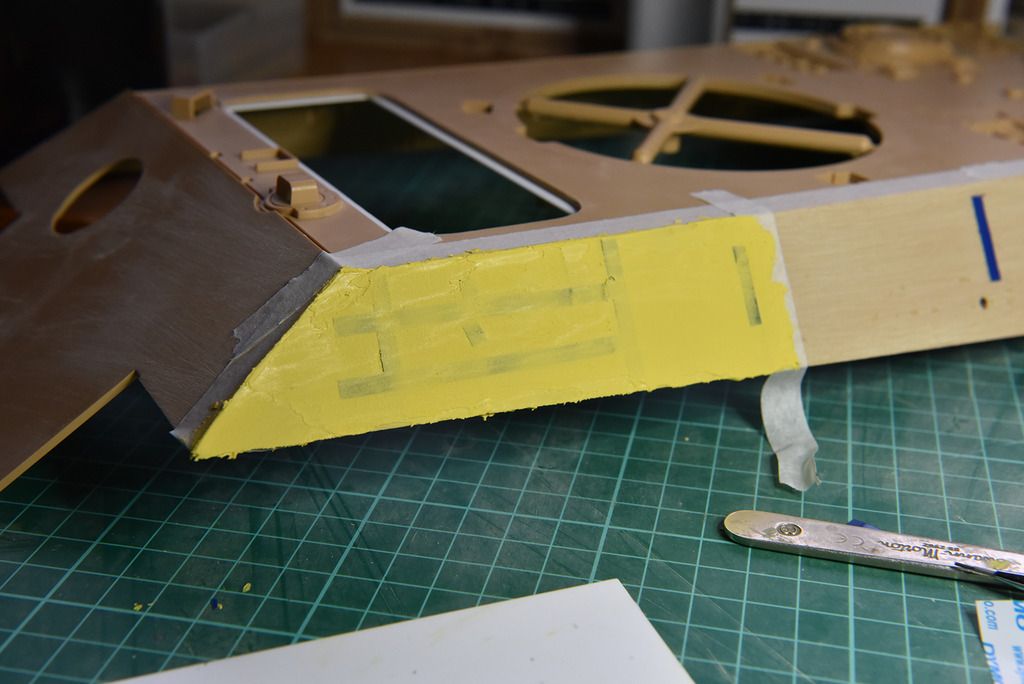
4. You then need to wait until the putty develops a 'skin'. When this happens the putty will take an impression from the tool rather than simply sticking to the tool and coming away.
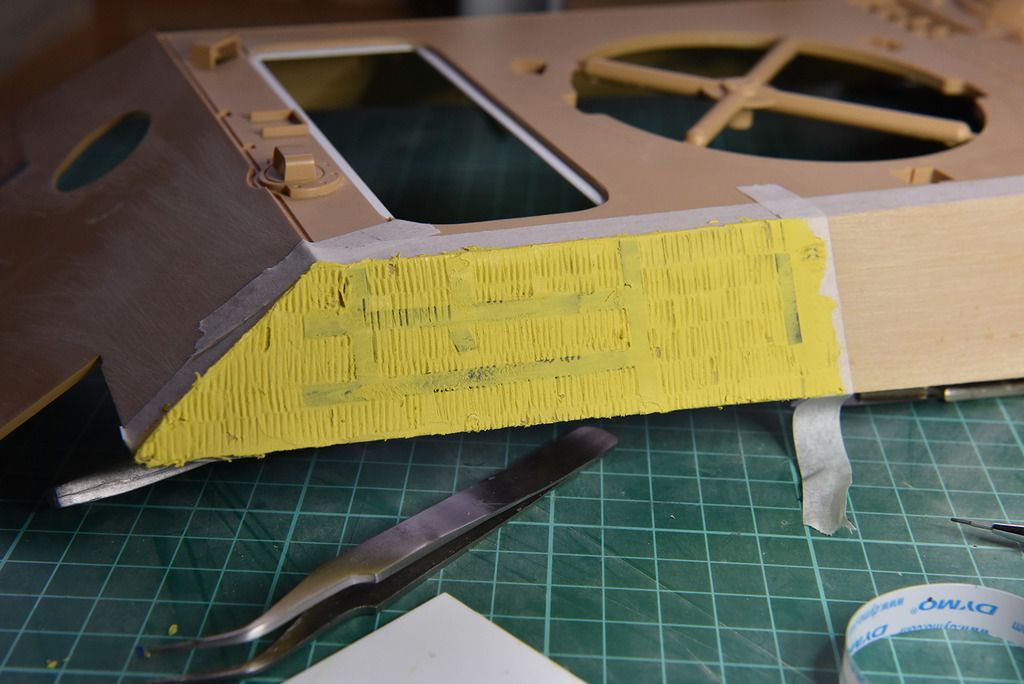
It's then a case of working your way round the model and completing the Zimmerit coating.
Here's a pic of the part finished Zimm with some of the fixtures loosely placed to give an idea of the final effect.
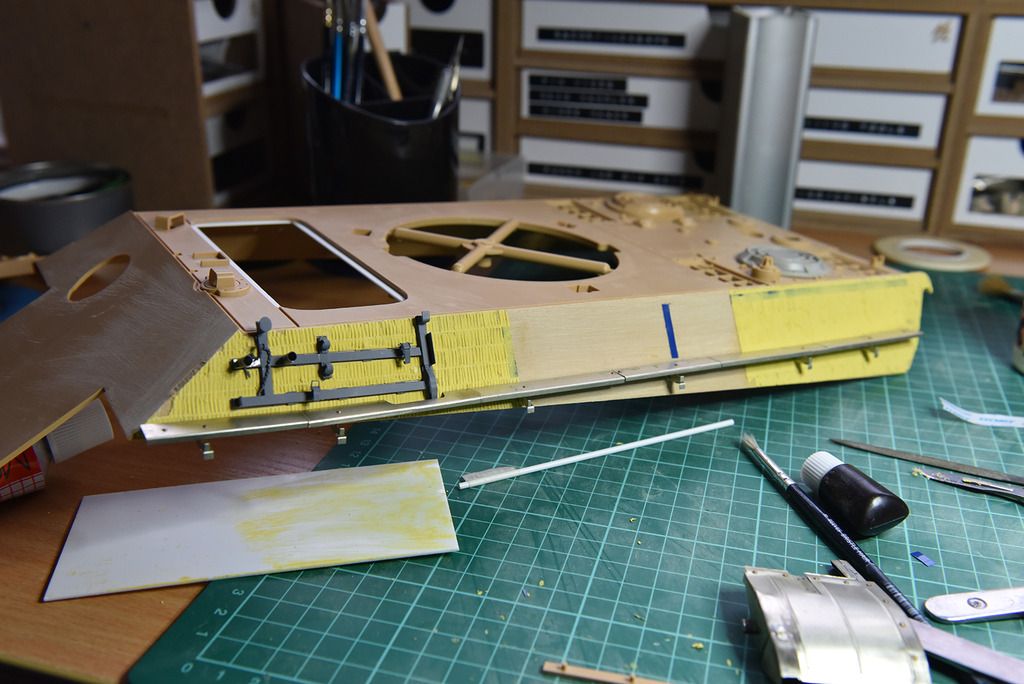
And that's my approach to the Zimm application on this big Panther. (Note: the Zimmerit on this Panther has the vertical pattern. You should check your references for the pattern used on your own particular AFV).
Cheers
Paul
Took a break from soldering this weekend and turned my attention to how I would be replicating the Zimmerit on the Panther hull.
I had purchased the Atak Zimmerit set a while back but decided against using it. Instead I've opted to simulate the effect with a 2 part putty and a Zimmerit tool (a punch with the pattern in the end). The particular putty I'm using is a brand called Mori Mori which has a very fine grain and is a fantastic material for model making purposes. However, getting hold of this stuff is not easy (I bought mine from Japan years ago), it also stinks to high heaven and requires a well ventilated room (you also need to wear a mask when sanding this putty).
What follows is the method I've found (after much testing) that gives the best results...
1. Sand the surface of the hull to give the putty a key to stick to. Then trace where the hull fixtures are to be placed.


2. Mask the marked area with Demo tape (this not only masks the area but acts as a guide for the thickness of the putty you will apply.

Mask the surrounding area with normal tape to protect it.
3. Mix the 2 part putty well (20 parts putty to 1 hardener). When the 2 parts are thoroughly mixed and of a smooth consistent colour the apply to the model. Apply it in manageable areas, although this putty has a long work time you do not want it to go off half way through the Zimm pattern!

4. You then need to wait until the putty develops a 'skin'. When this happens the putty will take an impression from the tool rather than simply sticking to the tool and coming away.

It's then a case of working your way round the model and completing the Zimmerit coating.
Here's a pic of the part finished Zimm with some of the fixtures loosely placed to give an idea of the final effect.

And that's my approach to the Zimm application on this big Panther. (Note: the Zimmerit on this Panther has the vertical pattern. You should check your references for the pattern used on your own particular AFV).
Cheers
Paul
- Status
- Not open for further replies.
Legal Notice
scalemodelling.co.uk is a privately operated online discussion forum. All content posted by members reflects their own views and opinions and does not necessarily represent those of the forum owners or administrators. While reasonable efforts are made to moderate content, no responsibility is accepted for user-generated material. By using this site, you agree to comply with UK law and the forum rules.
Currently on our website
Threads
37,405
Messages
707,857
Members
2,652
Latest member
Waffenträger Auf E-100