

You are using an out of date browser. It may not display this or other websites correctly.
You should upgrade or use an alternative browser.
You should upgrade or use an alternative browser.
Pushing Back .......
- Thread starter toto
- Start date
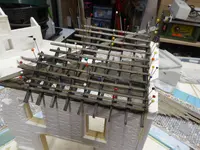

Thanks Joe,
Still got the hardest part to come ..... painting the brickwork. Don't have a clue how i'm going to do it and maintain the mortar courses ..... this is where it could all go horribly wrong. If I make a mess of that ....... then the bin beckons ....... we'll see ..... I'll need to bite the bullet and take the plunge at some point.
Cheers
Toto
Still got the hardest part to come ..... painting the brickwork. Don't have a clue how i'm going to do it and maintain the mortar courses ..... this is where it could all go horribly wrong. If I make a mess of that ....... then the bin beckons .......
we'll see ..... I'll need to bite the bullet and take the plunge at some point.Cheers
Toto
Done a bit more research ..... read that as utube gazing ...... looks like drybrushing the brickwork but still airbrushing the inside walls and mayby the ceilings as well.
On mumsie duties this afternoon so I may only get an hour oor two in the mancave tonight. I will be starting the roof tiles.
I only made a few casts of the tiles yesterday so we'll see if I have enough to co plete the task ....... probably not. I was getting a bit weiry of casting as I only have the 3 moulds and by the time you take the drying time and general turn around of the complete cycle process .....I'd had enough.
Meanwhle before doing my domestic duties for the day ..... its a coffee and more utube videos,
Tara for now
Toto
On mumsie duties this afternoon so I may only get an hour oor two in the mancave tonight. I will be starting the roof tiles.
I only made a few casts of the tiles yesterday so we'll see if I have enough to co plete the task ....... probably not. I was getting a bit weiry of casting as I only have the 3 moulds and by the time you take the drying time and general turn around of the complete cycle process .....I'd had enough.
Meanwhle before doing my domestic duties for the day ..... its a coffee and more utube videos,
Tara for now
Toto
OK .....
back from dounreay ..... 8 hour drive today as an accident shut the A9 down just before Perth. ..... Sat for two hours then eventually diverted through Dunkeld .... must have been a bad one .... hope everyone involved is ok.
Anyway ..... back in the saddle and ...... a change of plan ..... Ooooooo.
My intention was to carry on from where I left off last week ......
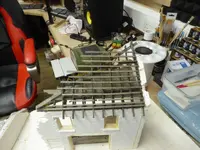
and start the roof tiles now that I have removed the pins from the tile battons.
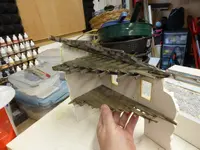
but ..... then I got to thinking. When I do the painting etc and the remaining wood work both internal and external, the building is going to be subjected to a load of handling and the tiles could take the brunt of it ..... So decided to postpone the tile installation for now.
My next project is to bring this other building up to the same stage .....
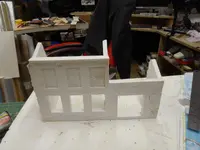
two roof sections and one internal upper floor......
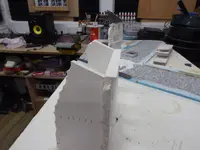
and the other end .....
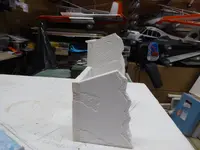
and the rear .....
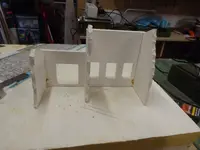
This has been a small manufacturing shop ( maybe a joiners ) with a storage area and maybe a small office upstairs.
So that is the plan for now with the third building .... the Cafe .... I think, coming after this one.
So now I need to look at ripping up more roof joists and floor joists etc ..... and work out how to build it.
maybe more later.
toto
back from dounreay ..... 8 hour drive today as an accident shut the A9 down just before Perth. ..... Sat for two hours then eventually diverted through Dunkeld .... must have been a bad one .... hope everyone involved is ok.
Anyway ..... back in the saddle and ...... a change of plan ..... Ooooooo.
My intention was to carry on from where I left off last week ......
and start the roof tiles now that I have removed the pins from the tile battons.
but ..... then I got to thinking. When I do the painting etc and the remaining wood work both internal and external, the building is going to be subjected to a load of handling and the tiles could take the brunt of it ..... So decided to postpone the tile installation for now.
My next project is to bring this other building up to the same stage .....
two roof sections and one internal upper floor......
and the other end .....
and the rear .....
This has been a small manufacturing shop ( maybe a joiners ) with a storage area and maybe a small office upstairs.
So that is the plan for now with the third building .... the Cafe .... I think, coming after this one.
So now I need to look at ripping up more roof joists and floor joists etc ..... and work out how to build it.
maybe more later.
toto
OK ...... so on we go .....
I've been looking at the way the gable walls meet the roof eaves ..... and its not good. I think there has been a bit of an error with the cast but I may be wrong. I'll come back to that later ..... but meanwhile I have cut the Daler Board for the lining of the inside walls .....
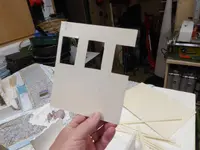
and here is the first cut .... albeit upside down .....
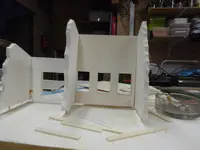
and there it is in place awaiting the PVA .... but first the two side walls ....
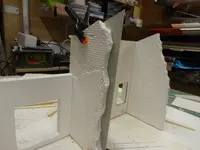
I offered the piece of Daler board up against the wall and then marked around the edges ....
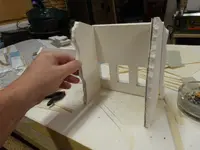
and there we have it ..... simples ....
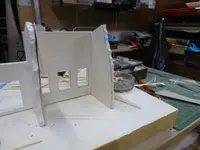
and the same with the other side. I'm not sure if I will do the same with the single storey store house or not ..... the jury is still out on that one.
I want to get the windows lined out and the roof and first floor to the office done first and then move on to the single story building which should be easier.
I'll come back with the difficulties I am having with the roof ridges later. I still have to get my head around that but there are a couple of issues which I need to overcome.
cheers for now
Toto.
I've been looking at the way the gable walls meet the roof eaves ..... and its not good. I think there has been a bit of an error with the cast but I may be wrong. I'll come back to that later ..... but meanwhile I have cut the Daler Board for the lining of the inside walls .....
and here is the first cut .... albeit upside down .....
and there it is in place awaiting the PVA .... but first the two side walls ....
I offered the piece of Daler board up against the wall and then marked around the edges ....
and there we have it ..... simples ....
and the same with the other side. I'm not sure if I will do the same with the single storey store house or not ..... the jury is still out on that one.
I want to get the windows lined out and the roof and first floor to the office done first and then move on to the single story building which should be easier.
I'll come back with the difficulties I am having with the roof ridges later. I still have to get my head around that but there are a couple of issues which I need to overcome.
cheers for now
Toto.
Attachments
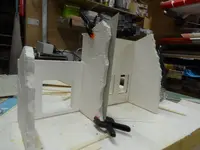
OK ...... topped up my red wine ..... I can continue ..... erm ..... I think.
I spoke about issues with the roof construction ..... here is what I have ..... I will apologies if the photo's don't quite explain themselves ..... the wine is taking effect ....
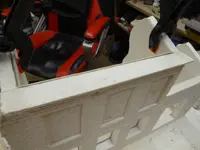
here is the first issue ...... a line of coping stones which to my opinion are both too high and too wide .....
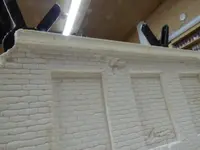
a view from underneath showing the brick corbel ....
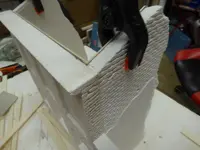
one of the gable walls which finishes in line with the coping .....
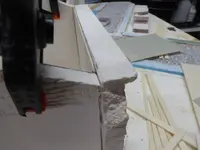
and one which finishes slightly below the coping stone. ..... Now .... some might argue that the builder / assembler got it wrong. You might be correct. at the point where I glued these parts together, I noticed that these parts were out a bit. I had to make the choice whether to make the base level or whether to line up the roof edges ....... As a total twat ..... I went with the base.
Now I will need to do a bit of skullduggery to pull the roof back in line.
Not only that but the tiled roof edge at the eaves is just going to be wrong. you would not have a tiled roof running down on to a capping stone the way that this is going to do. So I need to come up with a solution ...... which I don't have right now in order to make the finish believable.
I need time ..... without the wine.
so its on to tomorrow.
cheers for now
toto
I spoke about issues with the roof construction ..... here is what I have ..... I will apologies if the photo's don't quite explain themselves ..... the wine is taking effect ....
here is the first issue ...... a line of coping stones which to my opinion are both too high and too wide .....
a view from underneath showing the brick corbel ....
one of the gable walls which finishes in line with the coping .....
and one which finishes slightly below the coping stone. ..... Now .... some might argue that the builder / assembler got it wrong. You might be correct. at the point where I glued these parts together, I noticed that these parts were out a bit. I had to make the choice whether to make the base level or whether to line up the roof edges ....... As a total twat ..... I went with the base.
Now I will need to do a bit of skullduggery to pull the roof back in line.
Not only that but the tiled roof edge at the eaves is just going to be wrong. you would not have a tiled roof running down on to a capping stone the way that this is going to do. So I need to come up with a solution ...... which I don't have right now in order to make the finish believable.
I need time ..... without the wine.
so its on to tomorrow.
cheers for now
toto

1/3
That is really dveloping well mate!OK ..... pavements heightened ..... its starting to take shape.
View attachment 1286064
we are on our way this time .....
View attachment 1286065
now thats progress .....
View attachment 1286066
and some more .....
View attachment 1286067
and that is it until I have had something to eat. I will start on the Balsa wood camber on the roads later .....
cheers for now.
toto
Steve
Daler board glued to the internal walls this afternoon. Only had about 45 minutes in the shed todsy and I'm out for a beer tonight.
I think I may have a solution ( read that as fudge ) for the roof woodwork. Thats for tomorrow so it'll be balsa wood ripped to correct width and some PVA.
Looking forward to tomorrow.
See you then
Toto
I think I may have a solution ( read that as fudge ) for the roof woodwork. Thats for tomorrow so it'll be balsa wood ripped to correct width and some PVA.
Looking forward to tomorrow.
See you then
Toto
OK ...... back to it then,
My Daler Board has dried over night .....
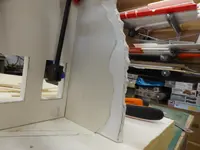
and ....
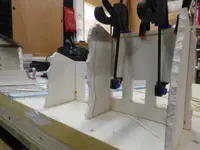
I will need to scribe the brick courses round on to the inside of the room where the plaster ( Daler Board ) finishes. Thats for later as for now ......
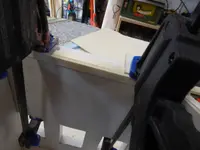
I'm making a start on the roof timbers and will probably line the inside of the window openings at the same time ..... just as the first building I done earlier ....
I am very much constructing the roof ..... on the hoof so if it does not resemble any construction technique that you are aware of ..... artistic licence my freinds. Covers a multitude of sins.
Where to look out for is where the roof slates meet the wall coping at the top above the windows .... completely at a loss here .... never mind .... that will be the last thing on the minds of the occupants right now.
more later as it happens
toto
My Daler Board has dried over night .....
and ....
I will need to scribe the brick courses round on to the inside of the room where the plaster ( Daler Board ) finishes. Thats for later as for now ......
I'm making a start on the roof timbers and will probably line the inside of the window openings at the same time ..... just as the first building I done earlier ....
I am very much constructing the roof ..... on the hoof so if it does not resemble any construction technique that you are aware of ..... artistic licence my freinds. Covers a multitude of sins.
Where to look out for is where the roof slates meet the wall coping at the top above the windows .... completely at a loss here .... never mind .... that will be the last thing on the minds of the occupants right now.
more later as it happens
toto
OK ....
A little more done .... You can only take small steps until the main support frame for the roof timbers is built and dry . after that you'll see some quicker progress.
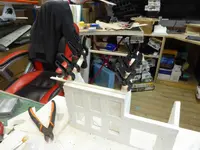
coming along .... slowly ...
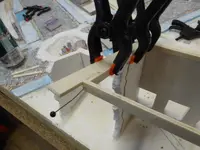
and .....
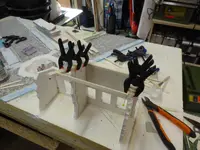
hope you can see where we are going with this ....
until later
toto
A little more done .... You can only take small steps until the main support frame for the roof timbers is built and dry . after that you'll see some quicker progress.
coming along .... slowly ...
and .....
hope you can see where we are going with this ....
until later
toto
So ..... the roof trusses ....
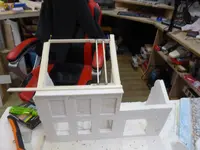
and it's all about spacer then a truss .... spacer then a truss .... you get the picture .....
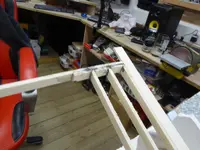
a bit like the above .....
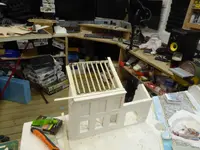
and we get to the end ..... with an uneven space that I could have avoided with a little more care but ..... I can live with it.
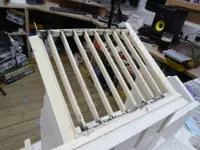
the ridge line at the top is starting to bulge a little but this wont be seen as once the noggings are in and the roof has a bit more structural strength ..... I will be cutting the ridge line back a bit so it will be gone....
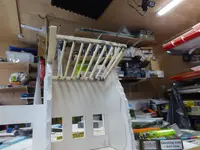
and from the underside from the rear .....
and now to go and do the noggings.
cheers for now .....
toto
and it's all about spacer then a truss .... spacer then a truss .... you get the picture .....
a bit like the above .....
and we get to the end ..... with an uneven space that I could have avoided with a little more care but ..... I can live with it.
the ridge line at the top is starting to bulge a little but this wont be seen as once the noggings are in and the roof has a bit more structural strength ..... I will be cutting the ridge line back a bit so it will be gone....
and from the underside from the rear .....
and now to go and do the noggings.
cheers for now .....
toto
So ..... noggings it is then ....
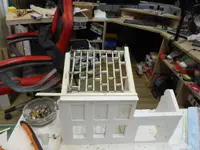
and as you can see the rafters are starting to run off at the top .... never mind, once I cut them back a bit , it wont be quite so noticeable....
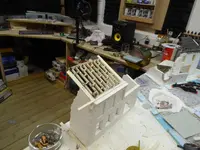
starting to get somewhere ...
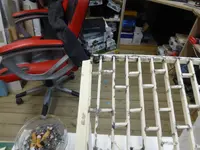
squint or wot ....
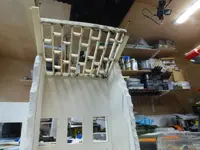
and from the underside ....
I'll need to give that little lot time to dry before doing any more or it will just take a hammering ....
so long for now
toto
and as you can see the rafters are starting to run off at the top .... never mind, once I cut them back a bit , it wont be quite so noticeable....
starting to get somewhere ...
squint or wot ....
and from the underside ....
I'll need to give that little lot time to dry before doing any more or it will just take a hammering ....
so long for now
toto
Attachments
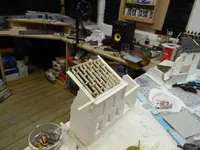
OK ..... so whilst awaiting the roof to dry out a bit ..... I've started on the ground floor .... well away from the roof ....
So on we go ....
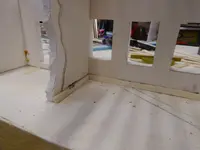
and I start with the perimter framework ...
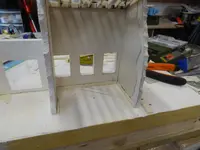
a bit like this ...
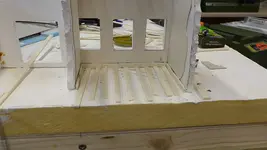
and cut a few floor joists to let me get started ....
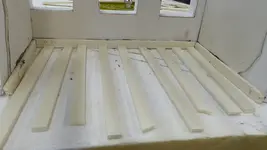
Now I'm on nogging cutting duties .... never stops does it ....
back later
toto
So on we go ....
and I start with the perimter framework ...
a bit like this ...
and cut a few floor joists to let me get started ....
Now I'm on nogging cutting duties .... never stops does it ....
back later
toto
OK .... picking up from where I left off ....
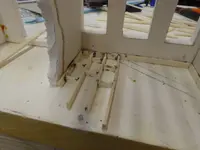
The first few floor joists and spacers start to go in. ..... need to watch that I don't glue the whole thing to the base .....
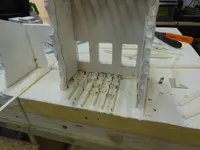
progressing nicely ....
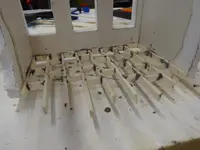
job done and I have lifted the whole structure off the base ..... its supported with wooden dowells that I drilled in way back at the start when I glued the walls together.
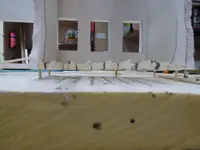
there we go ..... on stilts ....
Now to give it all a chance to dry a bit.
maybe back later .... I have a case to pack for tomorrow.
cheers for now
toto
The first few floor joists and spacers start to go in. ..... need to watch that I don't glue the whole thing to the base .....
progressing nicely ....
job done and I have lifted the whole structure off the base ..... its supported with wooden dowells that I drilled in way back at the start when I glued the walls together.
there we go ..... on stilts ....
Now to give it all a chance to dry a bit.
maybe back later .... I have a case to pack for tomorrow.
cheers for now
toto
So .... thats me until next weekend. The last weekend before jetting out to Cyprus on the 15th.
I want to have this buildings ground and first floor before I go and also the roof tile batons on as well...... thats the target untilI get back and have a fresh start with building no 3.
So, inching forward a bit at a time. I think after I get building no 3 up to the same level as the other two buildings, it will either be dry brushing the brickwork on all three building, or giving the inside walls a coat of filler at the joints and painting the insides.
Also start priming the pavibg areas with a brown primer before laying the pavement slabs. I suppose what I'm trying to say is that we shall get away from balsa wood for a bit of a break. ..... it'll be some painting and filling time.
Lets wait and see.
Cheers
Toto
I want to have this buildings ground and first floor before I go and also the roof tile batons on as well...... thats the target untilI get back and have a fresh start with building no 3.
So, inching forward a bit at a time. I think after I get building no 3 up to the same level as the other two buildings, it will either be dry brushing the brickwork on all three building, or giving the inside walls a coat of filler at the joints and painting the insides.
Also start priming the pavibg areas with a brown primer before laying the pavement slabs. I suppose what I'm trying to say is that we shall get away from balsa wood for a bit of a break. ..... it'll be some painting and filling time.
Lets wait and see.
Cheers
Toto

Hi Toto, what a huge undertaking. Will definitely be smashing once it's done. I had one project of near similar size but fizzled out called David and Goliath...will hopefully resurrect in the future. Keep working on your build and will pull up a chair...sofa to watch this done.
Cheers,
Wabble
Cheers,
Wabble

HI Toto well ive looked through your builds an youve done brilliant work i dint know there was so much went in just to put on a roof an in my opinion if you put the two halves togeather they would be good enough to live in lol an when you get them done will you set fire to them for just a few seconds like J/R does to give the building that bombed out smell an look ? but ive enjoyed looking an reading what you are doin here sir brilliant work SIR looking forward to more when you come back
ATB
chrisb
ATB
chrisb
Hi Chris,
Glad you enjoying the journey. There is a bit of work goes into it and if I was getting more shed time, I'd be much further ahead.
However, it is what it is and I'm still enjoying it regardless.
Loads more to come thats for sure.
Cheers for now
Toto
Glad you enjoying the journey. There is a bit of work goes into it and if I was getting more shed time, I'd be much further ahead.
However, it is what it is and I'm still enjoying it regardless.
Loads more to come thats for sure.
Cheers for now
Toto
Legal Notice
scalemodelling.co.uk is a privately operated online discussion forum. All content posted by members reflects their own views and opinions and does not necessarily represent those of the forum owners or administrators. While reasonable efforts are made to moderate content, no responsibility is accepted for user-generated material. By using this site, you agree to comply with UK law and the forum rules.