Theme editor

Scale Model Shop

Reinforcing the Gustav Line, Italy 1944

TIM FORSTER

Active member
Joined
Apr 28, 2018
Messages
329
Reaction score
116
Points
43
Age
58
First Name
TIM
Location
LONDON, UK
1/3
Thread owner
Ok, so anyone who has followed by last three projects not only has patience, but also knows that I am generally a slow worker… they usually take at least 3 years.
PXL_20260715_160827733 crop.webp

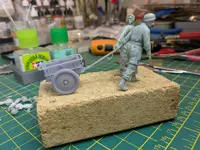
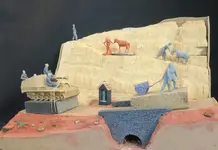
So I have resolved that this one is going to be much quicker! As part of the strategy I am only including one vehicle (although it is open-topped) plus an infantry cart. I am also going to avoid buildings altogether (unless you count a bridge and a roadside shrine). However, the figure count is probably not going to be any lower than my last one and, just to add a twist, two of them are going to be donkeys.

However, the dominating feature is here is going to be the mountainous terrain.

The general idea is to show the challenge facing the Germans as they sought to hold the Gustav line on the Italian front before, in May 1944, the Allies finally captured Monte Cassino and swept down the Liri valley towards Rome…
 
I already like where this is going Tim. The layers are the key to the composition and telling the story. Three years...okay made reservations to a nearby hotel and brought along a comfortable designer chair.

Cheers,
Wabble
 
Thread owner
I already like where this is going Tim. The layers are the key to the composition and telling the story. Three years...okay made reservations to a nearby hotel and brought along a comfortable designer chair.

Cheers,
Wabble
Thanks Wabble... I hope you aren't holding your breath at the same time!
 
Thread owner
Thanks guys, this may not be quite as exciting as my last project, but I hope that it has enough drama nonetheless.

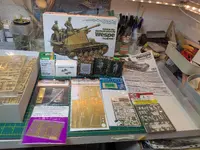
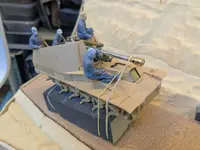
The main inspiration for this project was the Tamiya Wespe that I bought a couple of years ago.

PXL_20260123_182106506.webp

As you can see, I also went for a lot of extras - most of which I will end up not using.

Like the 250 that I put on my last dio, to my mind the Wespe qualifies as a ‘cute’ vehicle. It also manages to pack an awful lot into a relatively small space - I mean it is a 105 mm howitzer on a (stretched) Panzer II chassis after all…

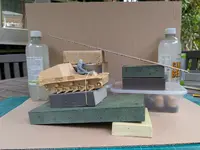
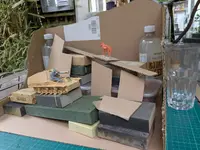
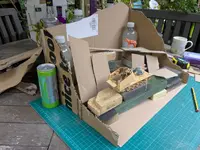
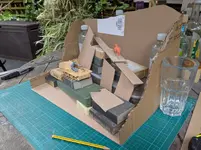
As with all my projects I started out by working out the space needed by mocking up the scene using bits of card, sanding blocks and whatever came to hand. Since the Wespe was going to be the only vehicle I had already started putting it together.

PXL_20260516_111641169.webp
PXL_20260516_115908502.webp
PXL_20260516_120409228.webp
PXL_20260516_120421606.webp

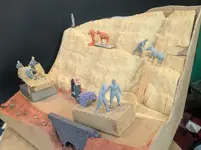
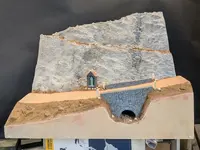
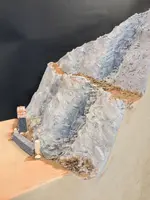
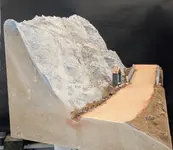
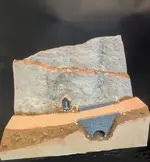
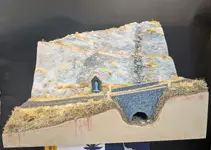
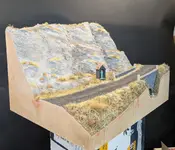
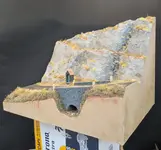
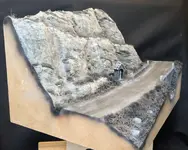
The idea was to have the Wespe making its way up a relatively narrow road, passing in front of a cliff face and over a bridge, with a mule track running up above in the opposite direction. I needed to allow enough height and depth to incorporate several elements: the steep drop in front of the road, the road itself (still wide enough to take a Wespe), the lower cliff face, the mule track set into its face and the cliff rising above it…
 
Thread owner
Thanks folks, I hope it lives up to expectations...

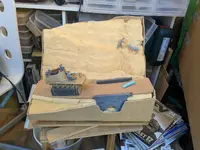
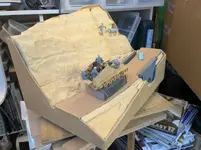
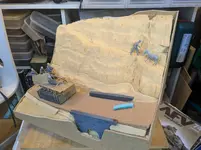
Here are a few more shots of the project in its early stage.

PXL_20260620_173711545.webpPXL_20260620_173720553.webpPXL_20260620_173735476.webp

PXL_20260620_173732605.webpPXL_20260711_153608431.webp

Obviously the vehicle and figures are all work in progress at this stage - half of them are simply blu-tacked together.

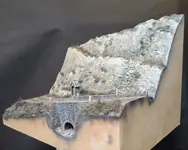
As can be seen, I used three blocks of ceiling insulation to build up the terrain and then edged it with hardboard. This type of insulation board is very cheap (i.e. free from a nearby skip) and carves very easily with saws, knives, a rotary tool with sanding attachment and a screwdriver. However, it is also very messy, so best done outdoors. I used PVA to fix everything in place with the odd tack nailed in here and there to help whilst it dried.

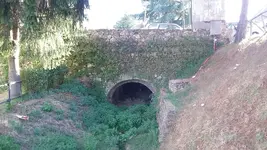
The road was laid using cork sheet and the bridge was made from high density foam, scribed with a knife and then a cocktail stick. I based it on this picture which I took in Tuscany about 10 years ago:

20160825_180523.webp

The next step was to start making the rock texture. In the past I have used Woodlands Scenic plaster rock moulds, which are very convincing. However, for such a large area I thought that this would be too much work. Plus all of the pieces would need to be joined together anyway and I was worried that this would look a bit odd.

So I
decided to use good old DAS air-drying clay instead. I used two colours - Stone and Terracotta - to help create some contrast between the rocks and the earth areas. I will be painting everything eventually, but this helped me to work out the lie of the terrain better as I went along

PXL_20260715_160901968.webp
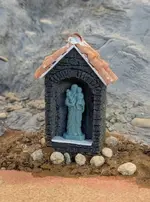
In the image above you can see that I had started building up the foreground. The bridge has been further detailed and by now I had added a roadside shrine to add a little more interest to the middle of the scene. This was put together using another piece of high densiry foam, a resin casting of a saint (from a bag that I found at a model show for £1) and some tiles left over from my last Italian project several years ago.

shrine crop.webp

Thenext step was to start building up the rock faces using the DAS and strategically placed stones.

PXL_20260717_140638366.webp
PXL_20260717_140659563.webp

I first covered the foam in a decent layer of PVA before using my fingers to press the clay into place. I then used a small pallete knife and wire brushes to shape the surface using photos as a reference. It's important to work out which way the strata run and then try and keep this consistent...
 
Hi Tim, working groundwork as I know it. The best part about dios is using the stuff that has been collected over the past, stuff that at the beginning seemed destined for a future diorama which people often discard. Groundwork is not always just pouring sand white glue, it's sculpting, finding the right scaled dirt or textured plaster that's workable. You obviously know how to go about it. Many have failed to see that the final landscape and foliage has to be painted over with a primer...often black or dark brown before re-working and blending up the individual scaled colours. Never is there anything used straight from the pack and plonked on however it seems to look right pre-painted by the manufacturer. You and I probably know that already. NightShift has shown that and explained it on YTube everytime and yet people don't realise. It's obviously a handicap if you don't have an airbrush to apply the paint.
Lovely stuff and building up nicely Tim.

Cheers,
Wabble
 
Thread owner
Hi Tim, working groundwork as I know it. The best part about dios is using the stuff that has been collected over the past, stuff that at the beginning seemed destined for a future diorama which people often discard. Groundwork is not always just pouring sand white glue, it's sculpting, finding the right scaled dirt or textured plaster that's workable. You obviously know how to go about it. Many have failed to see that the final landscape and foliage has to be painted over with a primer...often black or dark brown before re-working and blending up the individual scaled colours. Never is there anything used straight from the pack and plonked on however it seems to look right pre-painted by the manufacturer. You and I probably know that already. NightShift has shown that and explained it on YTube everytime and yet people don't realise. It's obviously a handicap if you don't have an airbrush to apply the paint.
Lovely stuff and building up nicely Tim.

Cheers,
Wabble
Thanks Wabble,

Yes, I agree that there's a lot more to it than white glue and sand. Shaping and sculpting is the key. I used to do a bit of railway modelling where cliffs and stone embankments are obviously a lot more common. You will see from my next post how I developed it...
 
Thread owner
Here you can see how everything looked after my first attempt once the clay had dried.

PXL_20260727_153008551.webp

However, I felt that everything looked too rounded, so I went in and added strips of clay which were then blended in to give it a more ‘jagged’ look.

PXL_20260728_172949560.webp

PXL_20260728_173009148.webp


PXL_20260728_173031761.webp

Whilst not 100% realistic I think it works well enough as a backdrop. It will definitely look better once I have added vegetation and paint…
 

Attachments

  • PXL_20260727_153024927 crop.webp
    PXL_20260727_153024927 crop.webp
    136.8 KB · Views: 0
Thread owner
Thanks Paul - I hope I keep learning from my mistakes!

And like John - glad you liked the cliff face (because if you didn't I'd be in trouble!)

So on with the show.

The next step was to add vegetation. This scene is set in May, so there should be plenty of greenery even in mountainous terrain.

PXL_20260802_163847401.webp

The grass is a combination of pre-made clumps from various sources (the sort that come on a backing strip) and good old fashioned static grass laid over diluted PVA glue using an applicator.

Most of the bank in the forground is covered with ‘rubberised horse hair’, which is much-beloved by railway modellers. Although it comes in rectangular blocks, it can be easily torn into irregular shapes and glued in place using UHU. This is just the undergrowth for what will later be clumps of bushes, but I am leaving off the the foliage until after the basic painting. I used the same technique for the brambles on my last diorama.

PXL_20260802_163922613.webp

PXL_20260802_164024879.webp

Of course it all looks a little artificial at this stage, but soon the magic will start to happen (at least I hope it will…)

The next step looks pretty drastic…

PXL_20260831_093627939 enhanced.webp

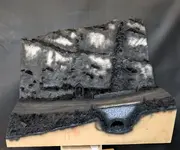
In the past I have avoided painting everything black. But this diorama is about 90% rock, road and bridge so I thought that I may as well go for it.

So I simply sprayed black Mr Surfacer with an airbrush to provide the absolute low-lights. In the odd hard-to-reach spots like the underside of the bridge I also used a brush.

The next step was a lot of fun with paints and airbrushes (I actually used both my IWATAs - the basic one for general coverage and the finer one for detail). It was also time to find out if all my clay sculpting had really paid dividends.

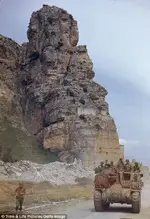
So what colour are rock faces in this part of Italy?

American troops ride an armored car down the road originally built by ancient Romans to reach...webp

I believe the shot above is an original colour photo. Even if you allow for the fact that it’s an old colour negative, I think this looks pretty spot on.

What’s particularly striking is the variation in hues within a single face: greys, browns, even yellows. Also note the grass and vegetation (although this looks like late summer).

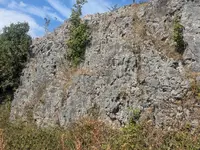
Out of interest, it’s not too dissimilar to this shot of a disused railway cutting that I took on the Tissington Trail in Derbyshire a few weeks ago:

PXL_20260813_131244046.webp

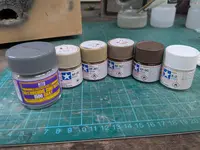
So I assembled this cast of characters:

PXL_20260831_165741660.webp

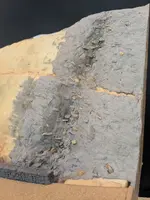
I started with a ‘master mix’ of Mr Surfacer Gray and Tamiya Buff (about 75:25 ratio, then thinned about 50:50) before adding the other colours as I went along, e.g. one with added yellow, another with earth and so on… I also lightened each ‘sub mix’ with white to add highlights where required. And then I used the airbrushes to apply these colours, aiming quite sharply from above to ensure that I took advantage of the black low-lights within the crevices.

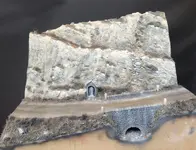
PXL_20260831_171255196 crop.webp

PXL_20260831_171334363 crop.webp

PXL_20260831_171315883.webp

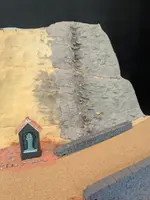
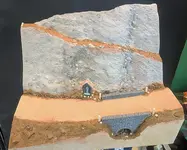
Of course, this is just the preliminary painting stage. There is a lot more to come with brush-painted highlights, washes, etc. Also, there are no greens or other foliage colours at all. I also have to paint the bridge and road side shrine - which I expect will add a lot more colour variation.

However, as a first attempt at creating a large expanse of rock I am pretty happy with the way it’s turning out…
 
Back
Top