Heres one Ive been wanting to get my teeth into for a while . Its the old Revell F4F- 4 Wildcat /Martlet in 1/32 . This is a rebox of a kit that was first tooled in 1969 so its not exactly state of the art ! That said , like a lot of these old Revell 1/32 kits its basically accurate and quite well detailed and it can be great fun to add some extra detail and bring them up to a modern standard. The kit mouldings are of an F4F-4 Wildcat and as such are nearly the same as the Martlet V it purports to be in this boxing. The only difference is that the Martlet V was a FM1 production Wildcat and as such only had four wing guns not the six depicted in the kit , an easy fix. Ill be adding various details to the cockpit , undercarriage and I'm planning on having the wings folded so the hinge points are going to need a lot of extra detailing too (the kit has 'working hinges' so its very basic and inaccurate)
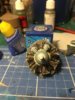
The mouldings have raised rivets and panel lines -standard for the time - but on this occasion theyre correct , the real thing being covered in rivets and overlapping joints . The only exception to this is the outer folding section of the wings , these were flush riveted so I'll have to sand these down a bit. Heres the box art and a few pics of the first prep work- filling some of the sink marks ! (i can forgive it this , it is 48 year old after all!)View attachment 289847 View attachment 289848 View attachment 289849 View attachment 289850 View attachment 289851 View attachment 289852
The mouldings have raised rivets and panel lines -standard for the time - but on this occasion theyre correct , the real thing being covered in rivets and overlapping joints . The only exception to this is the outer folding section of the wings , these were flush riveted so I'll have to sand these down a bit. Heres the box art and a few pics of the first prep work- filling some of the sink marks ! (i can forgive it this , it is 48 year old after all!)View attachment 289847 View attachment 289848 View attachment 289849 View attachment 289850 View attachment 289851 View attachment 289852
Attachments
-
![DSCN2628 [Desktop Resolution].JPG](/data/attachments/75/75032-bd2f523aa76eaefe57bad5e4e54cf0a6.jpg?hash=B4KtWmmOKC) DSCN2628 [Desktop Resolution].JPG2.7 KB · Views: 0
DSCN2628 [Desktop Resolution].JPG2.7 KB · Views: 0 -
![DSCN2629 [Desktop Resolution].JPG](/data/attachments/75/75039-e5e2cbdb0315b76abe17439fc4e3e07f.jpg?hash=CSYOR62Vvv) DSCN2629 [Desktop Resolution].JPG1.4 KB · Views: 0
DSCN2629 [Desktop Resolution].JPG1.4 KB · Views: 0 -
![DSCN2630 [Desktop Resolution].JPG](/data/attachments/75/75046-083e2d014b037366b233ca8ca0d889de.jpg?hash=fRXJw2t2NG) DSCN2630 [Desktop Resolution].JPG1.3 KB · Views: 0
DSCN2630 [Desktop Resolution].JPG1.3 KB · Views: 0 -
![DSCN2639 [Desktop Resolution].JPG](/data/attachments/75/75055-b811a681304c2595639f43e5f530aee6.jpg?hash=pYhsLspXC4) DSCN2639 [Desktop Resolution].JPG3 KB · Views: 0
DSCN2639 [Desktop Resolution].JPG3 KB · Views: 0 -
![DSCN2640 [Desktop Resolution].JPG](/data/attachments/75/75061-5039b2d58d53130a5926d4234b286dff.jpg?hash=UYJZGduCwA) DSCN2640 [Desktop Resolution].JPG3 KB · Views: 0
DSCN2640 [Desktop Resolution].JPG3 KB · Views: 0 -
![DSCN2641 [Desktop Resolution].JPG](/data/attachments/75/75068-a3e3132eb3803167e2864d16af2235d5.jpg?hash=Ty6xktKsJZ) DSCN2641 [Desktop Resolution].JPG2.8 KB · Views: 0
DSCN2641 [Desktop Resolution].JPG2.8 KB · Views: 0

![DSCN2656 [Desktop Resolution].JPG](/data/attachments/75/75362-d2c921534ba7226aa6aea8769d83251e.jpg?hash=RlIOdBg-jD)
![DSCN2657 [Desktop Resolution].JPG](/data/attachments/75/75367-25137e8dda1aa1afbfb84d2dfe2acfe5.jpg?hash=R3U0k7iCc7)
![DSCN2655 [Desktop Resolution].JPG](/data/attachments/75/75356-fa3eeb3e5d6ead646fbfef522c9d24a0.jpg?hash=3O9YbT2Vo6)
![DSCN2654 [Desktop Resolution].JPG](/data/attachments/75/75350-ea86efb26f4da8362add937470d34b5f.jpg?hash=xbwEn0E0QG)
![DSCN2646 [Desktop Resolution].JPG](/data/attachments/75/75301-0d5a4f23584a4347157179edf8a694a2.jpg?hash=EKuvA2Wgtn)
![DSCN2645 [Desktop Resolution].JPG](/data/attachments/75/75307-579e73b1a85a8cf63fce831399aa6ef9.jpg?hash=AraGT4q2TZ)
![DSCN2647 [Desktop Resolution].JPG](/data/attachments/75/75313-c81c96a02dec14aec9e96e56de3c24c8.jpg?hash=xogLInyfGi)
![DSCN2648 [Desktop Resolution].JPG](/data/attachments/75/75318-212d032e1bd2c8091b6bbf3b1469c9e5.jpg?hash=48Bow2SuE-)
![DSCN2649 [Desktop Resolution].JPG](/data/attachments/75/75323-5217a2692aad297c82b1885ca14d3930.jpg?hash=AZ8828v3T9)
![DSCN2650 [Desktop Resolution].JPG](/data/attachments/75/75329-ed7567cf7a11fce85dd0a26b86dd48ce.jpg?hash=dOYutv0_HX)
![DSCN2651 [Desktop Resolution].JPG](/data/attachments/75/75335-b2aa67be8a3ca6f0727b8136cc5c7214.jpg?hash=-vQYVhrc0A)
![DSCN2652 [Desktop Resolution].JPG](/data/attachments/75/75340-d04a0a607c982d4c137267c5fdc66a90.jpg?hash=egnBGpD1o_)
![DSCN2653 [Desktop Resolution].JPG](/data/attachments/75/75345-d19cec863d3a469141231d4cc5465a01.jpg?hash=cYJR8YFrpk)
![DSCN2658 [Desktop Resolution].JPG](/data/attachments/75/75490-c026f34b137f354385561a1109ff3c42.jpg?hash=OWvW9S4Jez)
![DSCN2659 [Desktop Resolution].JPG](/data/attachments/75/75496-16c50a8803dbf33f10728a22f085073d.jpg?hash=RDLIlK5sUj)
![DSCN2660 [Desktop Resolution].JPG](/data/attachments/75/75502-b6c0739878c7df938cc1e7b4280e0a2b.jpg?hash=fzxFm5MvJy)
![DSCN2661 [Desktop Resolution].JPG](/data/attachments/75/75506-85ac5b67d521a95d84ba7750a492e5ba.jpg?hash=fUWGtzJPPz)
![DSCN2662 [Desktop Resolution].JPG](/data/attachments/75/75513-263b4596871ef44605382a86e42e961e.jpg?hash=YABssvaCkt)
![DSCN2672 [Desktop Resolution].JPG](/data/attachments/75/75519-9b948b71c136cd70bb9bca934d2baa14.jpg?hash=l2eH72AvH5)
![DSCN2670 [Desktop Resolution].JPG](/data/attachments/75/75525-393d2c55552ead7b59e6c24162a50c7e.jpg?hash=m4hTV3SMNq)
![DSCN2671 [Desktop Resolution].JPG](/data/attachments/75/75531-d742c3ab760e221726dc140b850591d4.jpg?hash=TLJGg8aKBN)
![DSCN2663 [Desktop Resolution].JPG](/data/attachments/75/75538-6773a3bd230a383c5199bc297fa183dc.jpg?hash=4kg3YDNHhj)
![DSCN2667 [Desktop Resolution].JPG](/data/attachments/75/75544-73cdc48b8c1e3b54372a28ba5145ba08.jpg?hash=7jFJg9lzSI)
![DSCN2668 [Desktop Resolution].JPG](/data/attachments/75/75550-0157d51352f04505d7d3ef874605ba6c.jpg?hash=nKM2KoRNkq)
![DSCN2669 [Desktop Resolution].JPG](/data/attachments/75/75556-fc272f1d8fdbb44d8f7f484e0c88a7a9.jpg?hash=zmqGcz65H5)