Theme editor

Scale Model Shop

Revell 1:32 Spitfire Mk. 1

Status
Not open for further replies.

mossiepilot

New member
Joined
Jul 17, 2011
Messages
2,272
Reaction score
0
Points
0
1/3
Thread owner
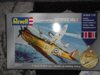
I'm starting the biggest scale build to date. Never done one this big before.

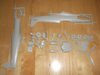
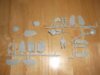
Here's the sprue shots-

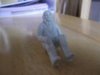
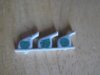
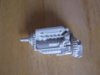
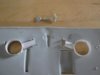
View attachment 41541View attachment 41542View attachment 41543View attachment 41545

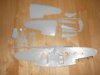
Don't know how old this kit is but it has flash all over the place and ejector pin marks galore.

View attachment 41544 As can be seen from the holes in the exhaust stacks. So plenty of work to do but should be a great learning kit to do. Also I'll be putting the pilot in, a first for me, so a bit of figure painting too.

Won't be a fast build, they never are, but I'll post as I go along.

Advice and comments gratefully received.

Tony.

View attachment 45154

View attachment 45155

View attachment 45156

View attachment 45157

View attachment 45158

View attachment 158180

View attachment 158181

View attachment 158182

View attachment 158183

View attachment 158184
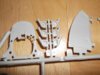
 

Attachments

  • spitfire build 005.jpg
    spitfire build 005.jpg
    2.8 KB · Views: 0
  • spitfire build 002.jpg
    spitfire build 002.jpg
    2 KB · Views: 0
  • spitfire build 004.jpg
    spitfire build 004.jpg
    2.6 KB · Views: 0
  • spitfire build 003.jpg
    spitfire build 003.jpg
    2 KB · Views: 0
  • spitfire build 001.jpg
    spitfire build 001.jpg
    2.1 KB · Views: 0
this kit is circa 1980s its round about 30yrs old,i was looking at one identical to this lol

mobear
 
Oh boy, there is a lot of work involved with this one! Still I bet it cost considerably less than the Tamiya one so there's less pressure involved!
 
A nice plane Tony looking forward to seeing this one develope although theres some work to do to get it up to scratch with all that flash
 
Wow, that mould does look a bit tired, and Revell call it a classic ! Anyway, it can be very satisfying sorting an old kit out. As I'm sure you'll find out.

Colin M..
 
I'll look forward to seeing you tackle this one Tony, there's a perverse satisfaction in doing old kits & turning them into something better. Plus it makes you appreciate the quality of modern kits all the more!

I bet this would be described as ' vintage ', a term currently used on eBay by seller's thinking they can charge a fortune for a pile of 70's scrap!

Cheers

Patrick
 
good luck in build :)

I'm still struggeling with mine... decals... :(

Roman
 
Thread owner
Well made a bit of a start on the Spit, but every part and I do mean every part has to be cleaned of flash and on some of the pieces the mould hasn't lined up properly so I'm almost carving new pieces out of the old. Still I'm enjoying every minute of this build and if it turns out half as good as I hope it will I'll be well pleased.

I'll post some photos soon.

Cheers,

Tony.
 
you will,i`m having same prob with the sopwith if it fits its a miracle,all i can say is hurrah

mobear
 
\ said:
Well made a bit of a start on the Spit, but every part and I do mean every part has to be cleaned of flash and on some of the pieces the mould hasn't lined up properly so I'm almost carving new pieces out of the old. Still I'm enjoying every minute of this build and if it turns out half as good as I hope it will I'll be well pleased.I'll post some photos soon.

Cheers,

Tony.
Just think of it as some sort of vac form kit !

Colin M...
 
I dont know how old this kit is,but i made it in my early teens.So it dates back to the early 1970's at least.I remember it had working undercarriage and a sliding canopy.I've picked it up a few times in my local model shop and thought about building it as a bit of nostalgia.I will be interested to see how this goes together.
 
Thread owner
A bit more done, View attachment 42047 I didn't like the idea that a kit of this size did not have any wheel wells so I scratched some, one problem is that the undercart dosen't fit in past the scratch parts,I would like to have fitted them almost last, fragile and all that, so thinking cap on!!!

View attachment 42048Engine is done and ready for undercoat, well almost, I need to fill and sand the other exhaust stackView attachment 42049,

Pilot's also ready for undercoat, research needed for correct colours, View attachment 42050 sorry about poor photo, I got in my own light.

View attachment 42051 one gripe, the vallejo air cockpit green I'm using seems very thin and takes three or four coats to get decent coverage, probably my fault as I didn'tundercoat first, silly boy!!

Comments and advice very welcome.

Tony.

View attachment 45429

View attachment 45430

View attachment 45431

View attachment 45432

View attachment 45433

View attachment 158455

View attachment 158456

View attachment 158457

View attachment 158458

View attachment 158459
 

Attachments

  • Spitfire2 004.jpg
    Spitfire2 004.jpg
    1.8 KB · Views: 0
  • Spitfire2 003.jpg
    Spitfire2 003.jpg
    1.8 KB · Views: 0
  • Spitfire2 002.jpg
    Spitfire2 002.jpg
    1.7 KB · Views: 0
  • Spitfire2 001.jpg
    Spitfire2 001.jpg
    1.8 KB · Views: 0
  • Spitfire2 005.jpg
    Spitfire2 005.jpg
    1.8 KB · Views: 0
ouch i see what you mean about the paint,someone here will know whats wrong.apart from that you is doing great

mobear
 
Quite a bit of progress there Tony! All looks nice to my untrained eye. The Vallejo model air will seem very thin as it's effectively pre-thinned for use with an airbrush.

Cheers

Patrick
 
The area, into which the leg goes, does not have a roof, and isn't totally enclosed; there's a sort-of wall at the rear, but the front is totally open, so there's no need to have a loop of plastic going over the well.

Incidentally, the kit is older than you think; it was Revell's first foray into 1/32 aircraft, and I built my first (at a price of 19/11d) during the early 1960s.

Edgar
 
Actually I think this is a 1970's kit - I am sure I built it in the early 70's, probably 1971 in fact - it was among the first 32 scale Revell released.

Hah - crossed post, Edgar says even earlier than me.
 
What pressure you using with the vallejo paint? i use about 10 to 15 psi nice and steady coating and controllable.

Hope this helps

Martin
 
I'm working same as Martin, about 1 bar of preassuer and work really fine for me

Roman
 
Hi Tony

It does seem this kit is a bit of a challenge due to it's age. Persevere with it though I'm sure you'll get a great looking Spit out of it. The scratch wheel wells look good but the reference from Edgar is outstanding. Shouldn't be too difficult to alter the scratch build parts.

I'm actually coming round to the idea of giving this kit a go too so I'm very interested in your build.

best of luck, and keep up the great work

Paul

Ps. Yes, you want model color not model air for brush painting
 
Status
Not open for further replies.
Back
Top