
You are using an out of date browser. It may not display this or other websites correctly.
You should upgrade or use an alternative browser.
You should upgrade or use an alternative browser.
Rick's Airfix 1/24 Hawker Hurricane MK1
- Thread starter rickoshea52
- Start date
- Status
- Not open for further replies.
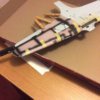
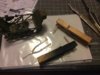
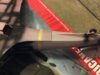
I got one of the wings together tonight plus a few other smaller bits. What a lousy fit on the wing tip!
View attachment 107170
View attachment 107171
View attachment 220193
View attachment 220194
View attachment 107170
View attachment 107171
View attachment 220193
View attachment 220194
Attachments
G
Guest
Guest
Nice work so far.
The cockpit looks fantastic!
The cockpit looks fantastic!
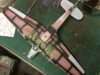
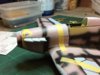
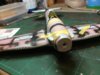
Got the wings closed up and sanded the leading edges then a touch of primer when they are fitted to the fuselage to see if they are smooth.
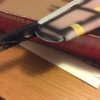
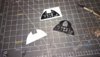
If anyone is building one of these I recommend filing the attachment tabs of the tail planes to make then fit the slot on the tail, they are too thick.
View attachment 107313
View attachment 107314
View attachment 107315
View attachment 220336
View attachment 220337
View attachment 220338
If anyone is building one of these I recommend filing the attachment tabs of the tail planes to make then fit the slot on the tail, they are too thick.
View attachment 107313
View attachment 107314
View attachment 107315
View attachment 220336
View attachment 220337
View attachment 220338
Attachments


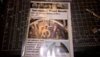
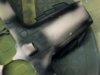
Does anyone have part number 1 for this kit going spare? It's the bit the exhausts are mounted to if you are not building the engine for show.
Thanks.
Thanks.
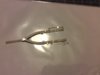
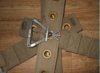
What is the disc on the the thin strap next to the left hand shoulder strap and which way should it be formed? The instructions from Eduard are not clear.
View attachment 111734
View attachment 224757
View attachment 111734
View attachment 224757
Attachments
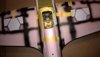
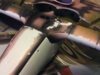
I've made a bit of progress with the instrument panel and seat belts.
View attachment 111735
View attachment 111736
View attachment 111737
View attachment 224758
View attachment 224759
View attachment 224760
View attachment 111735
View attachment 111736
View attachment 111737
View attachment 224758
View attachment 224759
View attachment 224760
Attachments
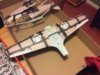
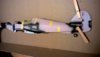
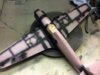
Slow and steady. Cockpit done and fitted with the fuselage closed up. The camera has picked up a few areas to touch up. I dry fitted the wings and the joins look okay but they take a bit of wrestling to fit nicely.
View attachment 113662
View attachment 113663
View attachment 113664
View attachment 113665
View attachment 113666
View attachment 226685
View attachment 226686
View attachment 226687
View attachment 226688
View attachment 226689
View attachment 113662
View attachment 113663
View attachment 113664
View attachment 113665
View attachment 113666
View attachment 226685
View attachment 226686
View attachment 226687
View attachment 226688
View attachment 226689
Attachments
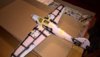
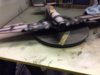
Wings on, there's some filling to be done but no massive gaps at the wing roots to battle only at the leading edges and belly to lower fuselage join.
View attachment 113868
View attachment 113869
View attachment 113870
View attachment 226891
View attachment 226892
View attachment 226893
View attachment 113868
View attachment 113869
View attachment 113870
View attachment 226891
View attachment 226892
View attachment 226893
Attachments
Tail planes fitted and a load of filler applied.
View attachment 114283
View attachment 114284
View attachment 227306
View attachment 227307
View attachment 114283
View attachment 114284
View attachment 227306
View attachment 227307
Attachments
A good question and I'd love to know the answer. I understand how the 'quick release' system on a Sutton harness held all the straps together...like this:\ said:What is the disc on the the thin strap next to the left hand shoulder strap and which way should it be formed? The instructions from Eduard are not clear.
View attachment 114288
But have never seen that disc thing on any surviving examples.
Cheers
Steve
View attachment 227311
Attachments
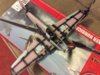
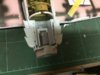
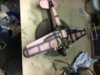
Some more work today with the exhausts being fitted with the replacement part from Airfix. I used part of the engine gearbox for the propeller mount that has been partly assembled ready for priming and paint. The gap between the two frames forward of the cockpit are nothing worry about, these will be closed up or covered by the cowling.
And I got the paint needed from SNMStuff this week.
View attachment 114348
View attachment 114349
View attachment 227371
View attachment 227372
And I got the paint needed from SNMStuff this week.
View attachment 114348
View attachment 114349
View attachment 227371
View attachment 227372
Attachments

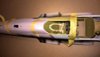
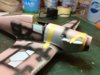
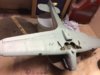
Engine cowling fitted, those in to wind edges are just awful. I masked her up tonight ready for primer and a first lick of paint.
View attachment 114771
View attachment 114772
View attachment 114773
View attachment 227794
View attachment 227795
View attachment 227796
View attachment 114771
View attachment 114772
View attachment 114773
View attachment 227794
View attachment 227795
View attachment 227796
Attachments
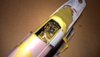
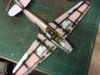
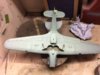
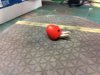
Primer done and a bit of filler smoothed out under the engine then a coat of Vallejo Pale Blue. I don't think much of this pre-shading malarkey. The propeller blades and spinner have been done too, the red looks quite vibrant.
View attachment 114847
View attachment 114848
View attachment 114849
View attachment 114850
View attachment 114851
View attachment 114852
View attachment 114853
View attachment 227870
View attachment 227871
View attachment 227872
View attachment 227873
View attachment 227874
View attachment 227875
View attachment 227876
Attachments
I also have trouble with it Rick. Post-shading is probably a better way to go. Dave, Steve, Barry and others have had some fantastic finishes using post shading.\ said:I don't think much of this pre-shading malarkey
- Status
- Not open for further replies.
Legal Notice
scalemodelling.co.uk is a privately operated online discussion forum. All content posted by members reflects their own views and opinions and does not necessarily represent those of the forum owners or administrators. While reasonable efforts are made to moderate content, no responsibility is accepted for user-generated material. By using this site, you agree to comply with UK law and the forum rules.