Theme editor

Scale Model Shop

Stirling Glider Tug

Status
Not open for further replies.

rtfoe

Well-known member
Joined
Apr 29, 2018
Messages
9,251
Reaction score
542
Points
113
1/3
Thread owner
Hi,
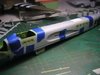
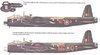
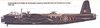
I have always been intrigued by the airborne and the chariots that transported them to their targets. One particular movie scene was the attack and taking of Pegasus bridge in The Longest Day. Although the transport tugs were clearly Halifaxes I converted Airfix's Sterling into a glider tug as they feature more in images of gliders tugged on D-Day or Market Garden.

View attachment 301255View attachment 301256View attachment 301257View attachment 301258View attachment 301259View attachment 301260View attachment 301261View attachment 301262View attachment 301263View attachment 301264

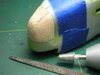
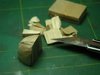
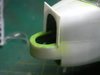
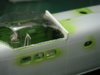
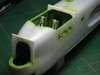
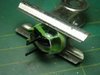
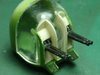
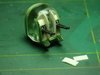
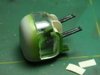
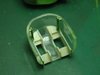
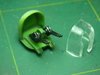
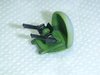
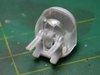
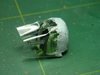
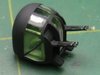
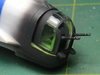
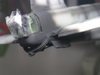
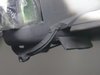
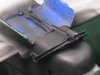
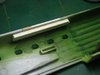
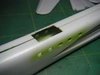
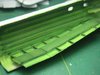
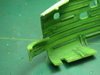
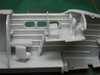
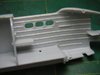
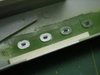
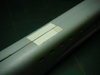
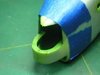
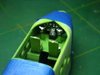
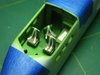
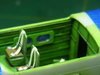
The above pictures show the difference of the tugs from the bombers. Features to omit were the front and dorsal turrets. The old Airfix kit cockpits of the time were basically very bare so I added some basic ribbing to the frame and walkways to the rear fuslage...don't know why I did the latter as very little can be viewed from the open rear door.

View attachment 301265View attachment 301266View attachment 301267View attachment 301268View attachment 301269View attachment 301270View attachment 301271View attachment 301272View attachment 301273View attachment 301274

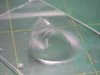
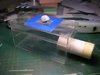
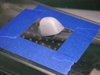
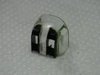
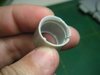
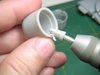
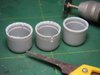
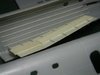
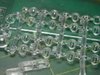
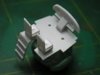
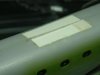
Cut off the dorsal turret and covered with card supported with shims. Masking tape seatbelts enhanced the appearance or the seats and picked out the instrument panel with tiny blobs of paint just enough to make it look busy. Also added a chart for the navigators table. The front turret area was to be worked on next.
More to come next.

Cheers,
Richard
 

Attachments

  • 13.jpg
    13.jpg
    2.7 KB · Views: 0
  • 12.jpg
    12.jpg
    2.5 KB · Views: 0
  • 11.jpg
    11.jpg
    3.2 KB · Views: 0
  • 10.jpg
    10.jpg
    2.4 KB · Views: 0
  • 9.jpg
    9.jpg
    3.2 KB · Views: 0
  • 8.jpg
    8.jpg
    2.9 KB · Views: 0
  • 7.jpg
    7.jpg
    3.4 KB · Views: 0
  • 6.jpg
    6.jpg
    2.7 KB · Views: 0
  • 5.jpg
    5.jpg
    2.5 KB · Views: 0
  • 4.jpg
    4.jpg
    2.5 KB · Views: 0
  • 3.jpg
    3.jpg
    2.2 KB · Views: 0
  • 2.jpg
    2.jpg
    2.2 KB · Views: 0
  • 14.jpg
    14.jpg
    2.3 KB · Views: 0
  • 15.jpg
    15.jpg
    1.7 KB · Views: 0
  • 20.jpg
    20.jpg
    2.5 KB · Views: 0
  • 19.jpg
    19.jpg
    2.8 KB · Views: 0
  • 18.jpg
    18.jpg
    3.1 KB · Views: 0
  • 17.jpg
    17.jpg
    3.1 KB · Views: 0
  • 16.jpg
    16.jpg
    1.9 KB · Views: 0
  • 1.jpg
    1.jpg
    1.4 KB · Views: 0
Richard

I too am a big fan of the Pegasus Bridge and Merville Battery operations. Looking forward to seeing how this project develops. Good luck

Steve
 
Thread owner
Thanks Steve and Richard,

The two operations by the British Airborne were astonishing feats...one objective taken in 15 mins and the other with less than a third of it's strength.

Cheers,
Richard
 
Thread owner
This was quite the fun part where I had to make my own home made vacuum form pump from a Ferrero chocolate box and vacuum cleaner.

View attachment 301413 View attachment 301414 View attachment 301415 View attachment 301416

Firstly on joining the fuselage I had to alighn the halves and fill gaps at the front turret and back of the cockpit. This was done with pla card and trimmed.

View attachment 301417 View attachment 301418 View attachment 301419 View attachment 301420

Then I carved balsa wood into the shape of the plexiglass nose cone for the removed turret filling and burring until it had the right shape. The next two pictures show my home made vacuum pump. After a few sheets of trying I got one passable cast. There were tiny bubbles but I could live with it. Picture on left below shows a botched vac form.

View attachment 301421 View attachment 301422

More to come in next thread on improving the rear turret.

Cheers,
Richard
 

Attachments

  • 30.jpg
    30.jpg
    2.2 KB · Views: 0
  • 29.jpg
    29.jpg
    2.1 KB · Views: 0
  • 28.jpg
    28.jpg
    2.8 KB · Views: 0
  • 27.jpg
    27.jpg
    2.8 KB · Views: 0
  • 26.jpg
    26.jpg
    2.7 KB · Views: 0
  • 25.jpg
    25.jpg
    2.6 KB · Views: 0
  • 24.jpg
    24.jpg
    2 KB · Views: 0
  • 23.jpg
    23.jpg
    2.3 KB · Views: 0
  • 22.jpg
    22.jpg
    2.6 KB · Views: 0
  • 21.jpg
    21.jpg
    3.1 KB · Views: 0
Thread owner
Hi,

My next modification was the tail turret. The Airfix kit part was very rudimentary and fit wasn't good. Since the clear part wasn't very clear I did some simple interior work.

View attachment 301849 View attachment 301850 View attachment 301851 View attachment 301852

I cleaned up the clear part and added farrings to hold the brownings...I then painted the internal framings.

View attachment 301853 View attachment 301854 View attachment 301855 View attachment 301856

Then I tested the fit and sanded where ever needed to flush it against the aircraft body. I clamped the assemblyto keep the clear part flush with the rear housing until the glue cured. I then masked and puttyied.

View attachment 301857 View attachment 301858 View attachment 301859 View attachment 301860

After that I carefully masked the glazing and sprayed the whole assembly Nato black.

View attachment 301861 View attachment 301862

That's it...next will be the tug cable mechanism.

Cheers,
Richard
 

Attachments

  • 41.jpg
    41.jpg
    2.9 KB · Views: 0
  • 40.jpg
    40.jpg
    1.7 KB · Views: 0
  • 39.jpg
    39.jpg
    2.4 KB · Views: 0
  • 38.jpg
    38.jpg
    2.8 KB · Views: 0
  • 37.jpg
    37.jpg
    2.4 KB · Views: 0
  • 36.jpg
    36.jpg
    2.4 KB · Views: 0
  • 35.jpg
    35.jpg
    2.1 KB · Views: 0
  • 34.jpg
    34.jpg
    2.5 KB · Views: 0
  • 33.jpg
    33.jpg
    2.2 KB · Views: 0
  • 32.jpg
    32.jpg
    2.2 KB · Views: 0
  • 31.jpg
    31.jpg
    2.5 KB · Views: 0
  • 42.jpg
    42.jpg
    2.2 KB · Views: 0
  • 43.jpg
    43.jpg
    2.4 KB · Views: 0
  • 44.jpg
    44.jpg
    2.5 KB · Views: 0
Hi Richard, cool subject and some very nice additions you've made to the base kit.:thumb2:
Following with interest.

Fernando
 
The tailgunner will be very happy with it sir ! It looks perfect.
 
Hi Richard
Going well, nice work on the deleted turret. Always wondered why they took off the front turret? At least that could have shot at a target....all the rear turret gunners could shoot would be the glider behind LOL
Tim
 
Thread owner
Thanks Fernando, Guy, Paul and Tim for looking in and commenting.

The base kit was very basic with lots of gaps and detail missing. now with the extra insulation not only the tail gunner is happy but the tail turret is looking like one. Good point on the deleted turrets, I guess being an interdiction operation at night these stations weren't often used. The tail turret was maintained against night fighters approaching low from behind or give protection to the glider.

Cheers,
Richard
 
Richard

Terrific work on the upgrades. I really enjoyed reading about your progress. Thanks for sharing:thumb2:

Steve
 
Richard.
That vacuum forming pump ! That's some dedication,and what a result. Most impressed. :thumb2:
Build looks to becoming on well, I shall sit with the crew.
John .
 
Richard,
That looks jolly good to me. Always liked the Stirling since building the Airfix one as a youngster. Keep up the good work.:thumb2:
Andy
 
This is looking really good.

I remember making an awful job of this kit as a young boy, but I loved the aircraft itself. I've read reviews that say Airfix are still churning out this kit from the original moulds - which means I ain't gonna buy one! Sheeessshhh! I had enough with the old Defiant I did recently.

Someone else has released a Stirling (and I have vague memories of seeing a glider tug version too) in 1/72; I think it's Italeri. Has anyone built one and is it any good?
 
Thread owner
Thanks Steve, John R, Andy C, and Dave for your kind replies.

Glad to share this old kit build. It's my second attempt for this kit. The first one was a bomber version that was stolen when displayed at a LHS. Had no choice but to make a vacuum pump to get the glasing...didn't know where to get any after market material for it. The crew are huddled at the briefing room John. I still build Airfix kits for nostalgia. I feel the Italeri kit engraving too deep but must be an easier kit to build with less clean up of the parts. I re-did the old Defiant and will share the progress shots on it later.

Cheers,
Richard
 
Thread owner
Hi, more progress on the Stirling, this time the tug mechanism situated under the tail...

View attachment 302644 View attachment 302645 View attachment 302646 View attachment 302647

Basically it was made up of three pla sheets cut to the shape of a 'D' and sandwiched attached to short swivel arms in cut outs at the base of the tail planes. The center portion of this 'D" where the cable release housing is connected further up the fuslage via a rod. All this was from guess work off pictures on glider tugs.

Cheers,
Richard
 

Attachments

  • 48.jpg
    48.jpg
    2.1 KB · Views: 0
  • 47.jpg
    47.jpg
    2 KB · Views: 0
  • 46.jpg
    46.jpg
    2.5 KB · Views: 0
  • 45.jpg
    45.jpg
    2.8 KB · Views: 0
Some really great work so far.Ive always liked the look of the sterling.I remember getting an airfix one for Christmas when i was 11 or 12.Black plastic and glue everywhere.My.brother made the bomb tractor if i remember.Keep it up as its very interesting.
Richard
 
Thread owner
Thanks Richard.
Yes , this Airfix kit shows its age but was the only game in town until Italeri decided to jump in. All the glider tug parts are available in that kit...just came out 7 years too late for me.:smiling4:

Cheers,
Richard
 
Thread owner
Next, the engine nacelle slats needed thinning down...then the radial engines were painted black and dry brushed with silver picking out the raised vanes on the pistons.

View attachment 303140 View attachment 303141 View attachment 303142 View attachment 303143

The inside of the nacelles were painted interior green and radilas fitted. The propellers look horrid with large amounts of flash but they were in the right proportions...major clean up ahead.

View attachment 303144 View attachment 303145 View attachment 303146 View attachment 303147

More to come later.

Cheers,
Richard
 

Attachments

  • 56.jpg
    56.jpg
    2.1 KB · Views: 0
  • 55.jpg
    55.jpg
    2.4 KB · Views: 0
  • 54.jpg
    54.jpg
    3.3 KB · Views: 0
  • 53.jpg
    53.jpg
    2.5 KB · Views: 0
  • 52.jpg
    52.jpg
    2.7 KB · Views: 0
  • 51.jpg
    51.jpg
    2.4 KB · Views: 0
  • 50.jpg
    50.jpg
    2.8 KB · Views: 0
  • 49.jpg
    49.jpg
    2.9 KB · Views: 0
Status
Not open for further replies.
Back
Top