1/3

You are using an out of date browser. It may not display this or other websites correctly.
You should upgrade or use an alternative browser.
You should upgrade or use an alternative browser.
Tamiya 1/12 Ducati Superleggera V4
- Thread starter Mr Bowcat
- Start date
1/3
I would think you’d risk the paint crazing if the surface layer dried too fast Paul. You’d also potentially distort the plastic as well.!
As an aside, do you think the mini heat guns would work in place of a hair-dryer to quick-dry acrylic paints?
1/3
Regular hairdryer it is, then. :thumb2:
Morning all. :smiling3:
Some weekend progress.
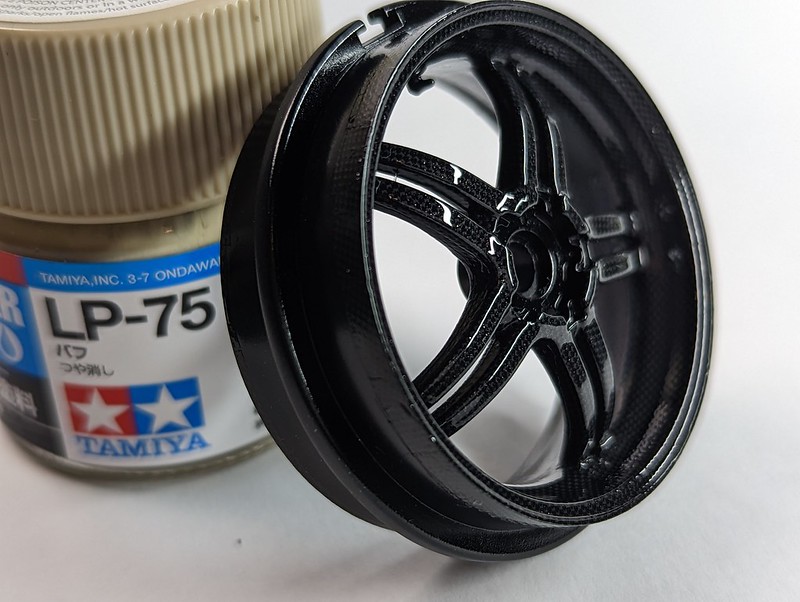
Back wheel CF'd and glossed.
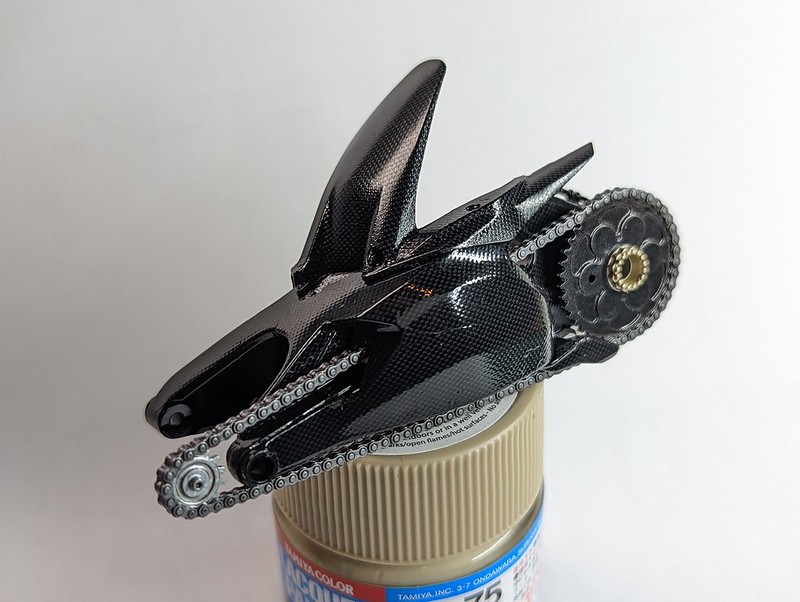
Swing arm completed.
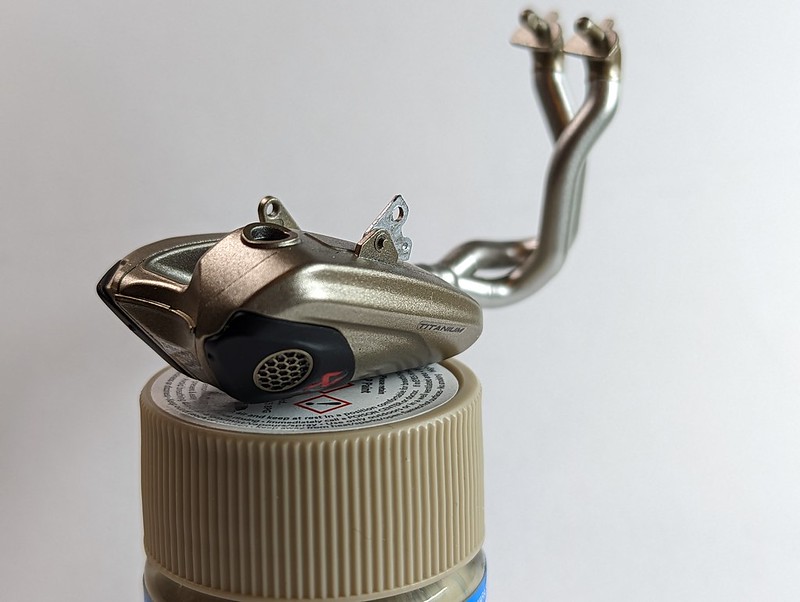
Exhaust built and painted.
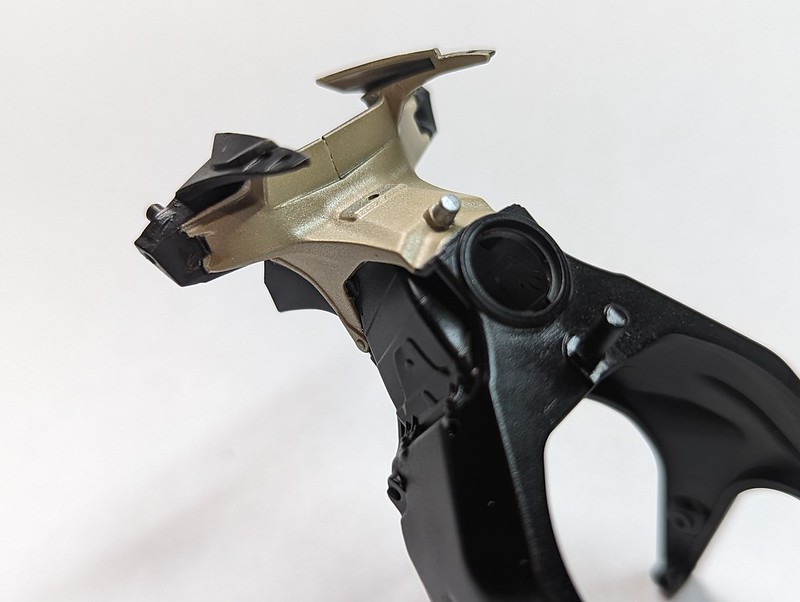
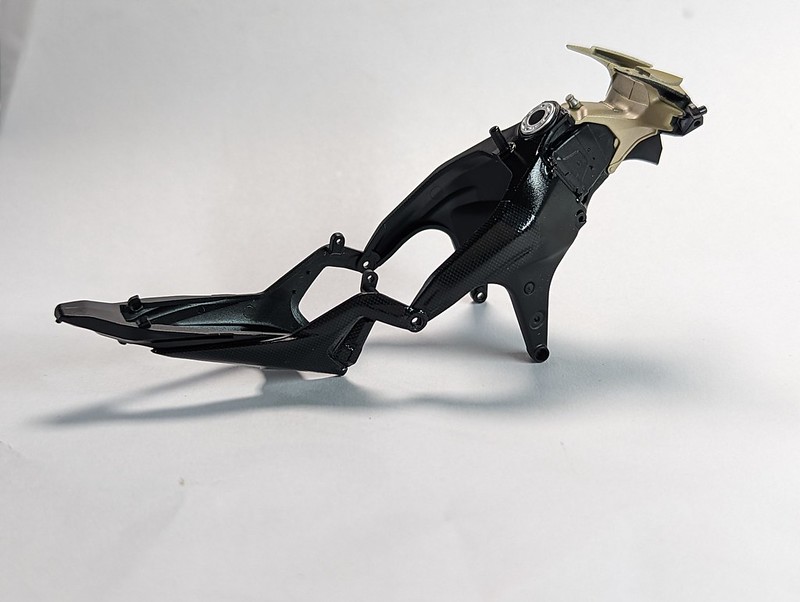
And the detail painting done on the frame. This involved some tricky masking but came out OK.
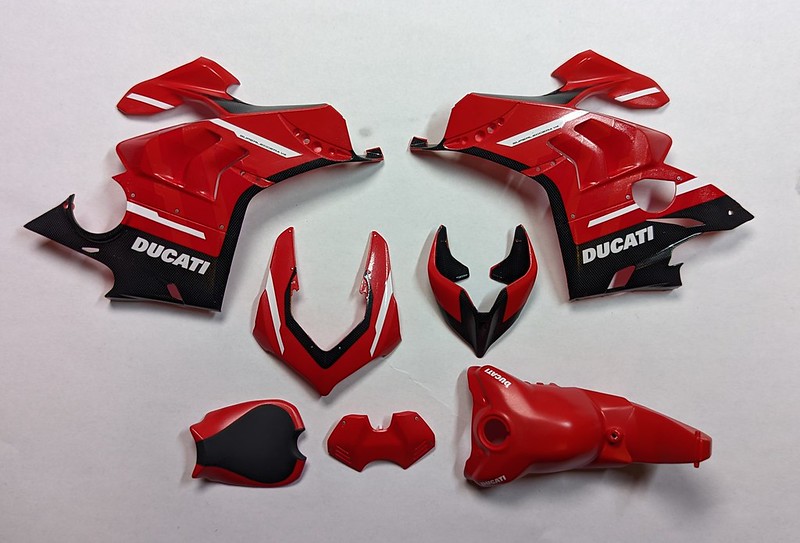
Next up is getting CF decals on the frame. I'm only going to cover the bits that will be seen, so to that end I've been cleaning up the various body panels so they can be test fitted to work out how far the decals need to go.
The details are insane!
Can I ask what’s your process when applying any washes? Are you clear coating before hand?
I’ve so much to learn!
Cheers Chris. ")
It depends a lot on the paint finish. I mainly use Tamiya LP (lacquer) paints which tend to lay down very smoothly. The washes on this bike, and the decals, were all over bare paint. However, if I'm building a plane or AFV I do usually gloss first, mainly because panel lines tend to be way longer and it helps the wash to flow, or if using a clay wash the whole thing gets covered and it's easier to remove from where I don't want it.
It depends a lot on the paint finish. I mainly use Tamiya LP (lacquer) paints which tend to lay down very smoothly. The washes on this bike, and the decals, were all over bare paint. However, if I'm building a plane or AFV I do usually gloss first, mainly because panel lines tend to be way longer and it helps the wash to flow, or if using a clay wash the whole thing gets covered and it's easier to remove from where I don't want it.
Cheers Chris. :smiling3:
It depends a lot on the paint finish. I mainly use Tamiya LP (lacquer) paints which tend to lay down very smoothly. The washes on this bike, and the decals, were all over bare paint. However, if I'm building a plane or AFV I do usually gloss first, mainly because panel lines tend to be way longer and it helps the wash to flow, or if using a clay wash the whole thing gets covered and it's easier to remove from where I don't want it.
Looks great mate.
I’m using Tamiya acrylics and on bare paint the mig ammo enamel wash caused the paint to smudge when I tried to remove it after drying.
I’ve since bought some enamel thinner so hoping that will clean it up as I go.
Yeah, I started out with Tamiya acrylics (still have a drawer full of them) but since moving to lacquers there's no going back. Far more durable, but they do smell a bit.
Morning all.
More CF (yawn).
Got the frame covered where it will be seen, and a couple more of the covers, one for the rear part of the exhaust and another that fits on the underside of the frame at the front where the headlights go.

With the frame done I was hoping to get the rear end together and fitted, however I'm waiting for some tyre decals from Italy. I tried painting the tyre stripes with acrylic paint (was worried about using lacquers on rubber). To this end I made some masks, but on removal peeled the paint straight off the tyre.
More CF (yawn).
Got the frame covered where it will be seen, and a couple more of the covers, one for the rear part of the exhaust and another that fits on the underside of the frame at the front where the headlights go.
With the frame done I was hoping to get the rear end together and fitted, however I'm waiting for some tyre decals from Italy. I tried painting the tyre stripes with acrylic paint (was worried about using lacquers on rubber). To this end I made some masks, but on removal peeled the paint straight off the tyre.
Morning all.
I'd taken a break from this build, all of the CF decals had sapped my mojo. One of my modelling rules is know when to walk away from the bench, and this was one of those times.
I got back to it this weekend with yet more CF, but the break had done the job and I enjoyed it. I got to work on the back end of the bodywork which is several small parts, all of which needed some CF.

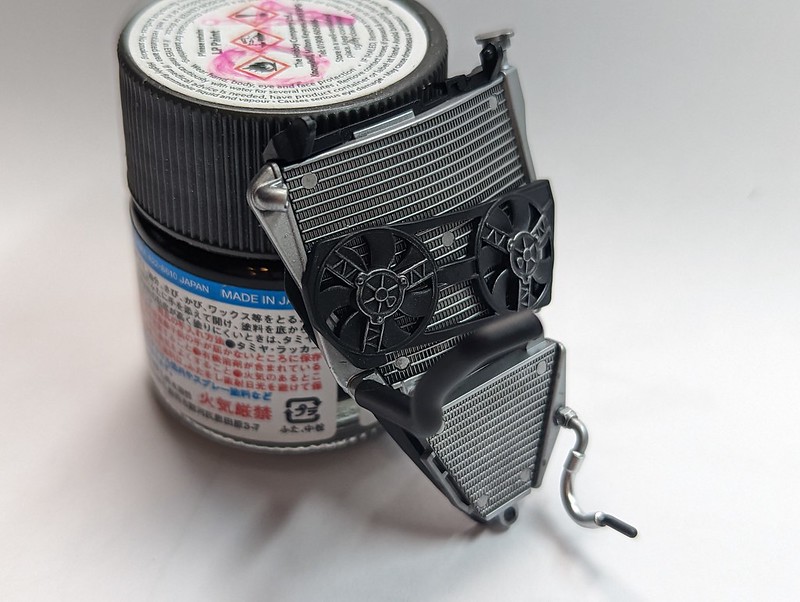
I also decided to put the radiator together. I've overdone the dry brushing on the fans, but as these will be facing in toward the engine I wanted to give the detail a chance to be seen.
I'm still waiting for the wheel decals to arrive from Italy so I think I'm going to move on to the fairing next.
I'd taken a break from this build, all of the CF decals had sapped my mojo. One of my modelling rules is know when to walk away from the bench, and this was one of those times.
I got back to it this weekend with yet more CF, but the break had done the job and I enjoyed it. I got to work on the back end of the bodywork which is several small parts, all of which needed some CF.
I also decided to put the radiator together. I've overdone the dry brushing on the fans, but as these will be facing in toward the engine I wanted to give the detail a chance to be seen.
I'm still waiting for the wheel decals to arrive from Italy so I think I'm going to move on to the fairing next.
Morning all.
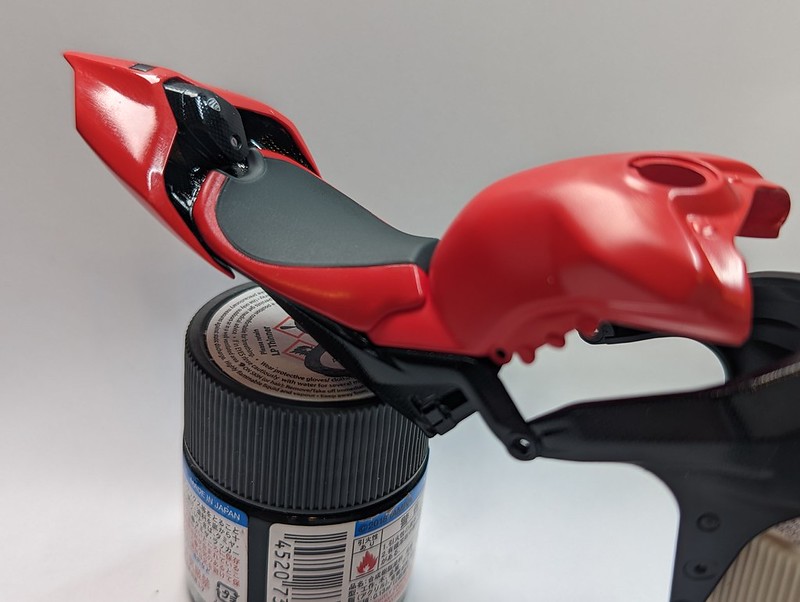
I had a lazy weekend so didn't do much modelling. I did gloss coat the body panels, and matt coat the parts with CF, but not worth a picture. Other than that I painted the shocks and got the front end put together.
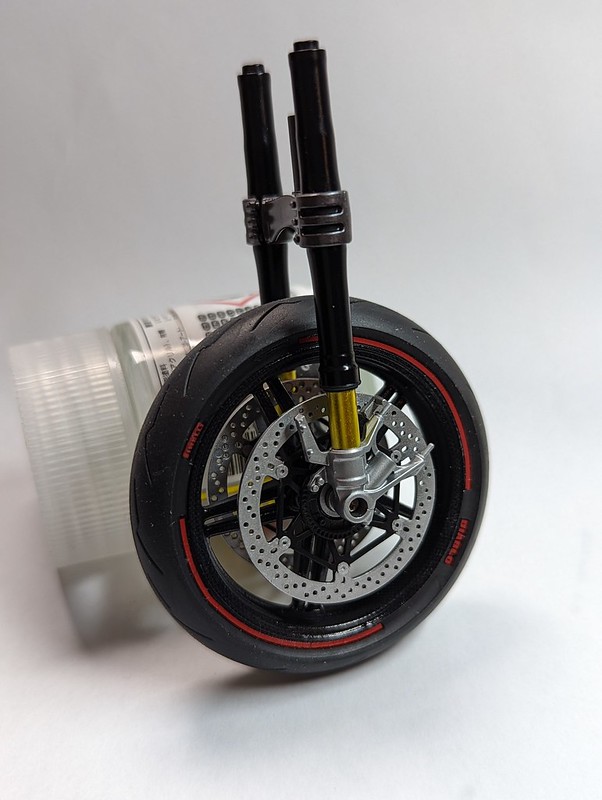
I had a lazy weekend so didn't do much modelling. I did gloss coat the body panels, and matt coat the parts with CF, but not worth a picture. Other than that I painted the shocks and got the front end put together.
TidyMorning all. :smiling3:
I had a lazy weekend so didn't do much modelling. I did gloss coat the body panels, and matt coat the parts with CF, but not worth a picture. Other than that I painted the shocks and got the front end put together.
Are the fork DP or standard.Morning all. :smiling3:
I had a lazy weekend so didn't do much modelling. I did gloss coat the body panels, and matt coat the parts with CF, but not worth a picture. Other than that I painted the shocks and got the front end put together.
- Joined
- Apr 27, 2018
- Messages
- 15,018
1/3
Bob,
Very tidy work mate, looking good.
Very tidy work mate, looking good.
Legal Notice
scalemodelling.co.uk is a privately operated online discussion forum. All content posted by members reflects their own views and opinions and does not necessarily represent those of the forum owners or administrators. While reasonable efforts are made to moderate content, no responsibility is accepted for user-generated material. By using this site, you agree to comply with UK law and the forum rules.