Theme editor

Scale Model Shop

Yaks Cold War build -Condor MiG 25P Foxbat in 1/72

Status
Not open for further replies.

yak face

Moderator
Staff member
Joined
Jun 13, 2009
Messages
14,411
Reaction score
977
Points
113
Age
60
Location
Sheffield
1/3
Thread owner
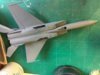
Heres my entry for this GB , the Condor 1/72 MiG 25P Foxbat. This beast of an aircraft was originally designed to combat the threat of the North American XB 70 Valkyrie . A very fast interceptor was needed by the soviets when they got wind that the americans were developing a Mach 3 bomber (which in the end only resulted in 2 prototypes before missile technology made them too vulnerable ) Made mainly out of stainless steel (to combat heat stress) the Foxbat was a very large , heavy point defence interceptor armed with heat seeking and radar guided missiles,and had a top speed of about mach 2.8 (although one was clocked at about Mach 3.2 , but it probably ruined the engines )
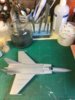
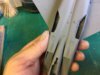
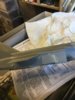
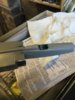
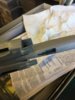
The kit is very nice looking in the box with very fine recessed panel lines and nicely detailed undercarriage. The cockpit isnt up to much but the canopy is very small so a bit of careful painting and some tape belts should be fine.heres the sprue shots and boxView attachment 283833 View attachment 283834 View attachment 283835 View attachment 283836 View attachment 283837
 

Attachments

  • DSCN2428 [Desktop Resolution].JPG
    DSCN2428 [Desktop Resolution].JPG
    2.6 KB · Views: 0
  • DSCN2429 [Desktop Resolution].JPG
    DSCN2429 [Desktop Resolution].JPG
    2.9 KB · Views: 0
  • DSCN2430 [Desktop Resolution].JPG
    DSCN2430 [Desktop Resolution].JPG
    2.8 KB · Views: 0
  • DSCN2431 [Desktop Resolution].JPG
    DSCN2431 [Desktop Resolution].JPG
    2.7 KB · Views: 0
  • DSCN2432 [Desktop Resolution].JPG
    DSCN2432 [Desktop Resolution].JPG
    3 KB · Views: 0
I'm sure you will build an excellent model Tony.

Thanks for join in ;)
 
Very nice Tony! The Foxbat was always a favourite of mine as a kid - just an airframe built around 2 massive engines!

An interesting point about it was after the US scientists examined the defected MiG 25, they found much more 1950s valve technology instead of more modern solid-state electronics. This insight gave rise to protection against EMP, something the Soviets were way ahead of the West & could have caused us to have lost our C&C in the event of a third world war.
 
Thread owner
Cockpit is just about done , I didnt go to town with it as very little can be seen with the canopy closed. I added some belts from tamiya tape to the seat and a bit of artistic license to the side consoles and this should be fine. The nose section is split vertically , while the fuselage is split horizontally and the method of construction is very strange with lots of separate parts going together to make the fuselage. This modular construction is going to be very tricky but im looking forward to the challenge!View attachment 283968 View attachment 283969 View attachment 283970
 

Attachments

  • DSCN2447 [Desktop Resolution].JPG
    DSCN2447 [Desktop Resolution].JPG
    2.8 KB · Views: 0
  • DSCN2448 [Desktop Resolution].JPG
    DSCN2448 [Desktop Resolution].JPG
    2.1 KB · Views: 0
  • DSCN2449 [Desktop Resolution].JPG
    DSCN2449 [Desktop Resolution].JPG
    3.1 KB · Views: 0
You don't see a Foxbat in ages and then...!
I have to admit I've never heard of Condor models but to be fair surface detail looks good - quite restrained.
I'm sure you'll make a stunner out of this regardless of build sequence/modular construction.

Looking forward to the progress
Paul
 
Made mainly out of stainless steel (to combat heat stress)
That seems strange. Anyone who has welded stainless steel will know, how much the stuff expands with heat. I wonder how it ever stayed together.
 
Thread owner
View attachment 284460 View attachment 284460 View attachment 284461 View attachment 284462 Bit more done on the foxbat .the strange breakdown of the parts is making progress slow. The fins are both on now and the nose section has been fitted also . Ive had to fill various sink marks and seams and the kit itself reminds me of an Amodel kit , in that every part needs cleaning up and test fitting / altering several times to achieve a decent fit. Next up is the intakes , i sense more drama coming! Cheers tony
 

Attachments

  • IMG_1203.JPG
    IMG_1203.JPG
    2.8 KB · Views: 0
  • IMG_1204.JPG
    IMG_1204.JPG
    2.9 KB · Views: 0
  • IMG_1205.JPG
    IMG_1205.JPG
    2.8 KB · Views: 0
Thread owner
Well I took a deep breath and tackled the intakes today . They are made up from three different parts which then have to fit round the two protruding parts on the body . I decided to glue the two intake assemblies together then just tape them into position until the glue dried so they would set in the right position. Then I removed them so I could paint the inside of the intakes before more dry fitting and fettling prior to gluing into place. Ive only done the one side so far but it seems to have worked , with the fit looking ok.View attachment 284495 View attachment 284496 View attachment 284497 View attachment 284498 View attachment 284499 View attachment 284500
 

Attachments

  • DSCN2464 [Desktop Resolution].JPG
    DSCN2464 [Desktop Resolution].JPG
    2.7 KB · Views: 0
  • DSCN2465 [Desktop Resolution].JPG
    DSCN2465 [Desktop Resolution].JPG
    2.8 KB · Views: 0
  • DSCN2466 [Desktop Resolution].JPG
    DSCN2466 [Desktop Resolution].JPG
    2.5 KB · Views: 0
  • DSCN2455 [Desktop Resolution].JPG
    DSCN2455 [Desktop Resolution].JPG
    2.4 KB · Views: 0
  • DSCN2454 [Desktop Resolution].JPG
    DSCN2454 [Desktop Resolution].JPG
    2.3 KB · Views: 0
  • DSCN2453 [Desktop Resolution].JPG
    DSCN2453 [Desktop Resolution].JPG
    2.4 KB · Views: 0
Hey Tony
The intake sequence sounds like a good plan.

it's beginning to take shape now looking forward to seeing the scheme applied.

Cheers
P
 
Nice work so far Tony. That intake assembly looks a little more complex than was probably necessary though!
 
Thread owner
That intake assembly looks a little more complex than was probably necessary though!
My thoughts exactly Joe , the whole breakdown is reminiscent of kits where different versions of the basic aircraft are to be modelled except that the only thing that changed on any of the marks of Foxbat was the nose or exhaust cans ,so the breakdown of the weird rear fin and intake assemblies seems a bit unnecessary , well at least its keeping me on my toes !cheers tony
 
Oooh, very nice, just that the braille scale is a tad small for my "sausages", I battle enough with 1/48.
 
Thread owner
View attachment 284830 View attachment 284831 View attachment 284832 View attachment 284833 View attachment 284834 Its looking a bit more like the iconic cold war warrior now ! The other intake has been fitted and both have been filled and sanded. This took a fair bit of fettling but hopefully it wont need much more attention- the first primer coat will show any problems. The wings have gone on too but the joint underneath will take some sorting! Ive put a big slug of lead in the nose and attached this too . This is the main airframe together now so after the glue has dried i can get the canopy on and prime it , then all the horrors will be revealed and it starts all over again!
 

Attachments

  • IMG_1218.JPG
    IMG_1218.JPG
    3.4 KB · Views: 0
  • IMG_1219.JPG
    IMG_1219.JPG
    3 KB · Views: 0
  • IMG_1220.JPG
    IMG_1220.JPG
    2.2 KB · Views: 0
  • IMG_1221.JPG
    IMG_1221.JPG
    2.8 KB · Views: 0
  • IMG_1222.JPG
    IMG_1222.JPG
    2.4 KB · Views: 0
Thread owner
View attachment 285038 View attachment 285039 View attachment 285040 View attachment 285041 Well ive got the first coat of primer on and i can now see what needs attention. Its not too bad , just a seam on one of the fin side sections and maybe a bit of tidying under the intakes . A lot of the panel lines are very shallow and i fear they may disappear under the paint , ive deepened a few on top of the fuselage but had to fill lots of my slip ups so i dont know if im going to carry on and do the whole airframe , i hate rescribing!
 

Attachments

  • IMG_1225.JPG
    IMG_1225.JPG
    2.6 KB · Views: 0
  • IMG_1226.JPG
    IMG_1226.JPG
    2.5 KB · Views: 0
  • IMG_1227.JPG
    IMG_1227.JPG
    1.9 KB · Views: 0
  • IMG_1228.JPG
    IMG_1228.JPG
    2.7 KB · Views: 0
Hi Tony
Looking very good. The panel lines look just about perfect now under that primer - restrained. But as you say any subsequent coats will fill them in more. I hear you with the rescribing I don't think it's many modellers favourite jobs!

What will the scheme be? Have you decided yet?
 
Status
Not open for further replies.
Back
Top