Theme editor

Scale Model Shop

Zoukei Mura Hs129B-2/ RIII, 1/32 scale.

BarryW

SMF Supporters
Joined
Jul 23, 2011
Messages
6,145
Reaction score
457
Points
83
Age
70
1/3
Thread owner
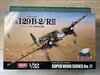
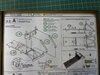
Well I am almost ready to start. My modelling room is awaiting my shelves and blinds but that does not stop me building. So this is it, my first build in the new man-cave.

The box:
View attachment 434979

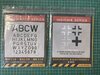
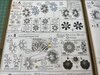
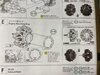
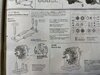
The aftermarket, not much, just paint masks. I will probably use decals for the swastikas.
View attachment 434980

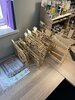
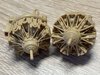
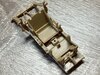
The sprues labelled and in my sprue rack ready.
View attachment 434981
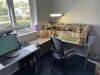
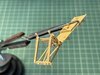
My bench all set-up
View attachment 434982

More to follow….
 

Attachments

  • A02ED231-1801-4D15-8D50-3EA0836CC844.jpeg
    A02ED231-1801-4D15-8D50-3EA0836CC844.jpeg
    3.7 KB · Views: 0
  • 0C23131A-F553-479C-ADF7-689B8089E497.jpeg
    0C23131A-F553-479C-ADF7-689B8089E497.jpeg
    3.4 KB · Views: 0
  • 35044C4A-F0AA-4580-A6A7-8AD0ABC3A597.jpeg
    35044C4A-F0AA-4580-A6A7-8AD0ABC3A597.jpeg
    3.8 KB · Views: 0
  • BA693886-722F-4C90-8C82-389537CF1123.jpeg
    BA693886-722F-4C90-8C82-389537CF1123.jpeg
    3.7 KB · Views: 0
Hi Barry
Well after all the time and effort you must be feeling pretty excited to at last start a model. Looking forward to following along.
Jim
 
Looks good. A very interesting little plane as a starter to christen the bench….
 
That workspace looks amazing. Well done sir. Look forward to seeing how the model turns out too.
 
What a way to start off with a tank buster Barry. Now the itch will stop. :smiling2:

Cheers,
Richard
 
Nice one to start with and something out of the ordinary....have a soft spot for a lot of WW2s twin engined fighters and ground attack aircraft..... This is one of them.

Looking forward to it coming together!

ATB.

Andrew
 
I have just marked "Watch" this tread.
Will follow with interest.
 
Barry,
oh, that looks far too tidy, and much too clean! More like a surgery, than a model bench. I could never keep mine like that, I'd have it looking like a rubbish dump in a day or so!
The Hs129 has always attracted me - I made the Airfix model a long time ago ( 45 years? ), that 75mm cannon being the main attraction!
Dave
 
Thread owner
Hi Dave. ZM will produce other variants with the bigger cannon in due course.

Anyway. I have cut plastic!

The parts are beautifully moulded, crisp, clean with no flash and minimum clean up.

The plastic is very high quality but soft, not soft in the Airfix sense which is easy to work with, but soft with a little elasticity. That gives it some minor sanding issues that I am not very keen on, but there are some advantages, the elasticity means that parts are less fragile and are less likely to break.

I really love the instructions, they leave no ambiguity about part placement showing the parts from different angles with excellent explanations. This model is going to be a fun build.

I have started work on the engines and have been working on the first two stages.

View attachment 434993

Here is how they are left for now.
View attachment 434992
 

Attachments

  • 96EDBC87-3764-47F4-A5EC-5D16E2ED2E48.jpeg
    96EDBC87-3764-47F4-A5EC-5D16E2ED2E48.jpeg
    4.1 KB · Views: 0
  • 16FDC1CF-0D37-476A-A488-01F4725AF020.jpeg
    16FDC1CF-0D37-476A-A488-01F4725AF020.jpeg
    3.8 KB · Views: 0
...and he's off. Those instructions do indeed look rather special.
Jim
 
Thread owner
I did a little more this morning. It is so nice not being exiled to the garage and just being able to just pop in.

The engine is coming together beautifully. The manifolds just click into place, beautiful engineering.
View attachment 435026

What I love is how ZM really want to help make sure you don’t go wrong. Just look at this, one step in the instructions for attaching one part, the care taken to make sure you know exactly what to do puts every other model company to shame and I do not exclude Tamiya from that.
View attachment 435027
 

Attachments

  • 6C454849-3EE3-4377-AF7B-E6BDACC6FDCA.jpeg
    6C454849-3EE3-4377-AF7B-E6BDACC6FDCA.jpeg
    3.7 KB · Views: 0
  • 1FD14623-C429-41FE-9A5F-253E5CC3D8C7.jpeg
    1FD14623-C429-41FE-9A5F-253E5CC3D8C7.jpeg
    3.7 KB · Views: 0
Thread owner
I have completed the construction of the engines, beautifully detailed, not much will be visible when completed.

View attachment 435064

I will be painting them soon.

While I will be fitting the engines ZM do give you the means to display them separately with a nice little engine mount made from the (now empty) sprues the engine parts came on. I will not bother but this is a nice touch.

View attachment 435065

Before I move on to the cockpit this might be a good time to report on the success of my ‘carpet-monster suppression measures’ or perhaps I should say, CSCM, taken in my new modelling room. To which, so far, I can say they are a great success. Every dropped part, however small has been quickly spotted and retrieved. The combination of the blue colour and low nap of the carpet tiles really makes parts stand out while keeping the floor clear of clutter gives nowhere for the CM to hide before pouncing. I have taken to vacuuming after every session as well as, again, by keeping the amount of plastic cuttings down spotting parts is a lot easier.
 

Attachments

  • C4E3306C-54B2-4F06-92C9-14EA53483695.jpeg
    C4E3306C-54B2-4F06-92C9-14EA53483695.jpeg
    3.2 KB · Views: 0
  • F1E8459B-B7E4-4DCF-92B1-6E02A7C176AE.jpeg
    F1E8459B-B7E4-4DCF-92B1-6E02A7C176AE.jpeg
    4.3 KB · Views: 0
Hi Barry
Lovely work. All credit to Zoukei-Mura and yourself. Nice to know that a very hungry Carpet Monster is jumping about in a frustrated rage :tongue-out3:
Jim
 
That's coming on very nicely indeed Barry and as you say the engine stand is a nice touch. Also good to hear that the anti carpet monster measures are working well so far.

ATB

Andrew
 
Thread owner
I have made a decent start on the cockpit.

The fit of parts is superb but they are very fiddly so a good ‘third hand’ set up is really needed. This is what I am using:
View attachment 435091
Simply a pair of locking tweezer held in a base (both available through John). It works well.

The photos and line drawings in the instructions make it really clear how parts should fit. With the parts below it would have been easy to get it wrong.
View attachment 435094
View attachment 435092

The seat in place, matching exactly what the instructions show.
View attachment 435093

More than any other brand it is important to follow the ZM instructions or you can make life difficult for yourself.
 

Attachments

  • 8E0BE7EF-CCDB-4CDD-BA7A-096B333965AC.jpeg
    8E0BE7EF-CCDB-4CDD-BA7A-096B333965AC.jpeg
    3.3 KB · Views: 0
  • B5503724-C785-4BF7-9FC2-73846DCC0718.jpeg
    B5503724-C785-4BF7-9FC2-73846DCC0718.jpeg
    3.7 KB · Views: 0
  • 86FED660-8CF1-4BFB-B167-693DDBEF016B.jpeg
    86FED660-8CF1-4BFB-B167-693DDBEF016B.jpeg
    3.4 KB · Views: 0
  • 55D535CE-84C7-459F-9ACE-7CC752629A23.jpeg
    55D535CE-84C7-459F-9ACE-7CC752629A23.jpeg
    3.8 KB · Views: 0
Looks like a great kit to build with excellent instructions, what better way to christen the new man cave.
 
What better way to christen the new man cave? Oh come on Christy Brinkley with a paint rack, couple of beers, and a big smile ....
 
Thread owner
An inbox review has been posted today on YouTube of this kit. It is interesting to watch.

Anyway I got a bit more work done on the cockpit this morning then I sprayed a coat of RLM066 to the inside of the cockpit and will detail it up later after I have sorted a few more cockpit subs. I also sprayed black MRP primer onto the front area of the engines. Very little of the engines will be seen so I won’t be doing a lot of detail painting and will just use metal powder to bring out detail and give it a metal glint.

View attachment 435140

A closer look at the cockpit before I painted it There is a lot more to do to this, not just detail paint.
View attachment 435141
 

Attachments

  • 2CD40B1B-E205-4F79-81A8-6C2B39A35349.jpeg
    2CD40B1B-E205-4F79-81A8-6C2B39A35349.jpeg
    3 KB · Views: 0
  • DFCE8B7A-E3BF-4314-9D86-1BCA6D6DA0F5.jpeg
    DFCE8B7A-E3BF-4314-9D86-1BCA6D6DA0F5.jpeg
    4 KB · Views: 0
Coming on really well. However, it looks like there are noticeable ejection pin marks on the seat base and back there Barry. Are they covered by anything during assembly or are they just not visible when the bird is completed?
 
Back
Top