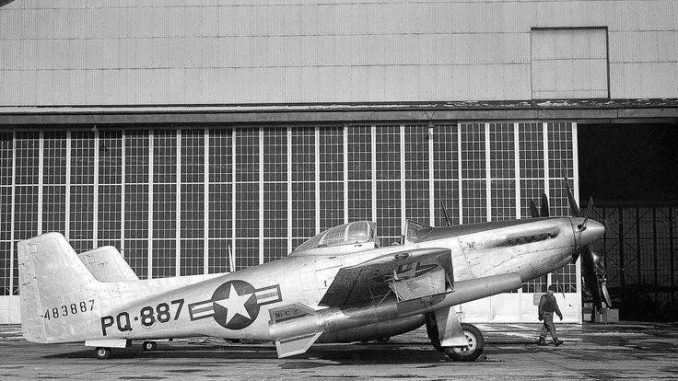
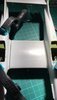
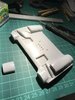
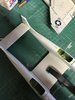
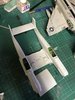
Theme editor

Scale Model Shop

Modelcraft 1/48 F82B ‘Twin Mustang’

Status
Not open for further replies.
Thread owner

Attachments

  • 21812D56-6298-4E25-8E30-09A170D75B24.jpeg
    21812D56-6298-4E25-8E30-09A170D75B24.jpeg
    3.4 KB · Views: 0
  • 437C9E4D-0764-4919-BBD2-B6C7B3096A56.jpeg
    437C9E4D-0764-4919-BBD2-B6C7B3096A56.jpeg
    2.5 KB · Views: 0
This might be fixable by enlarging the opening or shortening the tab of the centre wing section. Or is the bottom half of that wing correctly in place?
 
Thread owner
This might be fixable by enlarging the opening or shortening the tab of the centre wing section. Or is the bottom half of that wing correctly in place?
The bottom half of the centre wing incorporates the lower section of each fuselage . So it can’t be shortened easily.Not a problem.I will just fill it with plastic card.

View attachment 322324
 

Attachments

  • 1C9E6580-39C9-4D2A-AB84-A2F4F985B156.jpeg
    1C9E6580-39C9-4D2A-AB84-A2F4F985B156.jpeg
    3.7 KB · Views: 0
Just a thought. If the top part of the centre wing hasn't been glued already, how about cutting it right down the middle and adding the card there. It might be easier to fill and sand, then re-scribe in the middle rather than near the fuselage
 
Not to mention it’ll keep things more symmetrical than if you need to fill on one side. Alternatively, and for the same reason, glue the centre section in the middle and fill on both sides.
 
Thread owner

Attachments

  • 24C71C47-A088-40F6-9B19-9553EA3B7331.jpeg
    24C71C47-A088-40F6-9B19-9553EA3B7331.jpeg
    3.8 KB · Views: 0
  • 1FD8404A-31B0-4EEE-8AD2-2C4BBEDE97D4.jpeg
    1FD8404A-31B0-4EEE-8AD2-2C4BBEDE97D4.jpeg
    3.9 KB · Views: 0
  • 14E6590A-D614-44C6-B767-445B3540F5F1.jpeg
    14E6590A-D614-44C6-B767-445B3540F5F1.jpeg
    2.9 KB · Views: 0
  • 3C2A038C-15D0-4128-BB51-0A7729CF8801.jpeg
    3C2A038C-15D0-4128-BB51-0A7729CF8801.jpeg
    4.2 KB · Views: 0
  • 9E57D179-F8BE-4321-9BAE-3D88094B62F2.jpeg
    9E57D179-F8BE-4321-9BAE-3D88094B62F2.jpeg
    4.2 KB · Views: 0
  • B27811AA-396C-4B81-A5A8-51E78A2AE953.jpeg
    B27811AA-396C-4B81-A5A8-51E78A2AE953.jpeg
    3.9 KB · Views: 0
I think I’d move the Phantom out of the way for fear of knocking it over or dropping something on it when working on the Twin Mustang :)
 
Thread owner
I think I’d move the Phantom out of the way for fear of knocking it over or dropping something on it when working on the Twin Mustang :smiling3:
As my Daughter would say “lol!”
 
Dave .
I thought gaps were part of modelling ! I have them even on good kits :smiling2::smiling2:
You seem to be doing OK.
John.
 
Thread owner
Dave .
I thought gaps were part of modelling ! I have them even on good kits :smiling2::smiling2:
You seem to be doing OK.
John.
This was normal modelling for me years ago. I've been spoilt by new kits like the Zoukie Mura Phantom in the photo. Everything fitted perfect on that one and only a tiny amount of filler needed on a join under the radome.
 
Thread owner
The instructions say to ‘drill holes in lower wings at marked positions for tanks’. There are no marked positions. So I am having to best guess them from photos. Meanwhile the filler fest continues .

View attachment 323108
 

Attachments

  • 882DFF42-3E02-41C3-B180-CBB0A0FD8666.jpeg
    882DFF42-3E02-41C3-B180-CBB0A0FD8666.jpeg
    2.6 KB · Views: 0
I thought, “Why is he posting a picture of a chair?” and only then realised it’s part of the picture of the model :) That looks like it had quite some gaps, yes. As for the holes: if you can find a front view with the tanks in place that also shows the wingtips, you can measure in that and do some calculations based on the size of the real thing.

/me does a little searching

Ah, here we go:

View attachment 323111

Wingspan of the real aircraft is 15.62 metres. Using the ruler tool in Photoshop, I find the wingspan in the photo to be 728 pixels, and the distance from the left wingtip to the pylons under that same wing to be 94 and 158 pixels. That translates to 202 cm and 339 cm, or in 1/48, 42 mm and 71 mm in from the tip of the wing.
 
Thread owner
Thanks Jakko.Ive based my measurements on the position of the star n bars under the wing for the outboard pylon.Then I measured halfway between the outboard pylon and the wing root for the inboard pylon position.As you've gone to all that trouble I will mark out one wing with your measurements and see what it looks like.
 
I will mark out one wing with your measurements and see what it looks like.
Please let us know how much it differs. I won’t guarantee my measurements are any more accurate than what you have now, but it seemed better than having to eyeball it completely :)
 
Thread owner
Please let us know how much it differs. I won’t guarantee my measurements are any more accurate than what you have now, but it seemed better than having to eyeball it completely :smiling3:
As you can see from the photo Jakko, your measurements are slightly different to mine.But as you took the trouble to help me I am going to use your figures. All I need to do now is work out how far forwards (or backwards) to mount the pylons.

View attachment 323162
 

Attachments

  • 532D6C1D-F5C8-4B8B-8FC4-3A858F1D8D4C.jpeg
    532D6C1D-F5C8-4B8B-8FC4-3A858F1D8D4C.jpeg
    3.5 KB · Views: 0
I suppose I’ll now have to find a photo of the underside and measure that :)

Maybe this photo from Warbirds News will come in handy, it shows the position pretty well I think:

38920962_2282610821754085_5471156790227894272_n-678x381.jpg


The thing under the wing seems to be braced between the two pylons.
 
Thread owner
I
I suppose I’ll now have to find a photo of the underside and measure that :smiling3:

Maybe this photo from Warbirds News will come in handy, it shows the position pretty well I think:

38920962_2282610821754085_5471156790227894272_n-678x381.jpg


The thing under the wing seems to be braced between the two pylons.
ve drilled holes for the pylon before I saw your photo. No problem though.I will drill some more and move the pylon forwards a few millimetres.

View attachment 323164View attachment 323165
 

Attachments

  • F5A15AF9-081F-4BDA-951E-D90E82B43D1F.jpeg
    F5A15AF9-081F-4BDA-951E-D90E82B43D1F.jpeg
    3 KB · Views: 0
  • AB07D1B8-BF5C-48ED-A235-9425219F797C.jpeg
    AB07D1B8-BF5C-48ED-A235-9425219F797C.jpeg
    2.9 KB · Views: 0
Status
Not open for further replies.
Back
Top