Theme editor

Scale Model Shop

What's on the bench 2022

Not so much of an update as to what's on the bench, as an update to the bench.

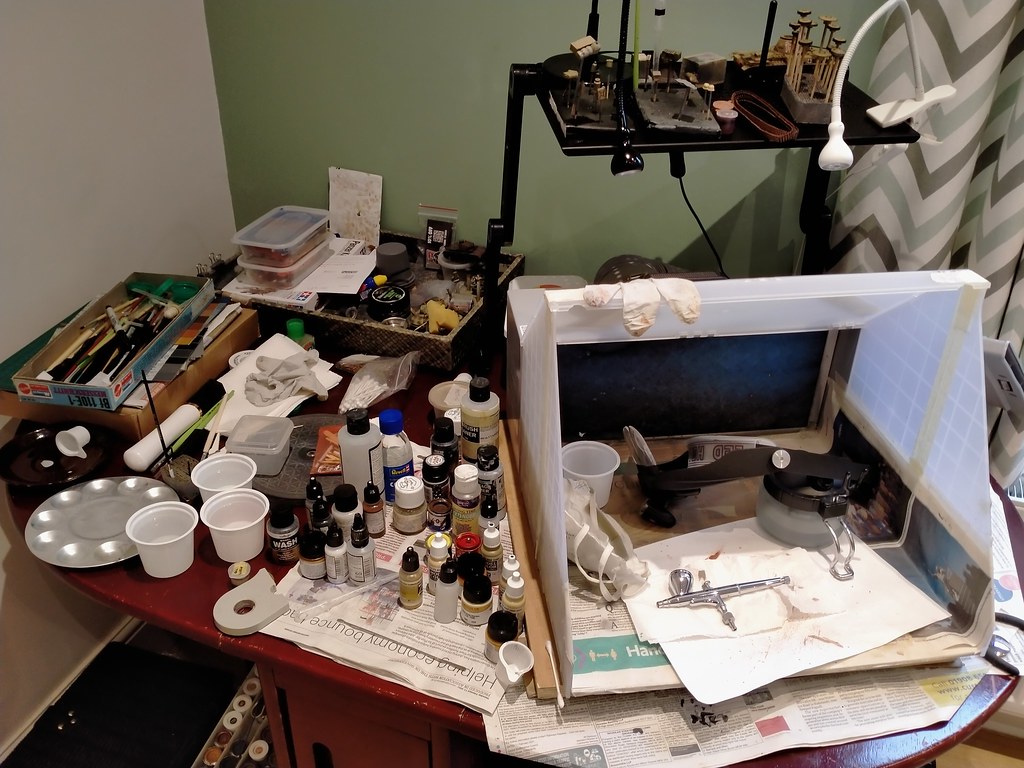
As most of you know my workspace is my kitchen table, which doubles as my work/assembly bench and spray bench. I also don't have any room left to store the stash. I have therefore been looking at updating my equipment and tools.

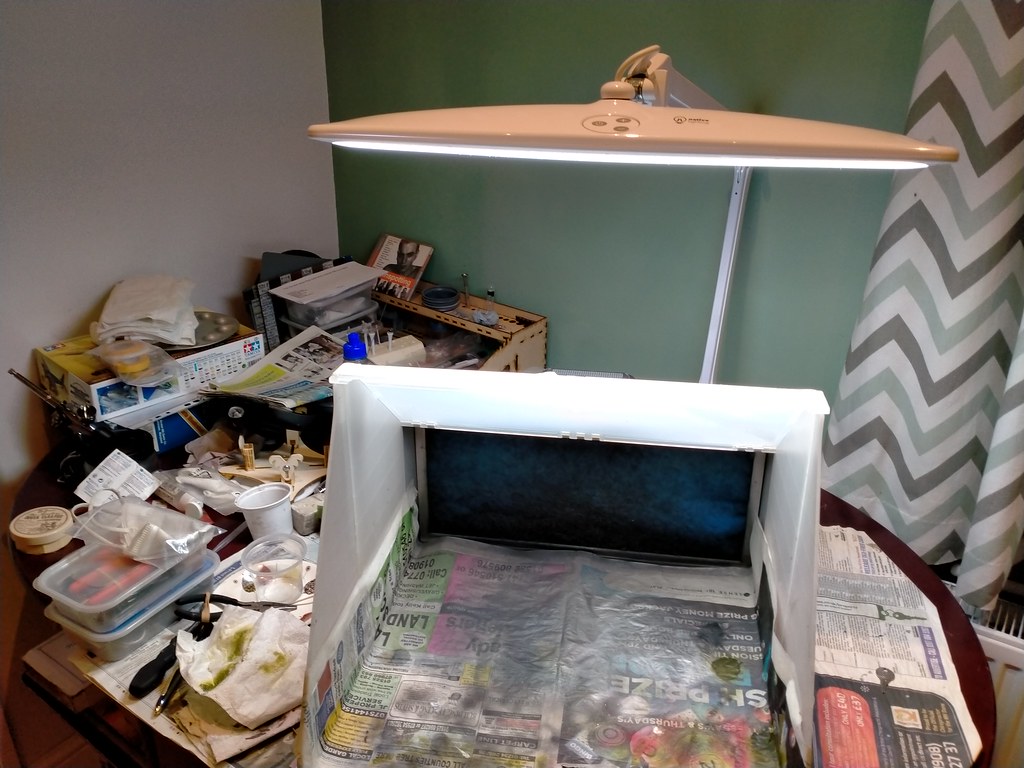
The most recent acquisition is the light I got for my birthday (here). It means I can get rid of the ugly laptop stand I have been putting my Ikea lamps on. As well as a general working light it doubles quite nicely as a spray booth light!

Thanks to @Bobthestug for the information on his light, which I noticed following his working area upgrade.

ATB.

Andrew


From this...


To this......


Lighting from over the front.....


Lighting from through the roof.....

I used to work in an area the size of your table but ever since I got my own cave space I still work the same sized area...habit I guess.

Cheers,
Richard aka Wabble
 
I've been working on the Base for my Tuskegee Dio......all the greenery is down and giving it a chance to set a little before attacking the "Taxiway/Runway" with a combination of fine ballast and earth. I need it to represent a firmly compacted dirt strip.P1012485.JPG
 
I've been working on the Base for my Tuskegee Dio......all the greenery is down and giving it a chance to set a little before attacking the "Taxiway/Runway" with a combination of fine ballast and earth. I need it to represent a firmly compacted dirt strip.
Lovely!!!
 
Thanks Andrew..........scenery is not one of my strong suits so a little encouragement goes a long way! :smiling:
 
I've been working on the Base for my Tuskegee Dio......all the greenery is down and giving it a chance to set a little before attacking the "Taxiway/Runway" with a combination of fine ballast and earth. I need it to represent a firmly compacted dirt strip.
That's looking superb to me mate :)
Lovely stuff for sure...
Cracking result so far ;)
 
Too kind Mr. Smiff.........but greatly appreciated Sir.......just hope I can get the dirt right. ;)
 
.just hope I can get the dirt right. ;)

Sorry Buddy, but how in the hell can you get dirt wrong??? It's dirt, just throw it down and go!!! Maybe add a goat or a few sheep and you're in business, Rick......Btw, love the 6700's and they got the hood side panels right to boot. They look sweet!!! Now if only someone would make a kit of it in 1/35...............

Prost
Allen
 
Thanks Allen, I might be overthinking the dirt a little.........think I'll just dump some ballast on it and dust it with some earth and call it good. :thumb2:
 
I did a little layout of my vehicles in a rough idea as to how I will be situating this "tiny" dio.........still much to do and am open to suggestions, criticisms, bribes, etc, etc....P1012486.JPG
 
The result of three hours. The swear jar did quite well out of this.
Might need to empty it befor I start on number two!

20221216_153657.jpg
Just the one of these boggies has more parts than some full build models!
 
Update time:
A word or two of caution! Dont know if it is a general "thing" with Border Model or just this one. READ the instructions very carefully.
Sometimes the translator was a bit tired I think. The English texts did not always follow the Chinese; The 88 has these boggies that attach to the base of the gun as we all know. There is a front and a rear.
The destructions start by saying build two... this goes on for a few steps then splits into a front and a rear. The English text refers to them BOTH as rear. I had to revert to the Chinese test to see which was which so I did not mix bits up. They are not 100% the same.
20221219_120526.jpg
That said the detail is aplenty! (as to being accurate, I'll let the experts call that one.
Oh through out the instruction booklet there are options here and there but nothing that hints are which option belongs to each other.
Another thing that got me are mould joint lines... Its a very new tooled kit. Why are there so many mould lines?! Easy removed with a sharp blade but still.
Soft Vinyl tyres? really. In Light Grey the same as the plastic. Why?!?!?! Rubber I can understand they can at least be made to look OK with some powder pigments...
The second bogie set 'only' took two hours to build!
 
Rick, don't forget to tear up the turf w/all the traffic, or expand the packed dirt into paths.
 
Practice, practice..... They look great Ian.
Ian,
They look the nuts mate.
Thank you chaps. Have made a start on the base.... More misleading!
To those of you that, like me, enjoy the option of being able to display an artillery piece either folded for the road or set up to firing position, beware this kit. It Is very much either or! Parts that are Glued INSIDE the folding legs in step 9 (I believe it was) are very instrumental in how the model CAN be displayed. Unfortunately, this only comes to be really apparent in step 14. which is on the next page. The parts in step 9 have to be one way round for legs in fire position. and the other way for transport, (and which could maybe allow the base to be folded once built)
I now have a gun which can only be displayed in the firing position! Great. Now I'll have to build and paint the bloody figures.
 
Back
Top