G
Guest
Guest
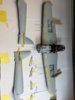
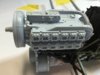
Wow Barry some complicated piece that and Airfix.
Tempted but in our small flat Pauline would have to stand all night.
For me detail in model making is the enjoyment. Complications and detailing where you have to use the grey matter to sort out the sequences. if you do not it all goes wrong.
Laurie
Tempted but in our small flat Pauline would have to stand all night.
For me detail in model making is the enjoyment. Complications and detailing where you have to use the grey matter to sort out the sequences. if you do not it all goes wrong.
Laurie
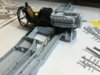
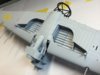
 beautiful job!!
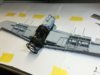
")