This will be built 'buttoned up' to display the brutal lines of the Tiffey to best effect. It is a shame not to display that engine but maybe another one day?
My main focus will be on the painting and weathering for which I will use:
AK Interactive Air Series RAF camo acrylic paints plus some Vallejo Model Air and Vallejo Primers.
Metallics will be AKI True Metal.
Weathering will be done with AKI enamel washes and pigments.
I will now be able to start the build on the 2nd January and will post progress at least weekly.
The box:View attachment 95265
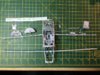
The sprues
View attachment 95266
View attachment 95267
View attachment 95268
View attachment 95269
Above there are no less than three sets of canopy sprues due to the problems Airfix had over quality. I will use the best of them and use one of the others to mask the cockpit as I like to paint canopies off the model.
Next the instructions:
View attachment 95270
View attachment 95271
View attachment 95272
I am likely to build the top scheme although there is a small chance that I will choose a non standard scheme.
Now the decals, the main markings will not be used.
View attachment 95273
Now some extras:
View attachment 95274
As you can see I have a full set of Miracle Masks for the RAF insignia, invasion stripes, camo etc plus some fabric seat belts (though I may not use them this time).
I also have this:
View attachment 95275
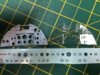
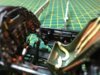
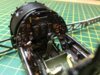
I will be using the Brett Green way of approaching the cockpit with a cockpit green/black interior rather than aluminium/black as per instructions.
I am looking forward to getting to my workbench Friday and making a start.
View attachment 208288
View attachment 208289
View attachment 208290
View attachment 208291
View attachment 208292
View attachment 208293
View attachment 208294
View attachment 208295
View attachment 208296
View attachment 208297
View attachment 208298
My main focus will be on the painting and weathering for which I will use:
AK Interactive Air Series RAF camo acrylic paints plus some Vallejo Model Air and Vallejo Primers.
Metallics will be AKI True Metal.
Weathering will be done with AKI enamel washes and pigments.
I will now be able to start the build on the 2nd January and will post progress at least weekly.
The box:View attachment 95265
The sprues
View attachment 95266
View attachment 95267
View attachment 95268
View attachment 95269
Above there are no less than three sets of canopy sprues due to the problems Airfix had over quality. I will use the best of them and use one of the others to mask the cockpit as I like to paint canopies off the model.
Next the instructions:
View attachment 95270
View attachment 95271
View attachment 95272
I am likely to build the top scheme although there is a small chance that I will choose a non standard scheme.
Now the decals, the main markings will not be used.
View attachment 95273
Now some extras:
View attachment 95274
As you can see I have a full set of Miracle Masks for the RAF insignia, invasion stripes, camo etc plus some fabric seat belts (though I may not use them this time).
I also have this:
View attachment 95275
I will be using the Brett Green way of approaching the cockpit with a cockpit green/black interior rather than aluminium/black as per instructions.
I am looking forward to getting to my workbench Friday and making a start.
View attachment 208288
View attachment 208289
View attachment 208290
View attachment 208291
View attachment 208292
View attachment 208293
View attachment 208294
View attachment 208295
View attachment 208296
View attachment 208297
View attachment 208298
Attachments
-
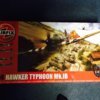 image.jpg3.5 KB · Views: 0
 -
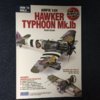 image.jpg3.3 KB · Views: 0
 -
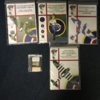 image.jpg3.5 KB · Views: 0
 -
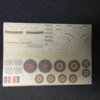 image.jpg2.6 KB · Views: 0
 -
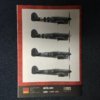 image.jpg2.7 KB · Views: 0
 -
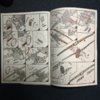 image.jpg3.6 KB · Views: 0
 -
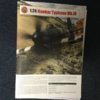 image.jpg2.9 KB · Views: 0
 -
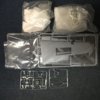 image.jpg3 KB · Views: 0
 -
 image.jpg3.4 KB · Views: 0
 -
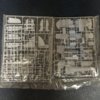 image.jpg3.4 KB · Views: 0
 -
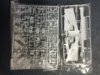 image.jpg2.9 KB · Views: 0
")


")