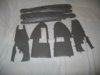
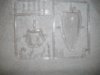
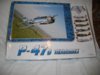
The fireworks outside tell me I can start this now! About time too, I've been drooling over the sprues and buying bits for this for months.
View attachment 95591
View attachment 95592
View attachment 95593
View attachment 95594
View attachment 95595
View attachment 95596
View attachment 95597
View attachment 95598
View attachment 95599
View attachment 95600
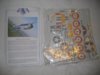
I'm going for the British one in grey/green.
View attachment 208614
View attachment 208615
View attachment 208616
View attachment 208617
View attachment 208618
View attachment 208619
View attachment 208620
View attachment 208621
View attachment 208622
View attachment 208623
View attachment 95591
View attachment 95592
View attachment 95593
View attachment 95594
View attachment 95595
View attachment 95596
View attachment 95597
View attachment 95598
View attachment 95599
View attachment 95600
I'm going for the British one in grey/green.
View attachment 208614
View attachment 208615
View attachment 208616
View attachment 208617
View attachment 208618
View attachment 208619
View attachment 208620
View attachment 208621
View attachment 208622
View attachment 208623
Attachments
-
 Aftermarket.JPG1.6 KB · Views: 0
 -
 Sprues7.JPG1.7 KB · Views: 0
 -
 Sprues5.JPG2.2 KB · Views: 0
 -
 Sprues4.JPG2.4 KB · Views: 0
 -
 Sprues3.JPG2.6 KB · Views: 0
 -
 Sprues2.JPG2.5 KB · Views: 0
 -
 Sprues1.JPG2.1 KB · Views: 0
 -
 Instructions and decals.JPG1.9 KB · Views: 0
 -
 Clear parts.JPG1.6 KB · Views: 0
 -
 Box.JPG2.5 KB · Views: 0

")
")