Bigfoot57
Active member
- Joined
- Jun 24, 2015
- Messages
- 1,216
- Location
- Weston Super Mare
- First Name
- Colin
- Location
- Originally a small village outside of Reading Berkshire called Burghfield Common
1/3


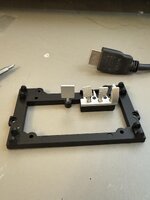
 So we’ve moved onto the dashboard and the bottom tray of the car which will include the accelerator break and clutch along with the steering mechanism. First off is to apply the decals to the dashboard before doing this. I gloss varnished the areas that the decals were gonna sit on so they stick better. Each decal is separate and has to be treated as such and due to the nature of their placement you can’t just slide them off the backing paper you have to actually use some fine grip tweezers to grip hold of the decal once it’s separated from the backing sheet and place it onto the model
 filedata/fetch?filedataid=248131


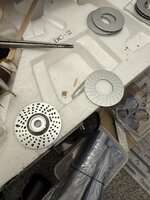
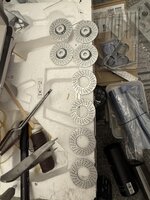
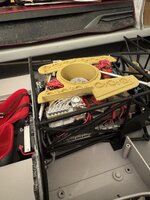
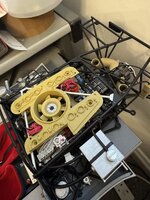
 Now added the discs to the chassis subframe along with the brakes and the intercooler and associated pipework oh and also added the brake cooling duct pipe work as well see attached picture I did some additional painting on this one as per what Nigel has done on his website that was to paint the tops of the bottles blue with a silver band around the middle of them and to repaint the intercooler pipework black and just leave the union joints as aluminium then to finally finish it off, I gave it a black wash using Mig Ammo black oil wash across the grill hatchings I also need to clean up the flocking on the top of the dashboard I will do this using a bit of Tamiya masking tape then once I done it to cover it with plastic so it stays clean until it’s covered by the top part of the body work of the car


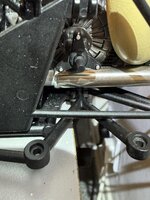
 Porsche 917K continuation of build this time adding the torrison bar which had to be threaded through the lower framework to link up with the rear shock absorbers another PIA
 Porsche 917K continuing build
 they were originally so when the glue is dried, I’ll be strapping in the spare wheel then we come to fit in the body panels after that it’s just the wheels and then it is finished


 Assembly in the body panels


 next up assembly in the front lamps these are made of several pieces. or main lamp housing then you have the two lamps followed by the two lenses. All very straightforward until you come fit the large lenses and find out they’re too large to fit around the housing, so you have to sand them down by about a quarter of a millimetre all round to get them to fit
 Porsche 917K continuation first off dry fit the transparency’s to make sure they fit so in the picture above you can see I’ve added the cockpit windscreen the two side windows and on the front the Headlamp covers next we will be adding decals to the wheels

scalemodelling.co.uk is a privately operated online discussion forum. All content posted by members reflects their own views and opinions and does not necessarily represent those of the forum owners or administrators. While reasonable efforts are made to moderate content, no responsibility is accepted for user-generated material. By using this site, you agree to comply with UK law and the forum rules.