Bigfoot57
Active member
- Joined
- Jun 24, 2015
- Messages
- 1,216
- Location
- Weston Super Mare
- First Name
- Colin
- Location
- Originally a small village outside of Reading Berkshire called Burghfield Common
1/3


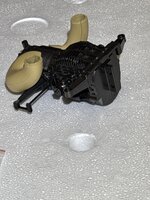
 So I got this in October and it’s been sitting on the floor since then so I thought it was time to start building it as is the norm. I will show you some sprue shots before the actual construction begins


 cheers