Theme editor

Scale Model Shop

Steve H, Under £5 build, Airfix 1:72 Spitfire Mk 1

SteveH

Active member
Joined
Apr 28, 2018
Messages
1,287
Reaction score
0
Points
36
1/3
Thread owner
I shall have a bash at this one
View attachment 378926
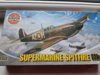
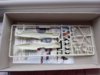
bought for under a fiver
View attachment 378927
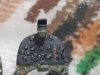
looks good in the box too
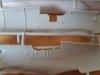
View attachment 378928
View attachment 378929
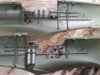
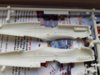
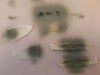
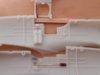
reasonable detail too
View attachment 378930
A replacement canopy too
View attachment 378931
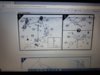
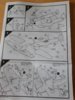
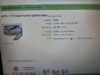
basic instructions!
View attachment 378932
Which are wrong!
So off to Scalemates for the right ones
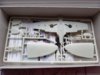
View attachment 378933
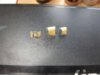
But some of the parts are missing, never mind I can manage without the 2 blade propeller but it would have been nice!

Lets see what I can do with this micro scale plane, I think I built one 50 years ago give or take!

More soon?

Steve H
 

Attachments

  • W6AfcMN.jpg
    W6AfcMN.jpg
    3.1 KB · Views: 0
  • BvHxg2x.jpg
    BvHxg2x.jpg
    2.2 KB · Views: 0
  • zK1YOnt.jpg
    zK1YOnt.jpg
    2.6 KB · Views: 0
  • qKd4CWi.jpg
    qKd4CWi.jpg
    2.1 KB · Views: 0
  • BMgUajs.jpg
    BMgUajs.jpg
    3 KB · Views: 0
  • mWM8VZu.jpg
    mWM8VZu.jpg
    2.7 KB · Views: 0
  • Iu0kMbn.jpg
    Iu0kMbn.jpg
    2.6 KB · Views: 0
  • 3kVzWAA.jpg
    3kVzWAA.jpg
    1.8 KB · Views: 0
Great stuff Steve. Should be fun. Like yourself, I must have last built one of these around 50 years ago, and if I ever build a plane again, this is where I'd probably start. Enjoy.
 
I'm a bit confused Stephen. I'm seeing recessed panel lines, but an old box. Unless I've missed something, the gods of eBay have shined upon you. Good catch.
 
I'm a bit confused Stephen. I'm seeing recessed panel lines, but an old box. Unless I've missed something, the gods of eBay have shined upon you. Good catch.
This intrigued me, so having a quick look over the photo's, I'd say that the instructions, decals and box all match and it's the sprues that are from the wrong set. Are there any markings on the sprues at all?
 
The sprues look like the newest incarnation of the kit. I made one a couple of years ago...great little model!
 
Thread owner
I think you could be right Chris and the previous owner may have mixed and matched as he did add in an aftermarket 3 piece canopy too.
The instructions are a giveaway as they were fro the old one, but apart from the 2 blade prop and the dash, all the parts must be a newer incarnation, which Salemates quote as the 2010 version not the 1970's as per the box.

Cool

Steve H
 
Thread owner
Morning all

Some scratchery to improve what little you might see in the 'pit

The door has been carefully removed too
View attachment 379592
View attachment 379593
Certainly no Plasmo, and without an etch kit, its as much as I feel comfortable doing
Paint
View attachment 379594
The paint set is great
View attachment 379595
All the war time UK based RAF scheme colours in one and is really easy to use, use a drop of water to 8 drops of paint and sprayed beautifully and smooth.

Some detail painting today and join up the fuselage halves

More soon?

Steve H
 

Attachments

  • h6L1g3x.jpg
    h6L1g3x.jpg
    2.9 KB · Views: 0
  • epiy3Ms.jpg
    epiy3Ms.jpg
    1.5 KB · Views: 0
  • dAT6Gyy.jpg
    dAT6Gyy.jpg
    1.9 KB · Views: 0
  • EpJc4YM.jpg
    EpJc4YM.jpg
    2.1 KB · Views: 0
Great work Steve. A nice bit of scratchery and good to see some paint going down. Sty away from lawnmowers now!
 
Not the first time I have seen an e-buy-gum kit that has been made up of left overs.
Now about these extra bits and bobs you are adding. As the Canopy was included in the box when you bought it I will let that slide.
Are we to assume that the copper wire was in the box as well.

The rules for the build are not that hard. A summary.
Buy a cheap kit for under a fiver and build it using only what is in the box at the time of purchase.

By all means alter the kit and improve it but only with what is in the box.
 
Nice start Steve, at least yours has some sort of interior molded to the fuselage, mine just has ejector marks!!!! :smiling2:

Paul.
:smiling2:
 
Thread owner
Its amazing what you can do with the kit sprue, a sharp knife and a candle flame!

The stretched sprue sometimes can look quite shiny too ;)

Otherwise its all in the box, though the canopy looks like it could be a trial to trim down, we will see

Steve H
 
Morning all

Some scratchery to improve what little you might see in the 'pit

The door has been carefully removed too
View attachment 379592
View attachment 379593
Certainly no Plasmo, and without an etch kit, its as much as I feel comfortable doing
Paint
View attachment 379594
The paint set is great
View attachment 379595
All the war time UK based RAF scheme colours in one and is really easy to use, use a drop of water to 8 drops of paint and sprayed beautifully and smooth.

Some detail painting today and join up the fuselage halves

More soon?

Steve H
I’m sorry Steve, but I’m at a bit of a quandary about this build. An old Airfix box with a new tool kit inside. 1/72 scale. Yet on the pictures above it clearly says Revell 1/32 on the inside of the fuselage.
 
Yet on the pictures above it clearly says Revell 1/32 on the inside of the fuselage.

I thought that at first but upon looking further I figured he was using the 1/32 as a guide to see where to cut the door out, as seen in the pictures directly underneath.
 
Thread owner
I thought that at first but upon looking further I figured he was using the 1/32 as a guide to see where to cut the door out, as seen in the pictures directly underneath.

That is spot on Andy

I thought someone was watching over my shoulder LOL

I have 2 x 1/32 Revell Mk1/11's and used one to check what detail would be scratchable and to find the door, I took loads of photos and got the 2 mixed.

Its definity a 1/72, and definity has the door cut off which definity didn't get into the paint shop

#Bu**er#

Though I will use the interior green again on the canopy once I've figured out the best way to take of the excess plastic,which is very very soft?

Got stuck sorting out the ""man drawer"" for SWMBO, before I can escape back to the AB and the garage

One Stug III B and a Flak I to paint

More soon?

Steve H
 
Thread owner
Morning everyone

A little update, painting inside as its too cold in the garage for the AB

View attachment 380200

Perhaps another layer of the Tamiya brown panel liner?

Then a matt coat, as it seems a little shiny?

View attachment 380201

A little paint came off the chair whilst trying out the tape seat belts

No decal for the control panel so its been hand painted!!!

View attachment 380202
View attachment 380203

You really can't see that much once its all installed.

Once the seat belts are in, I can join up the fuselage halves, seal up the joint, add the wings and fins and more paint, fun fun fun

More soon?

Steve H
 

Attachments

  • VFXhrkj.jpg
    VFXhrkj.jpg
    3.1 KB · Views: 0
  • 1o81Sgt.jpg
    1o81Sgt.jpg
    2.8 KB · Views: 0
  • azLrxNK.jpg
    azLrxNK.jpg
    2.9 KB · Views: 0
  • 4TqzEQU.jpg
    4TqzEQU.jpg
    2.9 KB · Views: 0
Thread owner
Morning

Pavla canopies, not a first choice but if there is no alternative!

it took nearly 2 hours to remove the 3 pieces from the vacuum mould and mask them!!!

There wasn't enough raised detail to scribe with a cocktail stick so it was trial and error free hand Grrr!!!

View attachment 380351

Next will be rudimentary seat belt then join up the fuselage 1/2's and sand the joint

More soon, though the Stug and Flak I are screaming for attention too LOL

Steve H
 

Attachments

  • zVDE00j.jpg
    zVDE00j.jpg
    1.9 KB · Views: 0
Back
Top