G
Guest
Guest
headlight lenses / porthole windows.
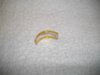
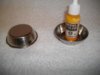
want some free headlight lenses / porthole windows etc, then get your favorite lady to go to Sainsburys.
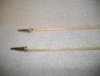
Womens underwear hangers ...... i'll let the pictures say it all
They're 9mm across and you get 12 per hanger
View attachment 45025
View attachment 45026
View attachment 158051
View attachment 158052
want some free headlight lenses / porthole windows etc, then get your favorite lady to go to Sainsburys.
Womens underwear hangers ...... i'll let the pictures say it all
They're 9mm across and you get 12 per hanger
View attachment 45025
View attachment 45026
View attachment 158051
View attachment 158052
![P1100573 [Desktop Resolution].JPG](/data/attachments/34/34312-10b7052ac6b183c108fc7a149557ac4c.jpg?hash=pnLccXDYQh)
![P1100571 [Desktop Resolution].JPG](/data/attachments/34/34351-ae0bcca098bc206dd27c30cd8b2faf3c.jpg?hash=cWMqRm8EdK)
![P1100572 [Desktop Resolution].JPG](/data/attachments/34/34338-a04aaafdc94f9cb7c4c052ac02dade4e.jpg?hash=aE3nRp9l1Z)
![P1100575 [Desktop Resolution].JPG](/data/attachments/34/34325-6db1a349e974febac6b2f7c6016d8d2b.jpg?hash=OScjYHBkma)
![P1110037 [Desktop Resolution].jpg](/data/attachments/24/24557-24e93021f682291a6cccefc2b332a7ad.jpg?hash=Q0fj1P6zWE)
![P1110038 [Desktop Resolution].jpg](/data/attachments/24/24546-f7b6cd97adaf6f04e4ae0cd3904b6d84.jpg?hash=zYFkVtosrL)