- Joined
- Apr 27, 2018
- Messages
- 15,043
1/3
Looking very nice.


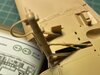
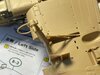
Instructions look fantastic but engineering for this kit perhaps a bit disappointing... five visible ejector pin marks in the cockpit is really surprising. It is though, a very full assembly that warrants open panels to show off the interior. They should make another option without too much interior with less cost to build an all closed version.The engineering of this kit is a thing of beauty and the instructions could not be better.
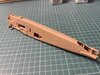
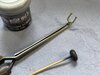
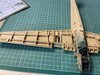
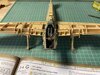
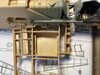
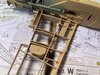
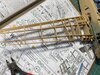
I did a fair bit of light sanding of the wing spars before fitting, not because of poor fit as such but I am aware that tolerances are tight. It is important not to try to force fit anything, if a part sticks just sand it lightly. The spars slid into position beautifully.
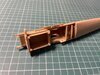
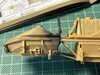
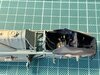
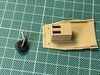
Then on to fit the fuel tanks and other wing internals
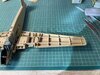
With this kit it really is important to look at the instructions. How many of us would just cement the fuel tank halves together? If you did there would be an issue. The bottom need to be slid into the wing position first and cemented in place, for the top to then be dropped in on top.
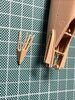
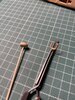
I found how useful it is to use a combination of extra thin, quick drying cement and a slower drying one. Then I notice, after completing the wing, that ZM themselves point this out in the next section of the build….
These meticulous instructions are a joy.
Personally I find nothing disappointing at all on the engineering. There are few visible ejection pin marks, those that are, are shallow and easy to clean up. I don’t agree about an option without the interior, simply because the cost is not in the plastic, so producing another version with missing parts would not save much and so would be pointless. I speak as someone who does not do open panels.Instructions look fantastic but engineering for this kit perhaps a bit disappointing... five visible ejector pin marks in the cockpit is really surprising. It is though, a very full assembly that warrants open panels to show off the interior. They should make another option without too much interior with less cost to build an all closed version.
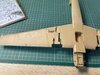
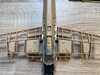
Build is looking good so far Barry, have you aligned the front nose yet as the picture shows the gun ports on the side cheek a little askew.
Cheers,
Richard
scalemodelling.co.uk is a privately operated online discussion forum. All content posted by members reflects their own views and opinions and does not necessarily represent those of the forum owners or administrators. While reasonable efforts are made to moderate content, no responsibility is accepted for user-generated material. By using this site, you agree to comply with UK law and the forum rules.