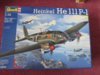
Well, as if a 1:24 Spitfire wasn't big enough, here is Revell's 1:32 He 111 P-1. A well known aircraft and well known model. It's been on the market for a few years now, its original price was around the £60.00 mark which isn't bad for a detailed model of this size. These days some people are asking around the £140 mark for this model - build it, maybe I should have sold it, mine cost less than £30. But no, that's not what we do here is it - we buy to build.
So, the box.
View attachment 264803
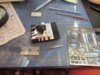
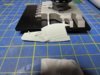
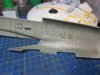
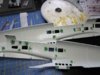
And the bits,
View attachment 264804
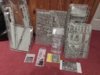
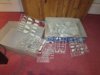
No there are no sprue shots, too many and too big ! Also, an Eduard mask set, with so much glazing, I'm going to need a bit of help here. I've also bought the Eduard interior PE set along with HGW fabric belts. This aircraft flew with a 'green house' on the front so with so much visible, I thought I would do a bit extra in the 'pit.
View attachment 264805
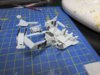
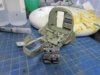
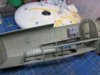
Cockpit detail is quite good in most places, but PE can make all the difference. So this is removed and replaced by the below.
View attachment 264806
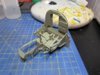
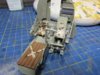
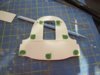
Other areas of the cockpit have the stock detail removed and replaced. Below is the cockpit slowly shaping up. Right now, I seem to be spending ages bending and shaping PE.
View attachment 264807
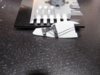
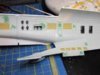
Eduard instruct you to remove the rear cockpit doors and fit their own, this is then repeated on he next internal doors, so, do I go for internal lights ?? A lot will be on view.
View attachment 264808
So this is what I seem to be doing nearly every night this week, bending metal. But hey, I haven't lost any yet.
View attachment 264809
With so many little pieces to put together, I don't seem to be getting very far at the moment, but soon, I'm sure I'll get to stick something big together soon.
Colin M..
So, the box.
View attachment 264803
And the bits,
View attachment 264804
No there are no sprue shots, too many and too big ! Also, an Eduard mask set, with so much glazing, I'm going to need a bit of help here. I've also bought the Eduard interior PE set along with HGW fabric belts. This aircraft flew with a 'green house' on the front so with so much visible, I thought I would do a bit extra in the 'pit.
View attachment 264805
Cockpit detail is quite good in most places, but PE can make all the difference. So this is removed and replaced by the below.
View attachment 264806
Other areas of the cockpit have the stock detail removed and replaced. Below is the cockpit slowly shaping up. Right now, I seem to be spending ages bending and shaping PE.
View attachment 264807
Eduard instruct you to remove the rear cockpit doors and fit their own, this is then repeated on he next internal doors, so, do I go for internal lights ?? A lot will be on view.
View attachment 264808
So this is what I seem to be doing nearly every night this week, bending metal. But hey, I haven't lost any yet.
View attachment 264809
With so many little pieces to put together, I don't seem to be getting very far at the moment, but soon, I'm sure I'll get to stick something big together soon.
Colin M..