Theme editor

Scale Model Shop

Revell 1:32 D.H. Sea Venom FAW 22

colin m

Moderator
Staff member
Joined
Dec 26, 2008
Messages
9,111
Reaction score
379
Points
83
1/3
Thread owner
The Matchbox Sea Venom, re-boxed by Revell will be my next bit of plastic entertainment.
33C6B070-C28B-4097-9C71-05DDC204B2B6.jpeg

There’re three versions in the box, but only one has a shark’s mouth! The sprues stack up into quite a pile.
C521868C-2038-46BE-BEB7-1E0DDF8EF542.jpeg

But, it’s an old kit, so detail is scarce.
A2375AFB-B3CC-47F1-986E-BB5CE6074396.jpeg
However, there are lots of reference pics on the web so I might manage a new panel line or two. Maybe even some rivets.

Clear parts are good but still might benefit from a dip in clear.
EC87E53A-FC3B-4263-8A82-CEE5337CD2FD.jpeg

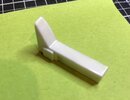
And we’re off. The instructions would have you start with the engine first, different, but ok. I’m not planning on having the engine on display, it’s a touch basic, and any way, I want a clean look, no panels open or flaps lowered. But I do need the engine in place to hold the jet pipe in its place.
Right, time to build an engine.
 
Great choice colin , I do love the old matchbox kits , like Frog they had a preference for out of the ordinary subjects , I mean at the time this was released a 1/32 sea venom was a revelation . Saw one of these at a show a few years back , he had detailed the VERY visible cockpit , must have scratchbuilt most of it as I cant imagine theres any AM stuff for it .
 
I shall be watching this, Colin. I'm not into jets at all but I do love the twin-boom Venoms and Vixens and Vampires for some reason. I have a vague recollection of seeing one as a nipper at a Yeovilton air show back in the mists of time.
 
Thread owner
Well gentlemen, thank you for your interest and apologies for the late start. In my defence, my room was taken over by shed load of boxes with the word ‘Christmas’ on them. They are now dealt with, so I can make a start.
The cockpit, is a large open space with very little detail in it. So I’ve started tarting things up a bit, but good heavens, adding tiny bits of detail seems to be taking ages.
Anyway, here’s the little bit I’ve managed.
Starting with the air intakes, what a place to leave a seam.
49DB436F-EFDE-40AB-A881-86A4C819840D.jpeg

This is a big switch panel on the RHS of the pit, straight out of the box. A bit lifeless.
C784D528-75BA-41BA-914F-EC93C38C8F95.jpeg
The below is the LHS cockpit wall. That huge wheel is quite prominent in the pit, so that will need a bit of attention. That grey ring, is the start of my new wheel.
69870CC4-C8F2-46FA-8A05-CEC668B9D14F.jpeg
The seats, all moulded detail has been removed. These will need a lot of work.
0DC6908C-65CA-4B76-AC57-11C3123B4E18.jpeg

Seat work underway. Harnesses removed and new cushions added along with an attempt at a sort of drogue shoot compartment. Don’t pay too much attention to the below, artistic license is flowing freely.
650553CD-9C3A-4017-A8FB-872102D763EE.jpeg
 

Attachments

  • E29181E1-EDB8-463C-B5D9-9F5BE4EA8D2E.jpeg
    E29181E1-EDB8-463C-B5D9-9F5BE4EA8D2E.jpeg
    3.7 KB · Views: 0
Blimey, I would expect more moulded on detail from a 1-72 scale kit! I had to check the title to make sure it IS 1-32 scale.
Nice work so far, I must say and it's put me off buying one!
 
Thread owner
I must say and it's put me off buying one
If the lack of detail puts you off, go and have a look at the prices these things are selling for. I paid about £25.00 for mine a while back. It's now silly money for a basic model.
 
Thread owner
That’s it, pit done. I could keep adding bit and pieces, but I actually want to start spraying before my guests arrive for Christmas.
46E4C02B-E917-41EE-A132-EA34B96096E4.jpeg
 
Some nice scratch building as I have one in the stash I know what's in store when I get around to starting it.
 
Thread owner
Well now, I didn’t get very far before some guests took over my room for Christmas.
BA260384-66E8-4A93-8CA1-683B6E15FCE7.jpeg
With Fluff (RIP) Lilly and Lottie installed, all spraying had to be suspended.

Awhile later, after they had returned home with Dau No. 1, work could continue. All I’ve done is the cockpit, mainly tackling the lack of detail. I dry brushed the IP as it had some light raised detail, but realised it wouldn’t do. Hence all I’ve managed to do is tart up a few bits and pieces, giving me the below.
DE6A7E4B-89D2-4A41-AA53-8AE2601581AA.jpeg
At least with this little lot done, I can close up the front half of the fuselage, and it might start looking like an aircraft.
 
Thread owner
And all to stuck together. Let’s hope it still fits in the fuselage.
CAAF65D3-E0E9-4AF2-B094-7E23453FEAE9.jpeg
51D02EE9-ED15-4332-BE44-0F7D662290F4.jpeg
 
Looking excellent Colin. Very nice touch with the green glass radar screens…..
Love the Guinea pigs, but couldn’t be doing with that spider….it would just have to go……
 
Very good work improving the cockpit. Looks excellent now.
Guinea pigs are wonderful creatures. Many, many years ago my daughter had a couple.
 
Back
Top