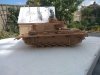
Theme editor

Scale Model Shop

Tamiya 1/35 Panzer 111.

  • Thread starter Thread starter Guest
  • Start date Start date
Thread owner
Here’s some I found on a quick browse through the Panzer III pages at worldwarphotos.info :smiling3:


(source)


(source)


(source)

There are also some pictures to be found of knocked-out vehicles that lack the spaced armour plate, but those are suspect — chances are good that the plate got removed as a result of the vehicle being hit.
Thanks Jakko .
 
Thread owner
Hi John very nice job so far shame you've got a problem with gun mount I'm sure you'll get round it, as for doing scratchey it's really is a dark art don't go there leave it to Mr T and Paul.
Pete.
 
I like to see nice clean tanks. They all must have been at one stage...... :flushed:
 
Thread owner
Greetings one and all.

While the SU 100 diorama dries ready to frost I decided to carry on with the figures and base on this one.

With the Infantry walking behind and to the side of the Panzer I decided to put some of their kit on the track guards. A box of spare ammo and two smaller cases.

2020_2.jpg


2020_3.jpg

Now many of you sharp eyed will have noticed this Panzer has no tracks and wheels, worry not. When the primer/ and top coat is done to all I shall do the wheels and then fit. As for those tracks the same will apply. Once made up and suitably painted I'm going to fit them before gluing the two halves together.
Think the Tamiya figure set is perfect with its winter uniforms.

At this point I decided to prepare the base. Using a piece of 18mm ply with a Sculptamold layer.


2020_4.jpg


2020_5.jpg

2020_8.jpg
Applied a coat of PVA to assist the Sculptamold
2020_9.jpg

2020_10.jpg

With the mix still wet I use a filler knife pressing and dragging it across the ply in each direction to give an even layer.


2020_11.jpg
Then some cart tracks made into the road way.

2020_12.jpg

Now sitting in the cave drying.
Track assembly next, bit of filling on the figures and away we go .

C&C Welcome.
 
Thread owner
Thanks Lee & Peter.

Started on the buildings yesterday, after a couple of hrs doing some more research on Russian Villages, styles materials etc.
This time I've decided to use foam board for the backing and cover the fronts in timber, most of it coffee stirrers, which I bought 2 years ago in bulk !
As my main supplier of Kappa line is closed due to the virus its time to use up all the off cuts. I knew they would come in handy one day :nerd:

First building.

2020_2.jpg
Even had to join the ends up !

2020_4.jpg
Final trimming will be done when they are assembled.

2020_6.jpg

The black is where the window will fit.

2020_5.jpg

Made from 1.5 x 1.8 mm Balsa, part glued on some cling film, then a section of plastic film attached with canopy white glue, which should dry clear. Then the frame will surround the whole section.
Hopefully tomorrow it will have dried so I can do the frame and fit into the building.

C&C Welcome.

Thanks for looking in.
 
Greetings one and all.

While the SU 100 diorama dries ready to frost I decided to carry on with the figures and base on this one.

With the Infantry walking behind and to the side of the Panzer I decided to put some of their kit on the track guards. A box of spare ammo and two smaller cases.


Now many of you sharp eyed will have noticed this Panzer has no tracks and wheels, worry not. When the primer/ and top coat is done to all I shall do the wheels and then fit. As for those tracks the same will apply. Once made up and suitably painted I'm going to fit them before gluing the two halves together.
Think the Tamiya figure set is perfect with its winter uniforms.

At this point I decided to prepare the base. Using a piece of 18mm ply with a Sculptamold layer.


Applied a coat of PVA to assist the Sculptamold


With the mix still wet I use a filler knife pressing and dragging it across the ply in each direction to give an even layer.


Then some cart tracks made into the road way.


Now sitting in the cave drying.
Track assembly next, bit of filling on the figures and away we go .

C&C Welcome.
Thats a horrible looking cake:thumb2:
 
Mmm looks like Porridge Papa John.Must be like Celluclay.Some spiffing work going on chap,
Carry on that man.
Richard.
 
John

Looking good and I have the feeling it will turn out very nicely by the end of the build!!

ATB

Andrew
 
Thread owner
Today I managed this, finished the window frames

2020_7.jpg
Can't use them as no room for another building, anyway a good exercise they van go into stock.

2020_5.jpg

Right I'm well aware of the festive roof, so before any members of the Rabble make any comment:tongue-out3: Mrs R kindly keeps old Christmas cards for note paper, as well as hording any likely looking object she comes across. As in this section of pipe.


2020_4.jpg
Found some PE straps in the spares box glued them on and made a stove rain hat with some Pewter . This should please Simon :smiling3:
2020_3.jpg
Enjoyed this a lot.
Had a look in the corrugated spares box and found 3 sheets ready treated, happy days indeed.

Thanks for looking in . C& C welcome
 

Attachments

  • 2020_6.jpg
    2020_6.jpg
    3 KB · Views: 0
Today I managed this, finished the window frames


Can't use them as no room for another building, anyway a good exercise they van go into stock.


Right I'm well aware of the festive roof, so before any members of the Rabble make any comment:tongue-out3: Mrs R kindly keeps old Christmas cards for note paper, as well as hording any likely looking object she comes across. As in this section of pipe.


Found some PE straps in the spares box glued them on and made a stove rain hat with some Pewter . This should please Simon :smiling3:

Enjoyed this a lot.
Had a look in the corrugated spares box and found 3 sheets ready treated, happy days indeed.

Thanks for looking in . C& C welcome
Cracking little building you`ve made yourself there John :thumb2: ,
The Tank looks suitably menacing trundling past such a picturesque scene.... gonna be good this!
Cheers,
Andy
 
Back
Top