
John, Jim, Scottie, Paul, Steve - thanks.
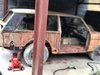
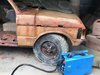
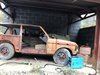
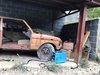
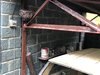
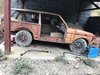
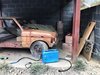
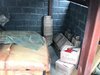
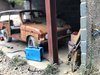
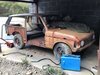
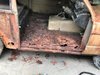
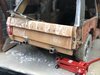
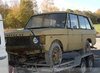
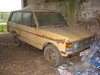
Cutting it a bit fine today being the last day of the GB but it is finally complete after sitting for thirty odd years in the stash :smiling4:
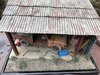
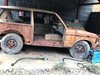
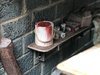
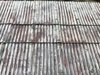
So here we go, no particular order and some of them look very similar as I was just snapping away outside whilst the weather was reasonable, completion pictures:-
View attachment 324381View attachment 324382View attachment 324383View attachment 324384View attachment 324385View attachment 324386View attachment 324387View attachment 324388View attachment 324389View attachment 324390View attachment 324391View attachment 324392View attachment 324393View attachment 324394View attachment 324395View attachment 324396View attachment 324397View attachment 324398View attachment 324399
Thanks to everyone that has followed along
Cutting it a bit fine today being the last day of the GB but it is finally complete after sitting for thirty odd years in the stash :smiling4:
So here we go, no particular order and some of them look very similar as I was just snapping away outside whilst the weather was reasonable, completion pictures:-
View attachment 324381View attachment 324382View attachment 324383View attachment 324384View attachment 324385View attachment 324386View attachment 324387View attachment 324388View attachment 324389View attachment 324390View attachment 324391View attachment 324392View attachment 324393View attachment 324394View attachment 324395View attachment 324396View attachment 324397View attachment 324398View attachment 324399
Thanks to everyone that has followed along
Attachments
-
 rov-183_2018-12-31.jpg4.2 KB · Views: 0
 -
 rov-195_2018-12-31.jpg4.2 KB · Views: 0
 -
 rov-196_2018-12-31.jpg3.7 KB · Views: 0
 -
 rov-179_2018-12-31.jpg4.3 KB · Views: 0
 -
 rov-178_2018-12-31.jpg4 KB · Views: 0
 -
 rov-180_2018-12-31.jpg3.9 KB · Views: 0
 -
 rov-181_2018-12-31.jpg4.1 KB · Views: 0
 -
 rov-182_2018-12-31.jpg4.1 KB · Views: 0
 -
 rov-194_2018-12-31.jpg3.8 KB · Views: 0
 -
 rov-193_2018-12-31.jpg4 KB · Views: 0
 -
 rov-184_2018-12-31.jpg4.2 KB · Views: 0
 -
 rov-185_2018-12-31.jpg4.2 KB · Views: 0
 -
 rov-186_2018-12-31.jpg4 KB · Views: 0
 -
 rov-187_2018-12-31.jpg4.4 KB · Views: 0
 -
 rov-188_2018-12-31.jpg3.6 KB · Views: 0
 -
 rov-189_2018-12-31.jpg4.3 KB · Views: 0
 -
 rov-190_2018-12-31.jpg4.1 KB · Views: 0
 -
 rov-191_2018-12-31.jpg3.9 KB · Views: 0
 -
 rov-192_2018-12-31.jpg3.9 KB · Views: 0
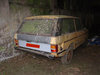
 I mean the rear three quarter view with the three pin socket.....and I know you knew that :tongue-out: